What Meegan Makes

vintage style, cottage living, home cooking

  • Home
  • Contact for Collaborations
  • Privacy Policy and Disclosure
  • Furniture Makeovers
  • 10 DIY Seasonal Banners
  • 15 Creative Spring Crafts

My Fall Jar

September 27, 2012 By Meegan 8 Comments

Last week I shared this post over at  Dirt and Pearls.  Thanks again Emily!!

In case you missed it, here you go…

Do you ever see things and want to make them yourself?  I do all the time.  That’s what I did for this post.  I have been seeing empty jars everywhere.  Then they are turned into vases, or candle holders with mod-podge and paper.

Today I thought I would share with you a Fall decor piece, that is super easy and looks great!

I have a jar that I cleaned out, then worked on my idea of what I thought would look good.  Here goes:

My Fall Candle Holder will consist of:  Old Book Pages & Homemade Mod-Podge (Homemade Mod-Podge is soooooo easy to make: 1 part glue to 2 parts water)

I brushed the Mod-Podge on the jar where I wanted to place my Old Book Pages.  (I did have to cut the pages to the size I needed)
After I had covered the jar with my pages-I went over the pages with more Mod-Podge to seal it securely
When everything was dry, I placed a tea light in my new Fall Candle holder and Viola!  I love this old rustic look.  Perfect for a Fall Mantel.
For more Fall ideas visit me here and here.

Please stop by for a visit at Meegan Makes anytime!  I am also on Pinterest, Facebook, Hometalk and Stumble Upon.  I would love to see you there as well.

Make it a terrific Thursday!!

Pin It
Linked with: Its Overflowing I Should Be Mopping CraftOManiac Get Outta My Head Please Practically Functional Cowgirl Up Rustic Anthology Brassy Apple DIY HSH Polly Want A Crafter Homemaker On A Dime Coastal Charm Kammy’s Korner Blackberry Vine A Diamond In The Stuff Elizabeth & Co Alderberry Hill Tales of A Trophy Wife Shaken Together Home Stories A2Z 504 Main Tiaras & Bowties My Girlish Whims Lil Luna Savvy Southern Style From My Front Porch Someday Crafts All Stars Block Party LiveLaughRowe House of Hepworths Freckled Laundry Keeping It Simple Whipperberry DIY Showoff Happy Hour Projects Primitive and Proper Todays Creative Blog Ivy and Elephants Domestically Speaking Whimsy Wednesdays Ginger Snap Crafts Debbie Does Creations No Minimalist Here Faded Charm White Lights On Wednesday 52 Mantels {Primp} Homestead Simple Restore Interiors Made In A Day Craftionary At The Picket Fence French Country Cottage The Dedicated House Not Just A Housewife Creations By Kara Cherished Treasures Redoux Debbie Doos Kurtz Corner The DIY Dreamer My Uncommon Slice of Suburbia Uncommon Designs Knick of Time

Cutting Burlap Without The Mess

September 26, 2012 By Meegan 17 Comments

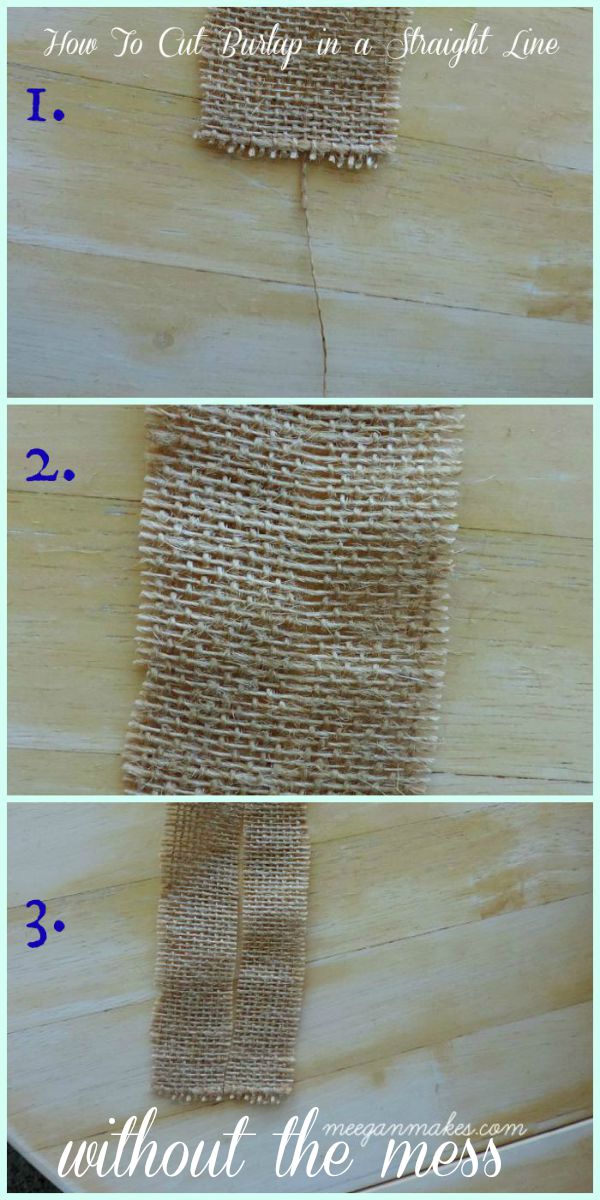
Fall is in full bloom and that means decorating with burlap. I don’t know about you, but until recently thinking about cutting a piece of burlap has made me cringe.  Just thinking about the mess to clean up and all those little fibers everywhere-ugh! I want to show YOU a trick to Cutting Burlap Without The Mess.

Since I have been preparing for a wedding this coming Friday, I have needed burlap.  While I was purchasing the dreaded burlap, the girl cutting it showed me a tip to solve my burlap misery!!  I thought I should share it with you-a few of my burlap loving friends.

How To Cut Burlap in a Straight Line

It really is as easy as 1,2,3.

Continue Reading

Fall Paper Decor

September 24, 2012 By Meegan 23 Comments

Okay, okay, now that Fall is really here according to the calendar, I can start sharing a few Fall projects around our home.  I just had to let Summer last as long as possible.  I just love Summer-what can I say??  I started by making some Fall Paper Decor.

I decided to use my grandpa’s croquet box as the base.  I played around with coffee filters after making the coffee filter wreath.  I decided to dye some in tea.  I soaked the filter in a pot of tea overnight.  So I taped up a few book page cones-and started to play.

Fall Paper Decor

This is my final result.  I am very pleased how she turned out.  I used a few empty jars, filled them with my book page cones, then added my tea dyed “flowers”.

I made the “flowers” just like I did for the coffee filter wreath-EASY PEASY!!

I also added torn pages to “fill in” in-between the jars.

Fall Paper Decor

I REALLY like my book page flower-so I clipped her onto the croquet box.  Great addition, don’t you think??

Fall Paper Decor

I was walking back from the pool and the pine cones caught my eye-just the right touch for Fall decor.

Now I have a little Fall decor with a little imagination.  She looks pretty right here for everyone to see.

Fall Paper Decor

This is my view when I walk into the kitchen.

Fall Paper Decor

This is a closer view when I am in the kitchen looking into the living room.

Fall Paper Decor

I had fun add some Fall Paper Decor to begin Fall decorating.

What paper projects have you done lately?  Please share them with me.  I am discovering all kinds of different ways to use paper.  It is a creative outlet I am really enjoying.

Thanks for following me.

Make it a marvelous Monday!!

signature

Sign up to receive my posts by email.  I don’t want you to miss out on anything!

 I share little bits and pieces of my blog and life on:
Pinterest
Facebook 
Hometalk 
Google + 
Stumble Upon 
Bloglovin’ 
twitter
Instagram 
Join me here soon, too!
This post is linked to fabulous parties here.


My Coffee Filter Wreath

September 22, 2012 By Meegan 15 Comments

Good Morning!!  How are you all doing today??  Are you keeping busy??  I sure am.  I am doing the flowers for a reception next Saturday, and still working on our son’s wedding luncheon/dinner.  Fun times.

I am excited to share with you both events and how they turn out.  Each wedding is going to be quite beautiful with such lovely colors.

All around blogland, you will see a coffee filter wreath.  Some are tea dyed, some are just white.  Some tutorials will tell you to use a screw driver to poke your coffee filter in.  Others will advise you to use a glue gun.

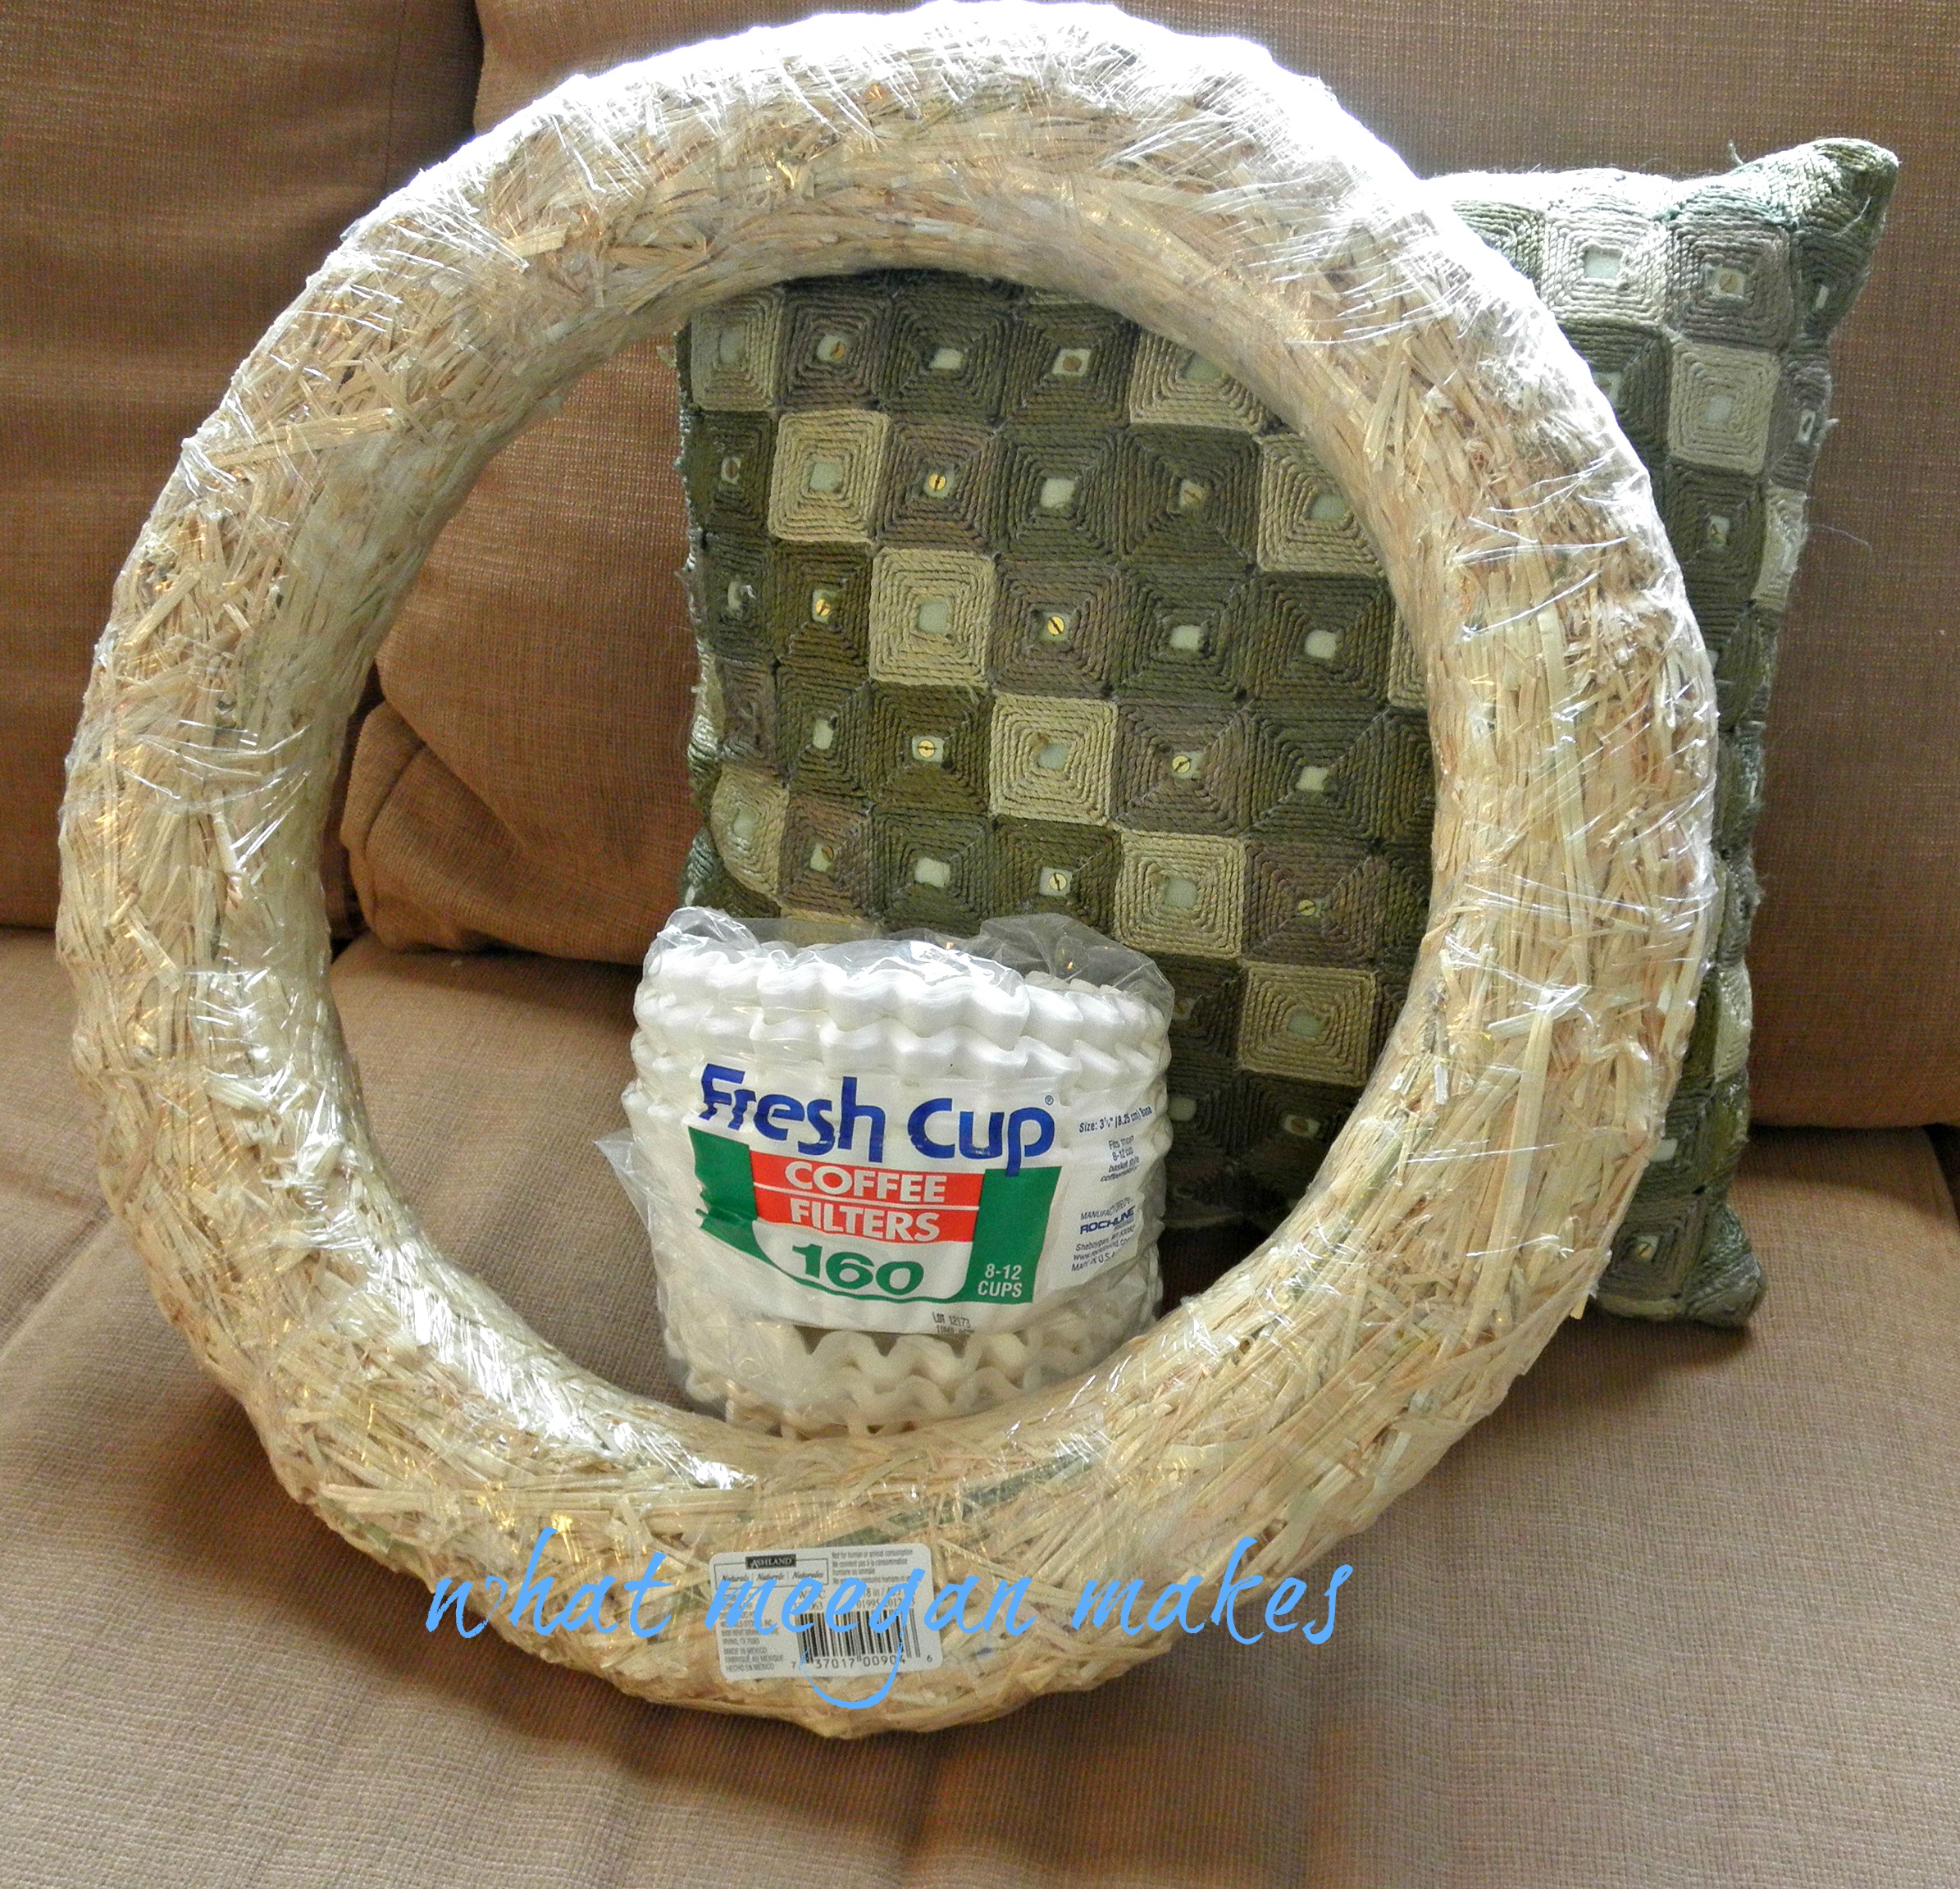
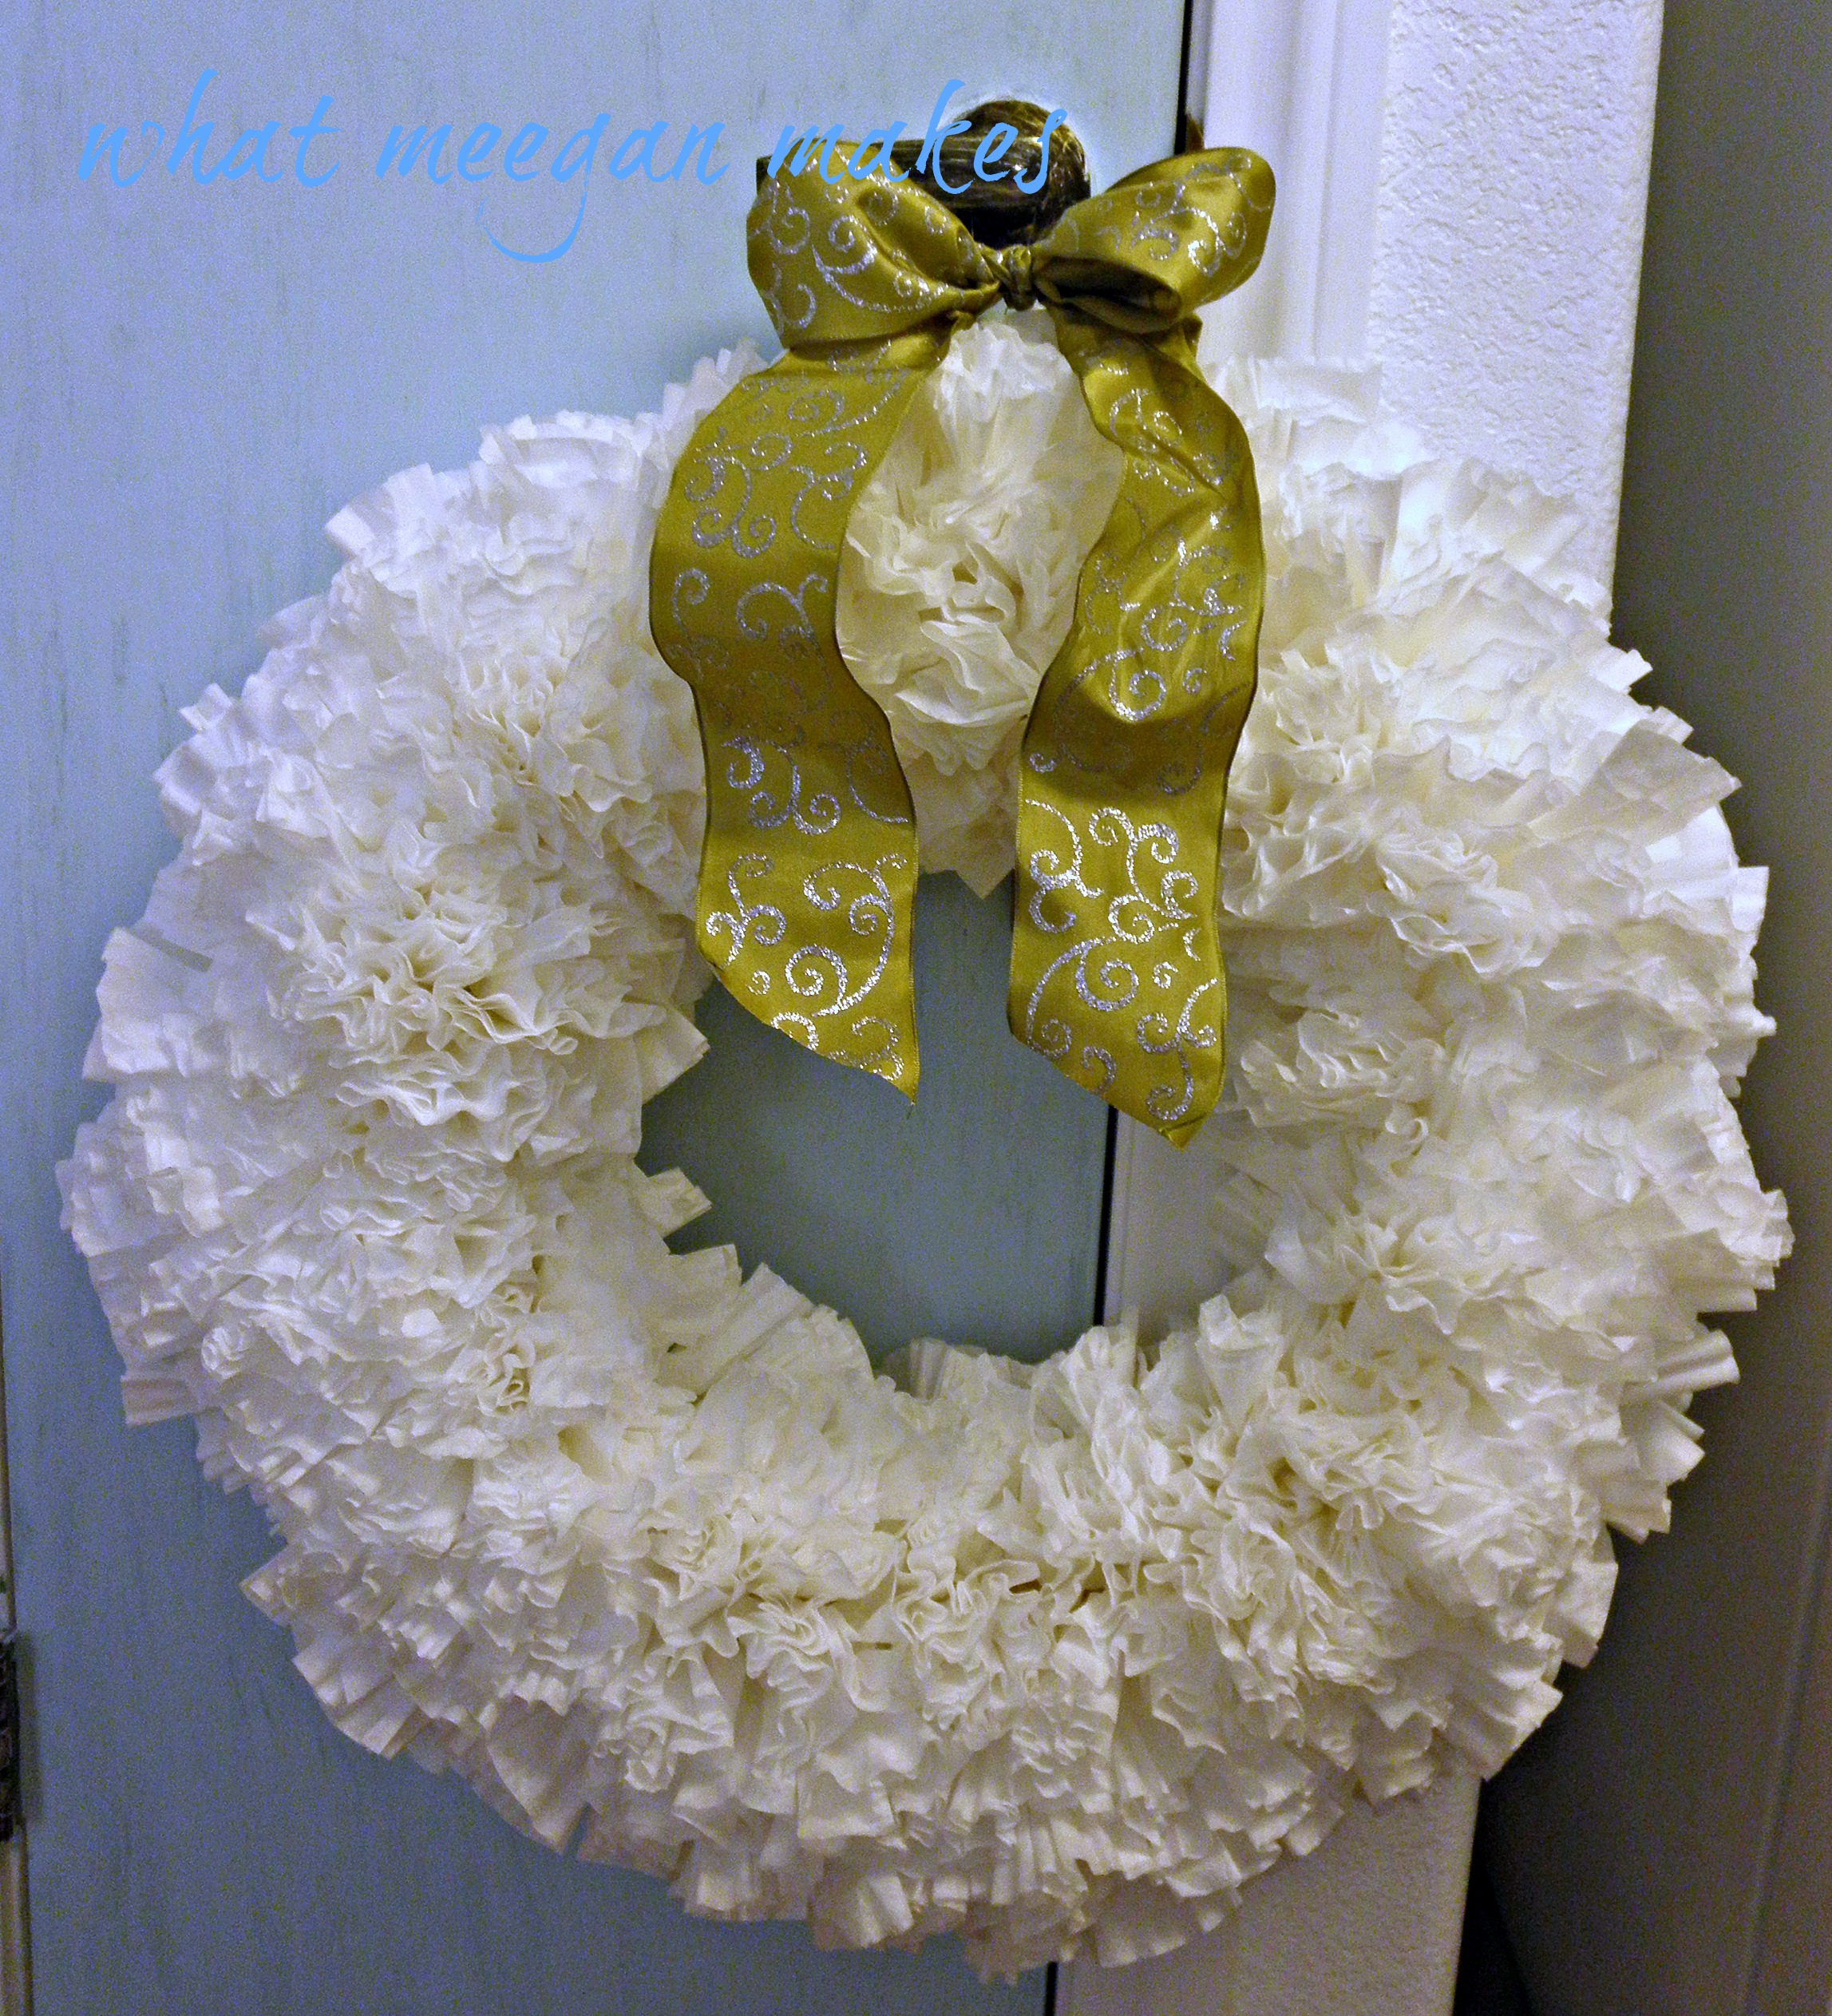
I decided to try one for myself.  I bought 2 packages of coffee filters at the dollar store and purchased my 18 inch wreath at Michaels.  I was ready to go…


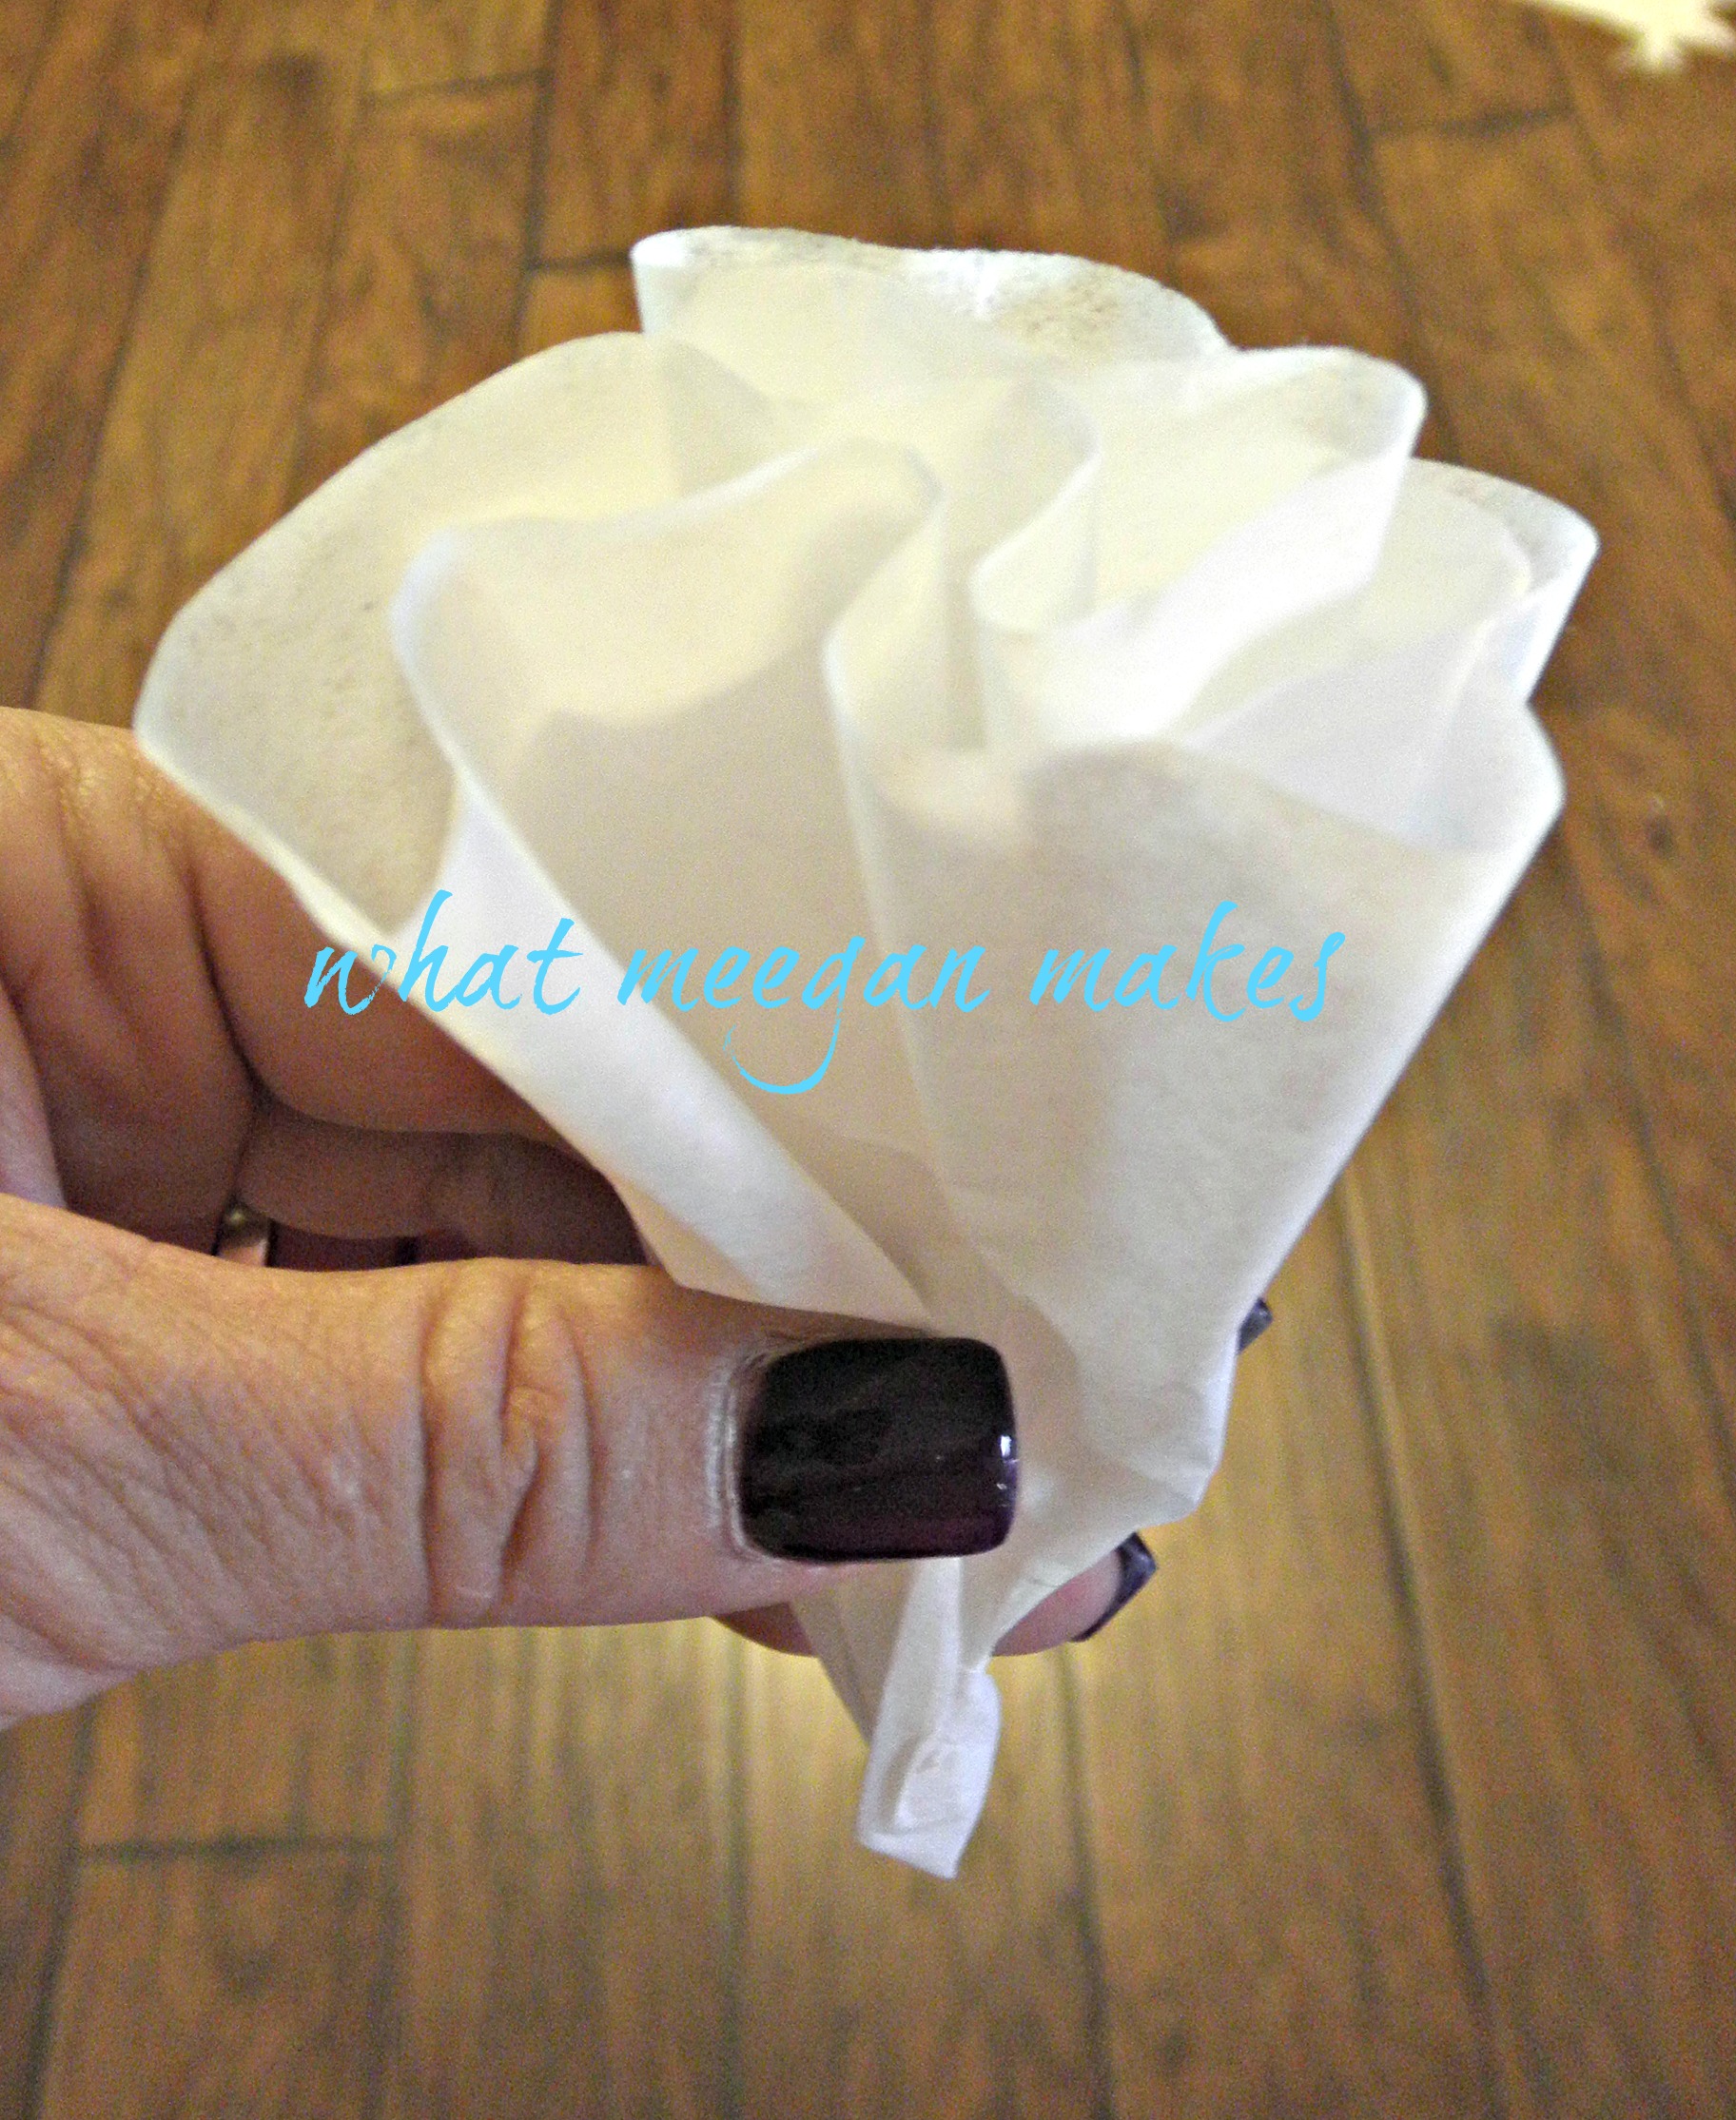
I started out by folding my coffee filter into eighths, then twisted and pinched the bottom.


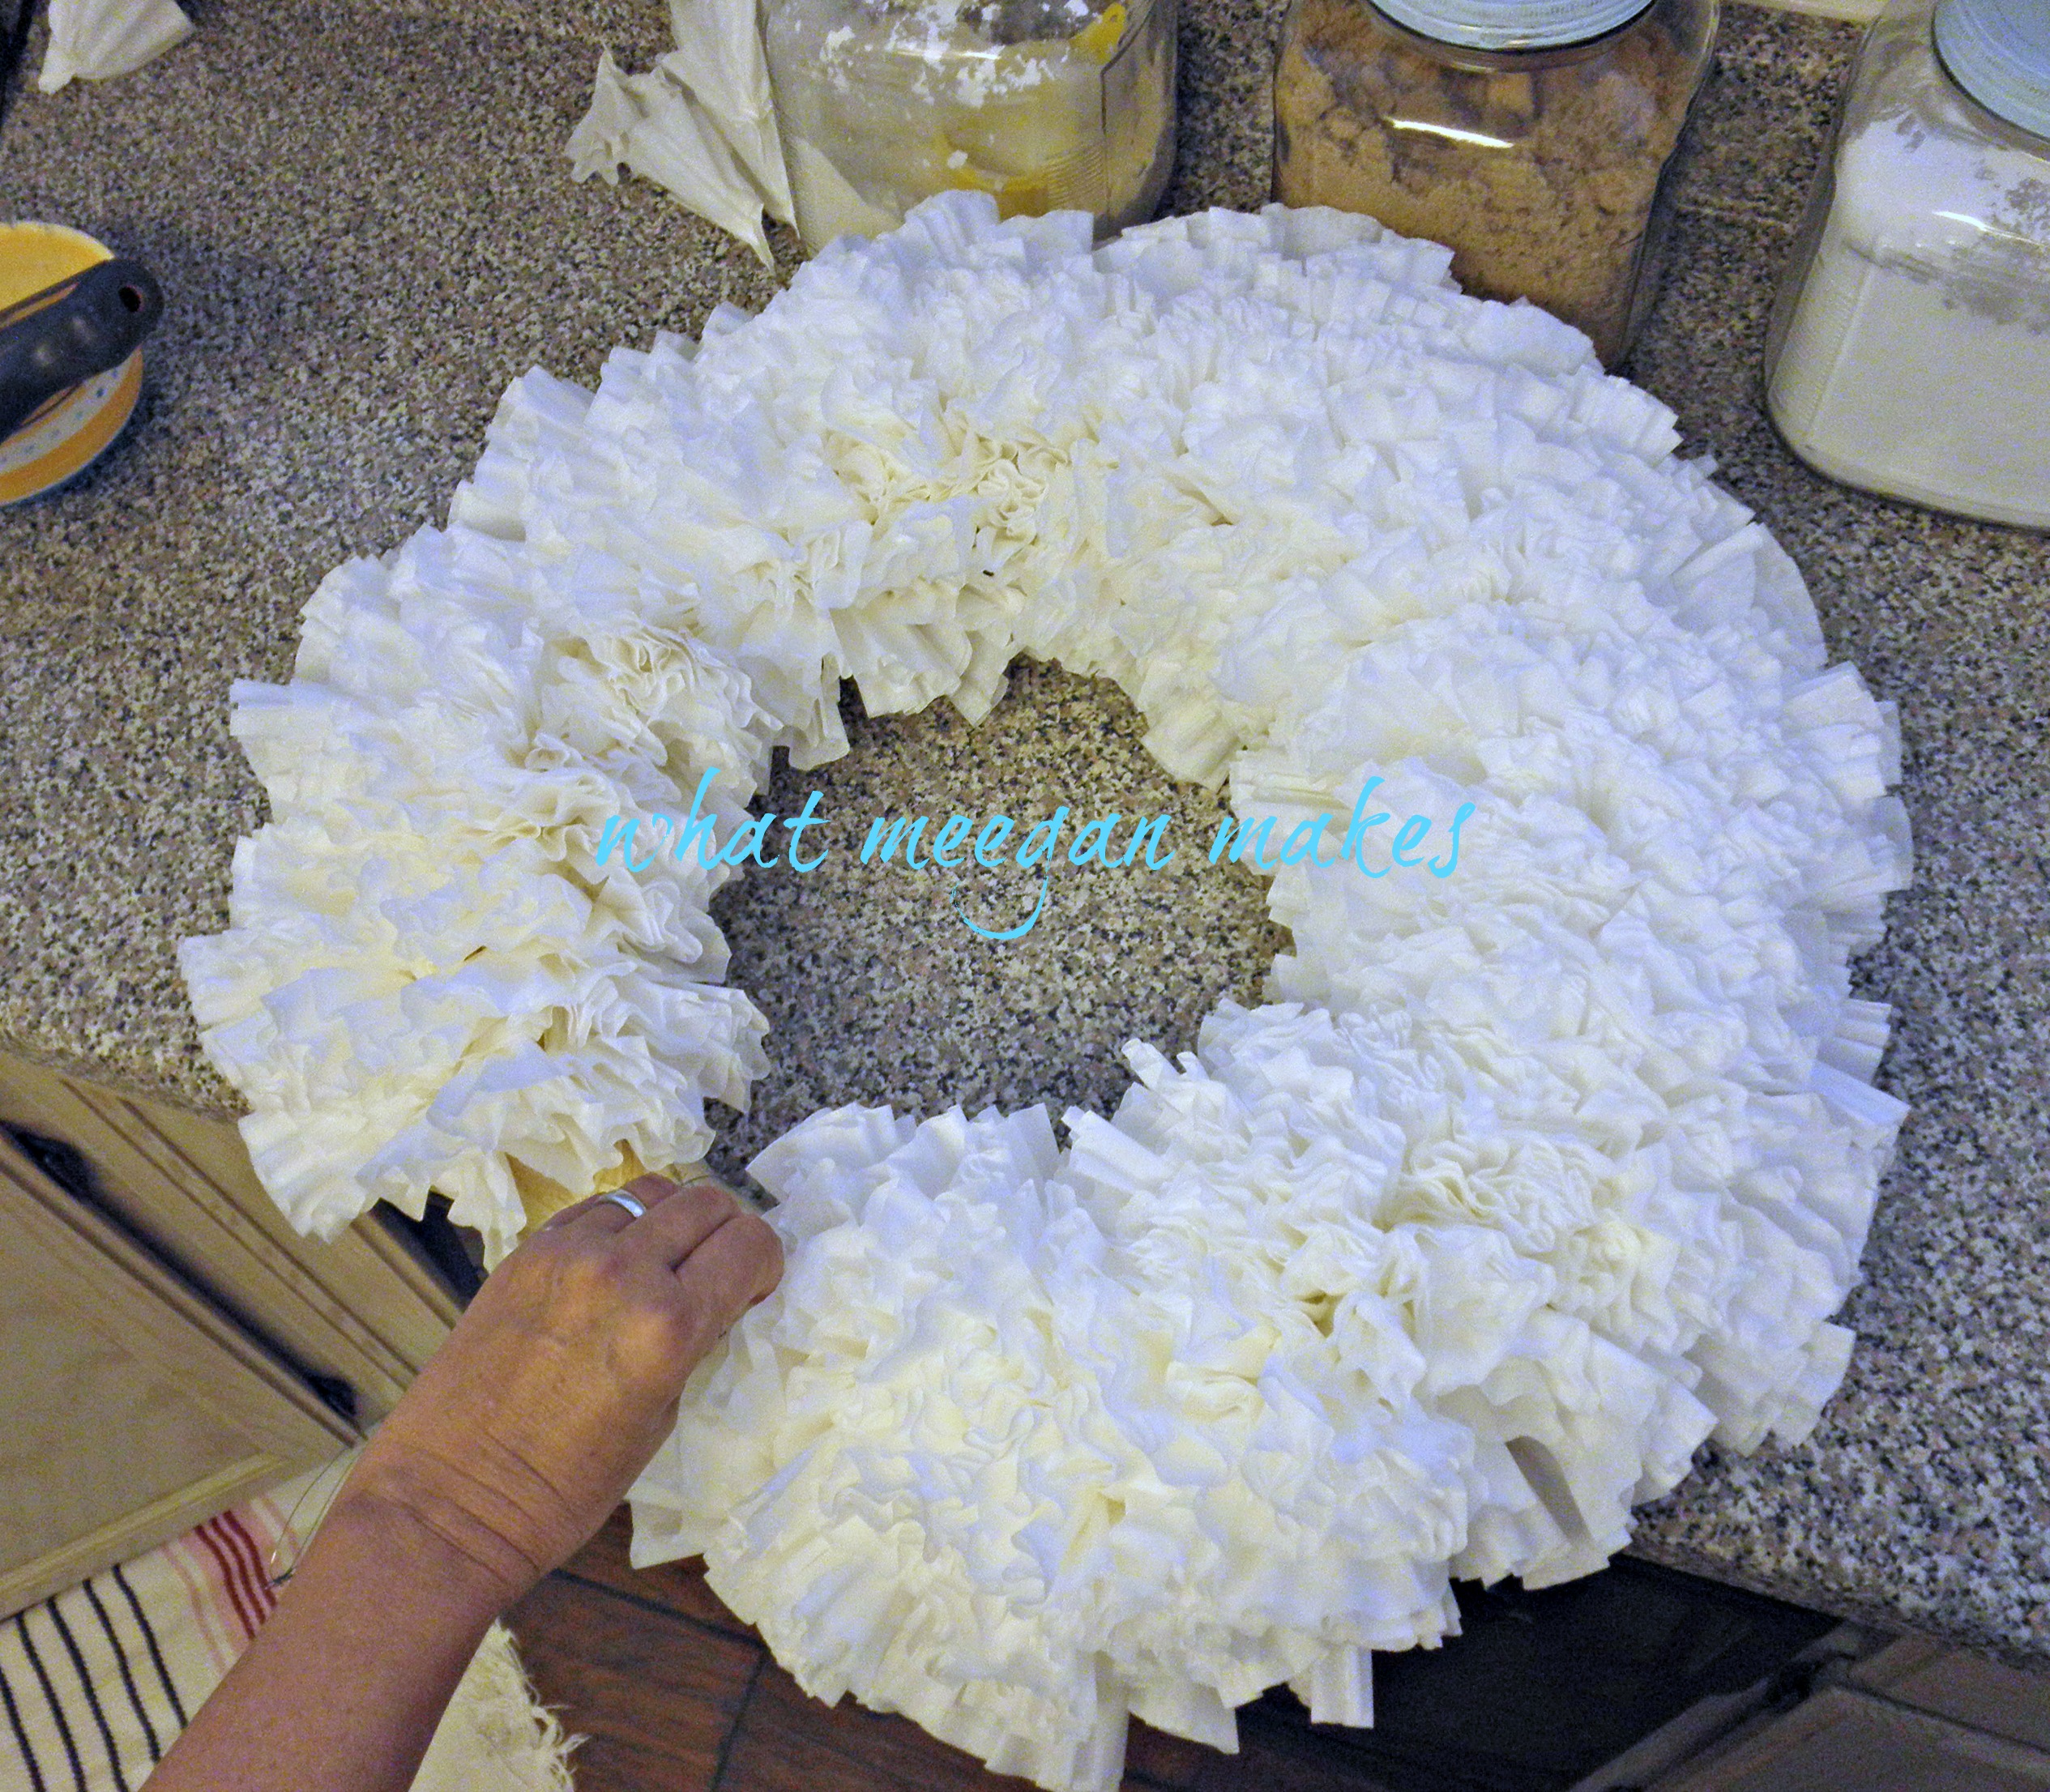
About 1/3 of the way through(which took me about an hour) of using the screw driver method, I opted to try the glue gun method to see if it would be any faster.  No, it was not faster.  (It was okay though-I watched DC Cupcakes on Netflix while I worked)


But I did like the look better.  When I was almost done I added a 28 gauge wire as a hanger for my new wreath.  Easy.  I used almost every single coffee filter-320 in all, 4 glue sticks, along with a couple of blisters (Yowza!)


Here is my finished product.  I think she is just lovely with the Fall green ribbon.  Doesn’t she look happy hanging on the pantry door?


Here’s another look just for fun!


Anyone that has ever made a coffee filter wreath-I tip my hat to you.  It is not a quick project.  It takes time and precision to make your wreath look full and balanced.  So, if you are looking for a quick project-this is not it.

Worth it, yes!

Let me know if you have attempted a coffee filter wreath.  What was the method that worked best for you?

Thanks for following me!  Be sure to stop by Pinterest, Hometalk, and be sure to addmeeganmakes.com to your Bloglovin’ Roll.

Pin It
Linked with: Its Overflowing I Should Be Mopping CraftOManiac Get Outta My Head Please Practically Functional Cowgirl Up Rustic Anthology Brassy Apple DIY HSH Polly Want A Crafter Homemaker On A Dime Coastal Charm Kammy’s Korner Blackberry Vine A Diamond In The Stuff Elizabeth & Co Alderberry Hill Tales of A Trophy Wife Shaken Together Home Stories A2Z 504 Main Tiaras & Bowties My Girlish Whims Lil Luna Savvy Southern Style From My Front Porch Someday Crafts All Stars Block Party LiveLaughRowe House of Hepworths Freckled Laundry Keeping It Simple Whipperberry DIY Showoff Happy Hour Projects Primitive and Proper Todays Creative Blog Ivy and Elephants Domestically Speaking Whimsy Wednesdays Ginger Snap Crafts Debbie Does Creations No Minimalist Here Faded Charm White Lights On Wednesday 52 Mantels {Primp} Homestead Simple Restore Interiors Made In A Day Craftionary At The Picket Fence French Country Cottage The Dedicated House Not Just A Housewife Creations By Kara Cherished Treasures Redoux Debbie Doos Kurtz Corner The DIY Dreamer My Uncommon Slice of Suburbia Uncommon Designs Knick of Time
« Previous Page
Next Page »

Recent Posts

  • Best Christmas Pillow Covers
  • Make Ahead Christmas Cookies
  • How to Make Bread and Butter Pickled Onions
  • Best Rattan Bedroom Choices
  • Ten Summer Beach Essentials

Purchase Beautiful Home Accessories for any style

Thrifty Style Team 2nd Friday Monthly

International Blogger Club-The 3rd Monday of Each Month

Fashion Trends for Over Fifty

DIY Bicycle Rim Halloween Wreath

Create and Decorate Pumpkins With Sea Shells

Fall Tablescape in Lavender and White

Vintage Bicycle Rim Wreath for Fall

How To Make a Faux Pumpkin Centerpiece

Glittery Welcome Embroidery Hoop Wreath

70+ Crafts and Decorating Tips for Fall

Top Ten Tips and Tricks for creating a Cottage Style Home

Pineapple Pecan Coffee Cake with Caramel Glaze

Raspberry Cream Sandwich Cookies

Cream Cheese and Shrimp Cocktail Dip

PERMISSIONS

What Meegan Makes and all it’s content, pictures, ideas, etc. are original ideas and copyright protected.

Using content including but not limited to: designs, original ideas, photos, posts, etc. is prohibited.

Please ask permission before using any content from my blog for any reason and if there is any question.

Search

FEATURED ON SHABBILICIOUS FRIDAY MAGAZINE

FEATURED IN EVERYTHING HOME MAGAZINE

FEATURED ON HUFFINGTON POST

FEATURED ON HUFFINGTON POST

MY OWN RECIPE WAS FEATURED

FEATURED ON GOOD HOUSEKEEPING

Designer Insights from Terry’s Fabrics

Copyright © 2026 ·Beautiful Pro Theme · Genesis Framework by StudioPress · WordPress · Log in