What Meegan Makes

vintage style, cottage living, home cooking

  • Home
  • Contact for Collaborations
  • Privacy Policy and Disclosure
  • Furniture Makeovers
  • 10 DIY Seasonal Banners
  • 15 Creative Spring Crafts

Etched Glass Vase

February 9, 2013 By Meegan 1 Comment

Etched Glass VaseI know!!  I made this Etched Glass Vase myself!!  I am excited to be sharing this project from the box of goodies I received last week.  When I opened the box and saw all of the  crafts from the Martha Stewart glass painting program, I was completely intimated to do the etched glass project.

But,  I was completely wrong!  This was super easy!!

Etched Glass VaseThis is what you will find in your Martha Stewart Glass Etching Kit, along with some disposable gloves.

Wash the glassware of your choice with soap and water.  Dry completely.  Use rubbing alcohol to clean off leftover  residue.

Now you are ready to go!!

Choose the pattern from Martha’s kit or make your own template.

I chose one from Martha’s kit:

Etched Glass Vase

The next step is just as easy.

Etched Glass VaseWearing your gloves, dab the etching cream with your brush from the kit onto the template holes.  Let set for half an hour.  I had to repeat this process 3 times to go all the way around my vase.

Then rinse off with water.

Yep, it’s that simple!!

Etched Glass Vase

You can use your etched glass item all year long!!  And add anything you want to fit your home decor.

Etched Glass Vase

I would highly recommend using Martha Stewart’s Glass Etching Kit.  Easy and very rewarding to see your project to come out so nice and professional looking!!

Etched Glass Vase

Thanks for stopping by on a Saturday!  I know you have busy lives.  Thanks for your support and help.

Giveaway next week!!  I can hardly wait!!

Let’s keep connected:

Pinterest Facebook Hometalk Google + Stumble Upon Bloglovin’ twitter

And now I am on Instagram!!  woo woo!!

Make it a Stupenous Saturday!!

Etched Glass Vase

 Linked with: Its Overflowing I Should Be Mopping Cowgirl Up Brassy Apple Coastal Charm Kammy’s Korner Elizabeth & Co Alderberry Hill Shaken Together Home Stories A2Z 504 Main Lil Luna Savvy Southern Style From My Front Porch All Stars Block PartyLiveLaughRowe House of Hepworths Freckled Laundry Whipperberry DIY Showoff Happy Hour Projects Ginger Snap Crafts No Minimalist Here White Lights On Wednesday 52 Mantels {Primp} Made In A Day Craftionary At The Picket Fence French Country Cottage The Dedicated House Creations By Kara Redoux Debbie Doos The DIY Dreamer My Uncommon Slice of Suburbia The 36th Avenue Funky Junk

Disclosure: I wrote this post as part of a campaign with Plaid Enterprises and The Blueprint Social. The opinions in this post are my own. I was not paid for this post, but I did receive the materials for the project gratis.

Framed Valentine’s Day Marble Art

February 6, 2013 By Meegan 7 Comments

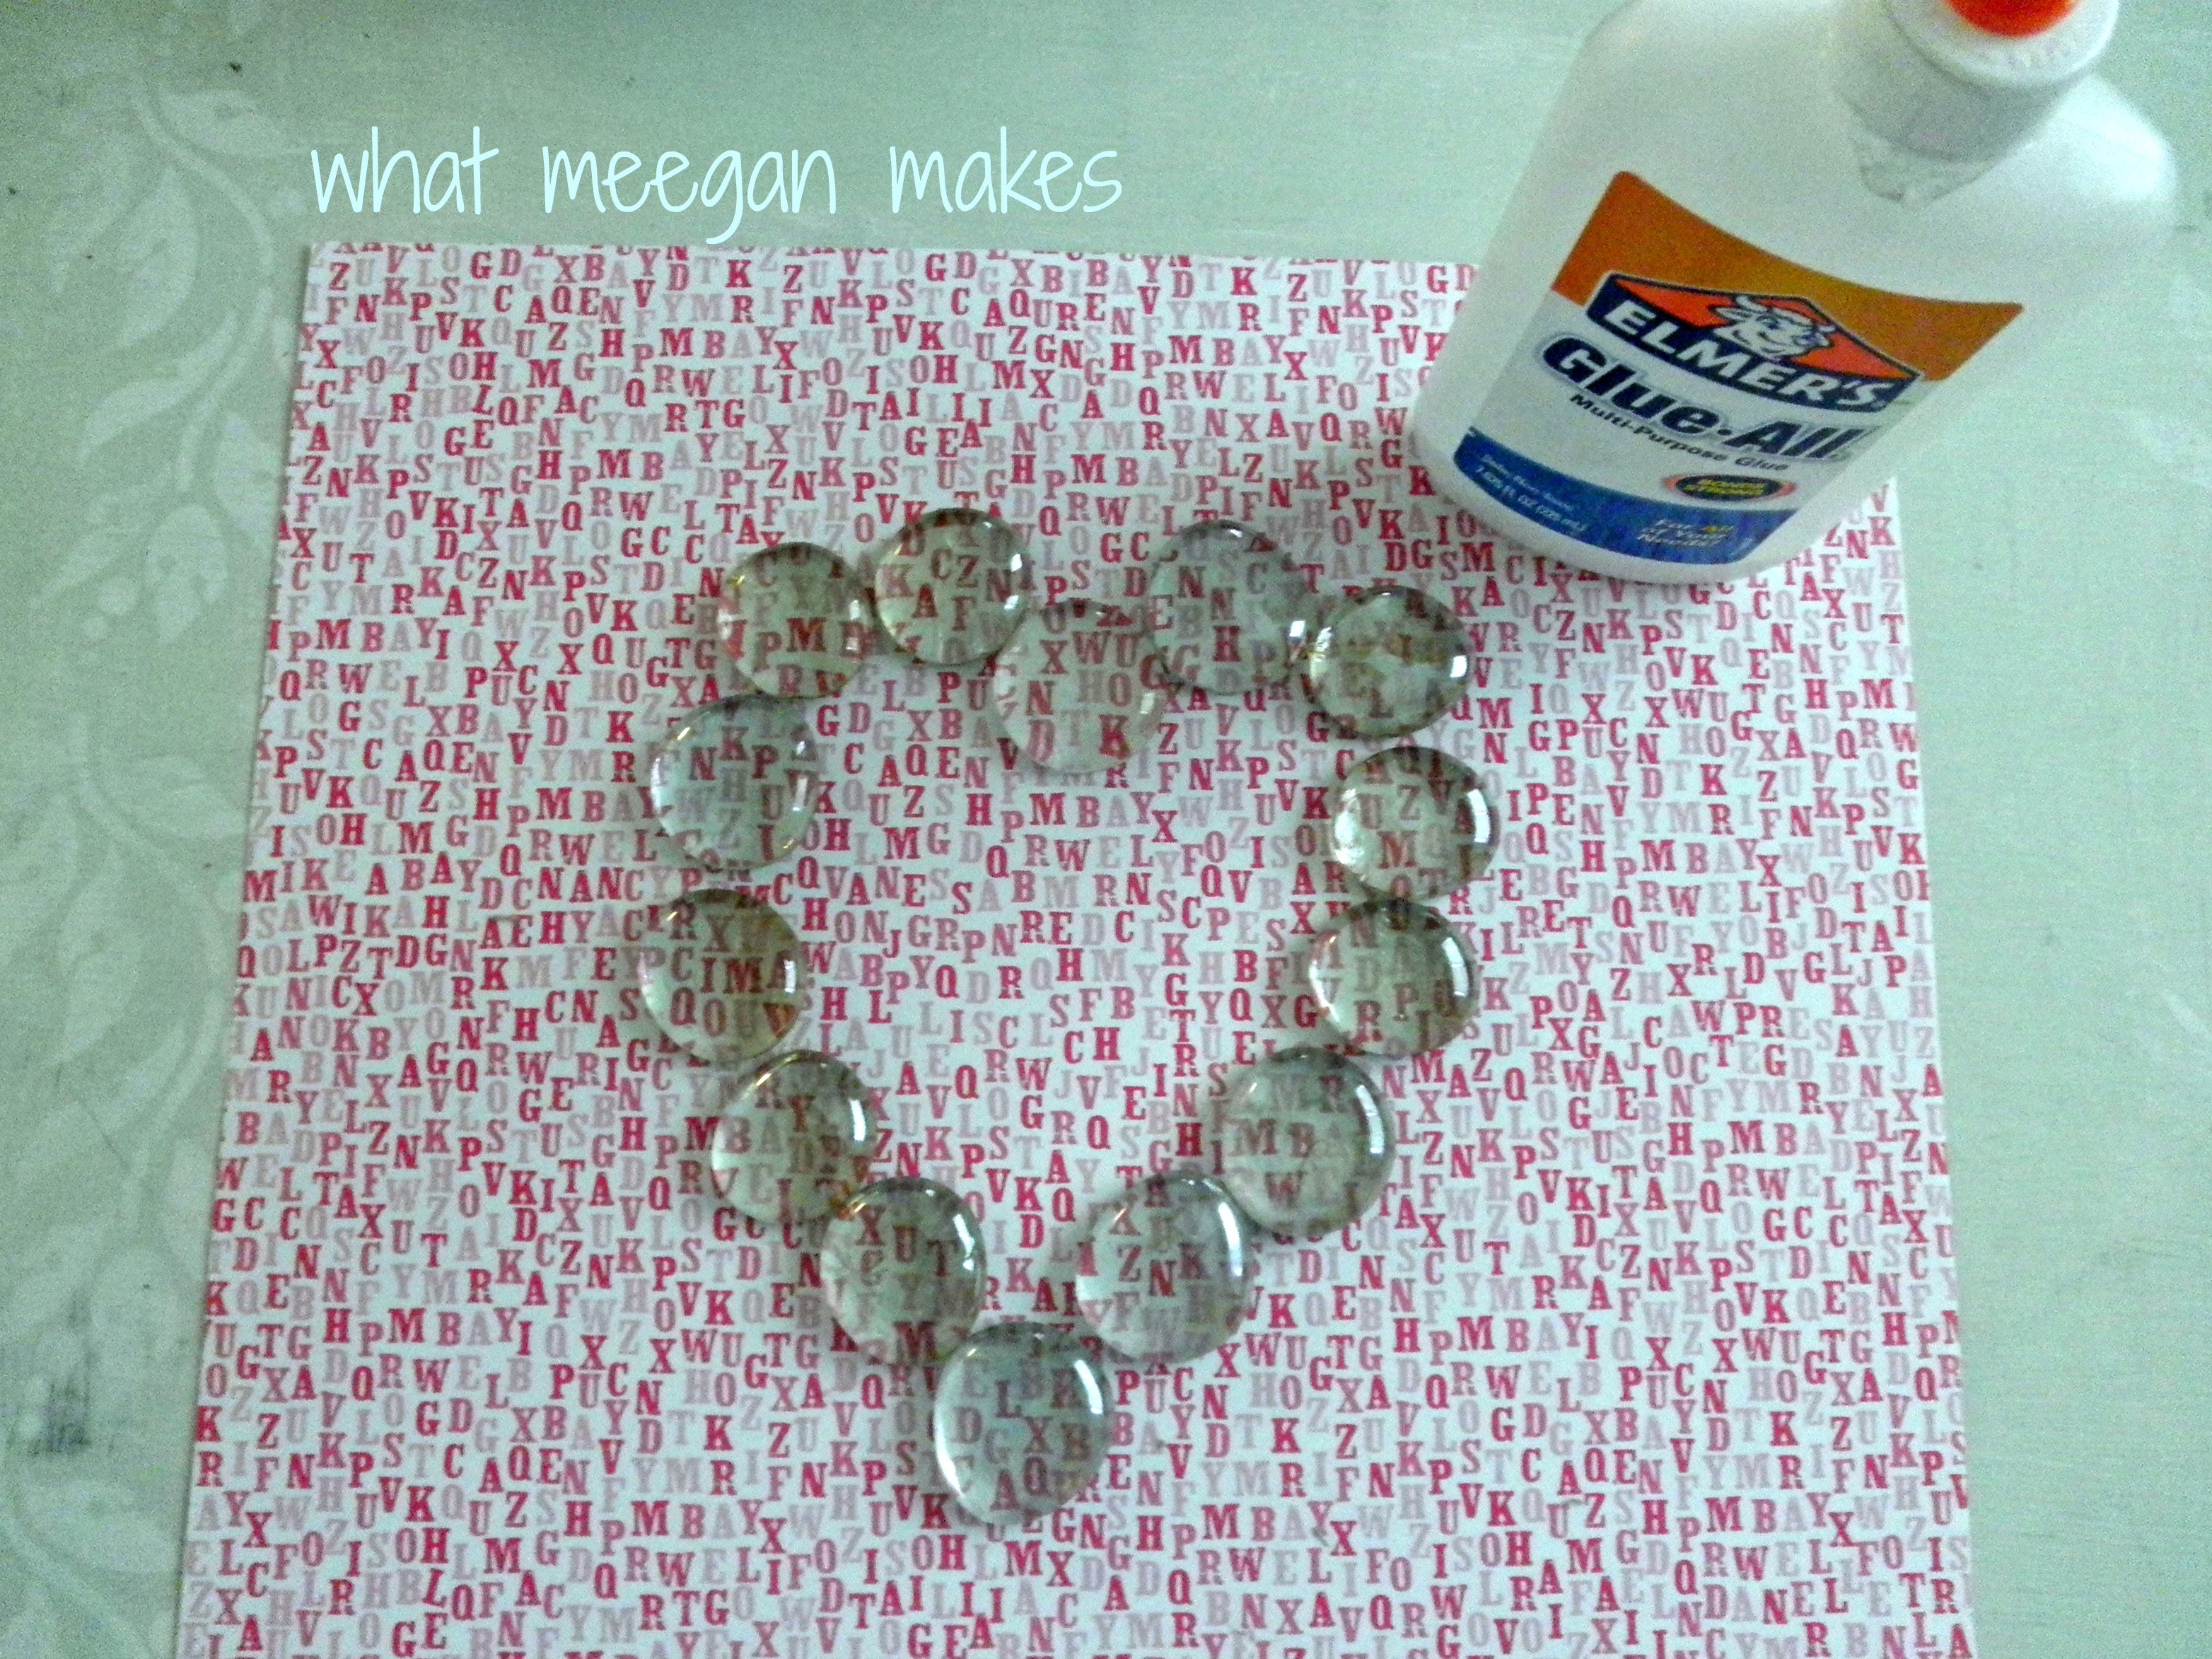
I just love that Valentine’s Day is coming soon!!  That is why I made this Framed Valentine’s Day Marble Art for our shelves.  Super easy and super fun!!  Just use your own imagination to make what you want.

Framed Valentine's Day Marble Art

I started with 3 components:

Elmers School Glue

Scrapbook Paper

Flat Marbles (I bought mine at the Dollar Tree)

Framed Valentine's Day Marble Art

Then I decided on a shape or letter:

Framed Valentine's Day Marble Art

Using a dab of glue on each marble, I glued them to my paper.  Once it was completely dry, I could frame it.

Framed Valentine's Day Marble Art

Pin It

I painted the fames to match the scrapbook paper.  I couldn’t resist adding some embellishments, and ribbon roses, too.  I then framed my Valentine Marble Art.

framed valentines day marble art

Pin It

L O V E  looks so nice on our vintage cupboard andFramed Valentine's Day Marble Art

Perfect for Valentine’s Day!!  Perfect for our shelves.

So simple!!  So easy!!

Are you ready for Valentines Day?  Maybe you should try making  Framed Valentine’s Day Marble Art!!  Let me know if you do, I would love to see yours!!

For more Valentine Ideas and Creativity you can also visit:

Valentine Inspiration

Rosette Heart

Floral Wire Valentine Hearts

Pinterest Valentine Inspiration

Thanks for stopping by today!!  Giveaway next week!!  I can hardly wait!!

Let’s keep connected:

Pinterest Facebook Hometalk Google + Stumble Upon Bloglovin’ twitter

And now I am on Instagram!!  woo woo!!

Make it a wonderful Wednesday!

Framed Valentine's Day Marble Art

 Linked with: Its Overflowing I Should Be Mopping Cowgirl Up Brassy Apple Coastal Charm Kammy’s Korner Elizabeth & Co Alderberry Hill Shaken Together Home Stories A2Z 504 Main Lil Luna Savvy Southern Style From My Front Porch All Stars Block PartyLiveLaughRowe House of Hepworths Freckled Laundry Whipperberry DIY Showoff Happy Hour Projects Ginger Snap Crafts No Minimalist Here White Lights On Wednesday 52 Mantels {Primp} Made In A Day Craftionary At The Picket Fence French Country Cottage The Dedicated House Creations By Kara Redoux Debbie Doos The DIY Dreamer My Uncommon Slice of Suburbia The 36th Avenue Funky Junk

Martha Stewart Paintable Clings

February 5, 2013 By Meegan 10 Comments


Martha Stewart Paintable Clings

Pin It

Last week I told you about a box I received new product from the Martha Stewart glass painting program.  I decided to use and decorate the Martha Stewart Printable Clings.  I am so excited to get started and share them with you!

Clings are for decorative purposes only, and are not dishwasher safe.  Wipe with damp cloth to clean.

Clings should be stored on the backer sheet when not in use.

Printable Clings can be applied to any nonporous glass or ceramic surface.

I chose to make:

Martha Stewart Paintable Clings

a decorative clear glass plate using the Silver Bordered Paintable Clings… and I couldn’t resist using:

Martha Stewart Paintable ClingsThe Black Bordered Clings, too!!

I started by picking out the Martha Stewart Glass Paint colors that went best in my home:

Martha Stewart Paintable Clings

Blue Sky, Key Lime, Red Coral, Kelp, Raincoat, and Monarch Orange for my clear decorative plate.

I began painting.  Super Easy and fun to be creative!!

Martha Stewart Paintable ClingsUsing the tip of the bottle, I worked in sections to fill each area completely.   Glass paint brushes are helpful when painting in small, intricate areas of the clings.

Before I added my clings:

I washed my plate with soap and water.  Dried it off, then using rubbing alcohol I cleaned off any leftover residue.

Once the paint was dried completely I was able to add the clings to my plate!!

Martha Stewart Printable Clings

Pin It

Now for the fun!!  I placed the design to the surface of the plate, pressing gently to smooth it.

I just used my imagination as I added the clings.  Cute cute cute!!  I can’t belive that I made this!!

Cool thing about these Paintable Clings: If you don’t like the positioning of where you placed them-you can move them!!  As a matter of fact-if you decide you want to use them seasonally, you can take them off and save them for next year!!

I had so much fun I made a cute flower pot to match using the Black Bordered Clings:

Martha Stewart Paintable Clings

Pin It

Using the same colors, I decorated this flower pot for Spring.  The Black Bordered Clings Kit has butterflies, dragon flies, and, a floral selection.  How cute is this??  Just love me this dragon fly!!

Everything I made looks professionally made, and the products were very easy to use.  I was impressed!

These Martha Stewart products can be found at Michaels.

For more ideas follow Plaid Crafts on Pinterest or Martha Stewart Crafts on Pinterest.  Another fun place to follow is Plaid Crafts on Facebook.

Thanks for stopping by today and letting me share my Martha Stewart Paintable Clings!!

Make it a terrific Tuesday!!

Let’s keep connected:

Pinterest Facebook Hometalk Google + Stumble Upon Bloglovin’ twitter

And now I am on Instagram!!  woo woo!!  See you there!!

Martha Stewart Paintable Clings

Disclosure: I wrote this post as part of a campaign with Plaid Enterprises and The Blueprint Social. The opinions in this post are my own. I was not paid for this post, but I did receive the materials for the project gratis.
Easy Peasy Valentine Heart-Revisited

January 9, 2013 By Meegan 27 Comments

Good Morning everyone! I thought you might like to see this Easy Peasy Valentine Heart-Revisited.  It was one of my first posts lasts year.  And I thought you would love to see it again for your Valentine’s decorating this year.  It’s so simple and didn’t cost a dime!

One of my daughters, Serretta from Serretta Style, created this Beautiful Rosette Heart, and I wanted to share with you how she did it:

Easy Peasy Valentine Heart-Revisited

Continue Reading

« Previous Page
Next Page »

Recent Posts

  • Best Christmas Pillow Covers
  • Make Ahead Christmas Cookies
  • How to Make Bread and Butter Pickled Onions
  • Best Rattan Bedroom Choices
  • Ten Summer Beach Essentials

Purchase Beautiful Home Accessories for any style

Thrifty Style Team 2nd Friday Monthly

International Blogger Club-The 3rd Monday of Each Month

Fashion Trends for Over Fifty

DIY Bicycle Rim Halloween Wreath

Create and Decorate Pumpkins With Sea Shells

Fall Tablescape in Lavender and White

Vintage Bicycle Rim Wreath for Fall

How To Make a Faux Pumpkin Centerpiece

Glittery Welcome Embroidery Hoop Wreath

70+ Crafts and Decorating Tips for Fall

Top Ten Tips and Tricks for creating a Cottage Style Home

Pineapple Pecan Coffee Cake with Caramel Glaze

Raspberry Cream Sandwich Cookies

Cream Cheese and Shrimp Cocktail Dip

PERMISSIONS

What Meegan Makes and all it’s content, pictures, ideas, etc. are original ideas and copyright protected.

Using content including but not limited to: designs, original ideas, photos, posts, etc. is prohibited.

Please ask permission before using any content from my blog for any reason and if there is any question.

Search

FEATURED ON SHABBILICIOUS FRIDAY MAGAZINE

FEATURED IN EVERYTHING HOME MAGAZINE

FEATURED ON HUFFINGTON POST

FEATURED ON HUFFINGTON POST

MY OWN RECIPE WAS FEATURED

FEATURED ON GOOD HOUSEKEEPING

Designer Insights from Terry’s Fabrics

Copyright © 2026 ·Beautiful Pro Theme · Genesis Framework by StudioPress · WordPress · Log in