What Meegan Makes

vintage style, cottage living, home cooking

  • Home
  • Contact for Collaborations
  • Privacy Policy and Disclosure
  • Furniture Makeovers
  • 10 DIY Seasonal Banners
  • 15 Creative Spring Crafts

DIY Embellished Frame

July 9, 2014 By Meegan 4 Comments

This post is sponsored by Blueprint Social and Plaid Crafts.

I am one of the lucky ones that gets to share a new type of craft sensation.  It’s called Decoden. Today I am going to share with you Mod Podge Collage Clay. And how you can make a DIY Decoden Embellished Frame.

At first you might feel that Decoden is too much embellishing, but that’s part of the excitement.  AND, when you get to work with it like I have recently, you will be hooked. Decoden is the art of decorating anything with trinkets, and “the more the merrier”.

As I have used Mod Podge Collage Clay, I was excited to make my DIY Embellished Frame.

DIY Embellished Frame Label

Now, doesn’t that look fun?  Let me show you how I made my frame.

I received these Mod Podge products: Collage Clay in Strawberry and Vanilla, Hot Melts, Mod Molds, and Collage Drizzle Paint.

DIY Embellished Frame

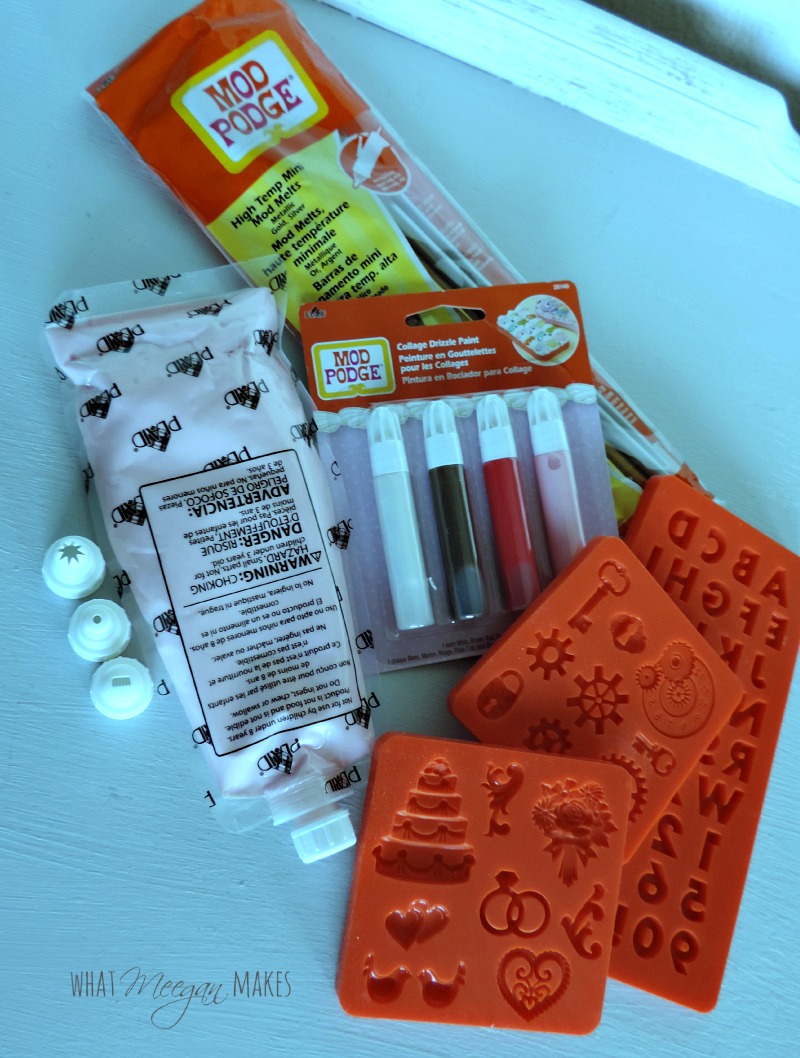
 My first step was to make  some embellishments with the Hot Melts and the Mod Molds.  Using a mini high temp glue gun I filled the molds and waited ten minutes for them to harden.  You can also fill your Mod Molds with Collage Clay.  Wait 24 hours to dry and pop them right out.

DIY Embellished Frame

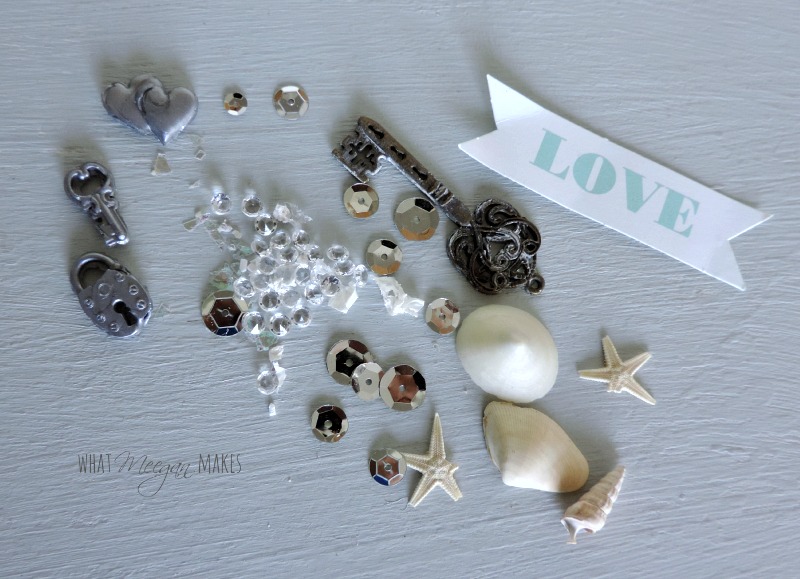
While I was waiting for the Hot Melts, I gathered my trinkets.  I used glitter, crystals, shells, starfish, keys, sequins, and a few scrapbook supplies.

DIY Embellished Frame

Now it was time to start my DIY Embellished Frame.  I used the star tip with strawberry collage clay to cover the top of my frame.  Making rosettes I was ready to add my embellishments.

DIY Embellished Frame

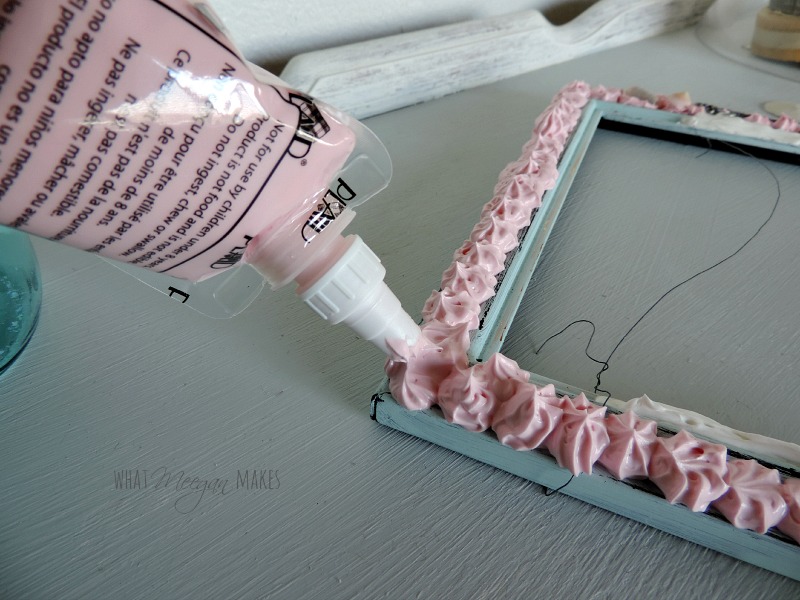
 I began to add my shells and crystals.  Then the real fun started.  I remembered “the more, the merrier” while I added my trinkets and embellishments.

DIY Embellished Frame

I was having so much fun that I decorated a clothes pin to hold my picture.  Some glitter and a shell was just the right touch.

DIY Embellished Frame

Now it was time to let my frame dry.  It takes a full 24 hours for the Collage Clay to dry.  So, don’t be in a rush to use your Decoden art.  Let it dry completely.

  I have to admit I was a little nervous about designing an over the top look in my 3D collage clay. But using this new technique was a lot of fun. I KNOW you will enjoy it as well.

DIY Embellished Frame Label

Collage Clay is not recommended for children ages 12 and under, and the product is not edible. Small parts are a choking hazard for children.

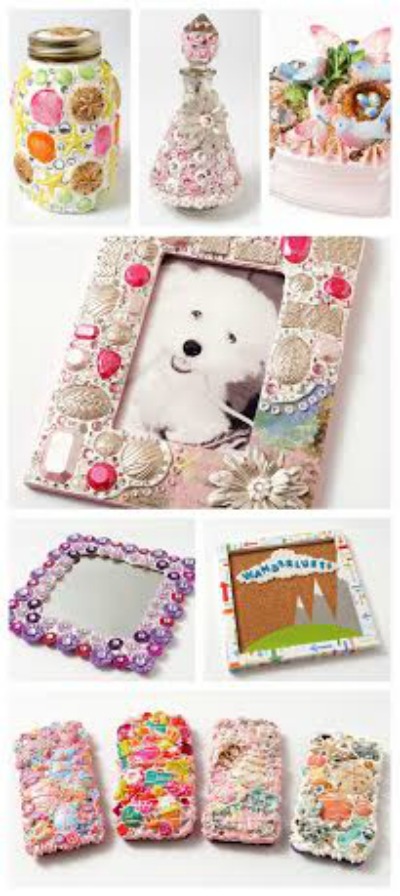
Here are more varieties of how YOU can create your own Decoden art with Mod Podge Collage Clay:

Mod Podge Design

You will find Plaid products in your local Michaels Store.

You can keep up with Plaid in a number of ways: 
Blog | Newsletter | Pinterest | Facebook | Instagram
| Twitter | YouTube | Google+
You can win your own set of Mod Podge Collage Clay supplies…

a Rafflecopter giveaway


Don’t forget to check out my fellow bloggers ideas, too.

Make it a wonderful Wednesday.

signature

I share little bits and pieces of my blog and life on: Pinterest Facebook Hometalk Google + Stumble Upon Bloglovin’ twitter Instagram  

Sharing this post at some of these amazing blogs.

Filed Under: crafting Tagged With: crafting, Giveaway

Comments

  1. danielle says

    July 9, 2014 at 9:12 AM

    Fun – I love how it came out.

    Reply
  2. Kristina & Millie says

    July 9, 2014 at 9:12 AM

    where have I been that I don’t know about this mod podge clay or the melts?!?!? I have to have some!

    Reply
  3. Claire @ A Little Claireification says

    July 9, 2014 at 10:03 AM

    How fun is this Meegan?? I have never tried the Mod Podge Clay – this may be my newest favorite thing! Thanks for the giveaway too!

    Reply
  4. Michele @ The Scrap Shoppe says

    July 10, 2014 at 7:55 AM

    How fun! It does look good enough to eat… even if you’re not suppose to. ;)

    Reply

Leave a Reply Cancel reply

Your email address will not be published. Required fields are marked *

This site uses Akismet to reduce spam. Learn how your comment data is processed.

Follow on Bloglovin

Recent Posts

  • How To Embellish Christmas Ornaments
  • Handmade Bead and Crystal Christmas Ornaments
  • How To Decorate Pumpkins with Vintage Doilies
  • Peppermint Snowball Cookies
  • Decorate an Olive Bucket for Fall

Purchase Beautiful Home Accessories for any style

Thrifty Style Team 2nd Friday Monthly

International Blogger Club-The 3rd Monday of Each Month

MY AFFILIATES

Fashion Trends for Over Fifty

DIY Bicycle Rim Halloween Wreath

Create and Decorate Pumpkins With Sea Shells

Fall Tablescape in Lavender and White

Vintage Bicycle Rim Wreath for Fall

How To Make a Faux Pumpkin Centerpiece

Glittery Welcome Embroidery Hoop Wreath

70+ Crafts and Decorating Tips for Fall

Top Ten Tips and Tricks for creating a Cottage Style Home

Pineapple Pecan Coffee Cake with Caramel Glaze

Raspberry Cream Sandwich Cookies

Cream Cheese and Shrimp Cocktail Dip

PERMISSIONS

What Meegan Makes and all it’s content, pictures, ideas, etc. are original ideas and copyright protected.

Using content including but not limited to: designs, original ideas, photos, posts, etc. is prohibited.

Please ask permission before using any content from my blog for any reason and if there is any question.

Search

FEATURED ON SHABBILICIOUS FRIDAY MAGAZINE

FEATURED IN EVERYTHING HOME MAGAZINE

FEATURED ON HUFFINGTON POST

FEATURED ON HUFFINGTON POST

MY OWN RECIPE WAS FEATURED

FEATURED ON GOOD HOUSEKEEPING

Designer Insights from Terry’s Fabrics

Copyright © 2023 ·Beautiful Pro Theme · Genesis Framework by StudioPress · WordPress · Log in