Since the Holidays have passed I am now back into doing my DIY projects around my cottage apartment. Learning How To Refresh a Stand Mixer with Spray Paint is one of this years goals.

*This post was updated October 2025.
This post is part of the Thrifty Style Team and organized by Julie from Redhead Can Decorate.
![]()
Every SECOND Friday, of each month a group of amazing bloggers share their thrifty and creative ideas. Today is just one of those days! I will be listing their links at the end of this post so you can see ALL of their ideas.
My thrifty project today is How To Refresh a Stand Mixer with Spray Paint.
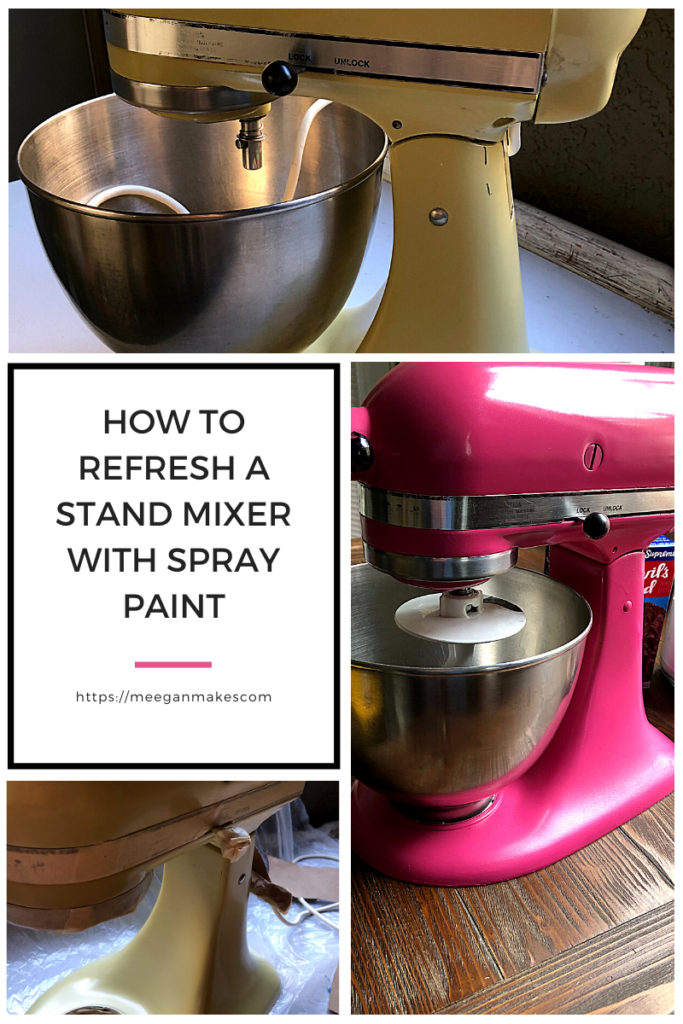
I have had my stand mixer for almost 40 years. Yep, you read that correctly. FORTY years. It works fabulously and I just wanted to refresh it with a different color.

You can see that is has been used and worn. Some of the wording is fading, but everything else is in tack. Nothing that a little paint can’t fix.

Before painting I used masking tape to cover the areas that I wanted to keep original. Like the unlock/lock knob, the bowl plate, and other small details that add character and definition.

For larger areas, I taped pieces of heavy craft paper (you could also use cardstock or cardboard) and carefully covered and secured them.

To keep the cord from getting paint on it, I covered it with tape, plastic and paper. Also using a fine grit sandpaper helped to soften up the scratches and scuffs before starting to paint.
Rust-oleum Berry Pink was my color of choice. It will definitely add a touch of brightness to my kitchen.

With a plastic drop cloth underneath and covering all the surrounding the painting area, I lightly sprayed the stand mixer in small areas. To spray the paint with full force causes drips and blotches.
Since I was painting outside, there was an occasional spot that would bubble or pucker up. I waited until it was almost dry and re-sand it. Then spray again. It only happened in two spots, so it wasn’t too bad.
*A great tip to speed up the drying process is to use a blow dryer (on medium heat) or a heat gun. This not only speeds up the drying time, but helps the paint dry evenly*

Oh my goodness! What a difference! With the pop of color and the satin finish the silver really stands out and looks fresh. And now I am actually wanting to cook or bake.
As an added bonus-The stand mixer looks fabulous as an accessory on my kitchen counter, too.
Having you visit my blog is always a treat. Especially on Thrifty Style Team day.
As promised, I am leaving the links for all the other members of the team below. Have fun and enjoy!

Redhead Can Decorate – DIY Home Gym
The Painted Hinge – How to Repurpose Cabinet Doors into Wall Decor
DIY Beautify – 7 Thrifty Cleaning and Organizing Solutions for the Home
2 Bees In A Pod – Repurposed Vintage Tea Towel
Postcards From The Ridge – Paper Heart Wall Art
The How To Home – DIY Family Charging Station
The Tattered Pew – Bergere Painted Shutters
Sweet Pea – DIY Frosted Branches
What Meegan Makes – How to Refresh a Stand Mixer with Spray Paint
Cottage At The Crossroads – Fabric Hearts with Yo-yos
Lora B. Create & Ponder – Upcycled Old Tin Organizer DIY

Moree ideas from What Meegan Makes…
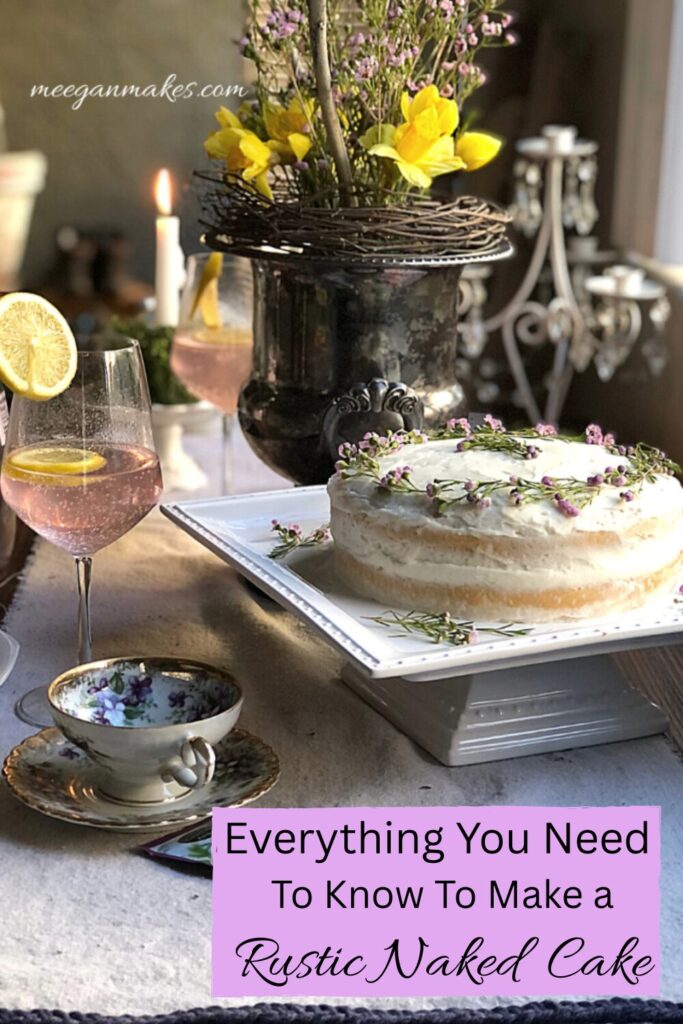
Everything you need to know to make a Rustic Naked Cake.

How to Make Rustic Ladder Chandelier


Wow Meegan – what a difference! Your brave choice paid off big-time. We never would have thought of painting the mixer for an update. Very smart choice – it looks amazing!
What a great update for your mixer. Love its new color!
Great fresh look for your old mixer! I love that version spray paint the best.
Meegan, what a great idea! I love the color you picked, it’s so cheerful!
It is so good to know that these mixers can be revived with spray paint. The color you chose is fabulous!
Meegan, this looks like a brand new mixer! I can’t believe you’ve had it for forty years. I’m sure there have been hundreds a tasty treats made with it and now it has a pretty new look. Thanks for the great idea.
I love this transformation Meegan – your mixer looks brand new! Love the color too!
Meegan I love this!!! Your mixer turned out so good and I love the bright color you picked! I totally want to try this!
Wow, wow, wow! From antique looking to almost brand-new! Great choice of paint color too!