What Meegan Makes

vintage style, cottage living, home cooking

  • Home
  • Contact for Collaborations
  • Privacy Policy and Disclosure
  • Furniture Makeovers
  • 10 DIY Seasonal Banners
  • 15 Creative Spring Crafts

Update Your Existing Rug with Interior Paint

October 30, 2012 By Meegan 3 Comments

There are affiliate links at the end of this post, at no extra cost to you upon purchase.

I have had rugs on my mind. I would like 3 new rugs. One for the kitchen, one for the side of my bed, and a new one for the TV room.  I look for deals, I look for colors, and I look for makeovers ideas.  I look even when I don’t need a rug.  I don’t know what that means psychologically, but I just like rugs.  That is all there is to it. SO, I decided why not “Update Your Existing Rug with Interior Paint”.

Update Your Existing Rug with Interior Paint

I got right to business…


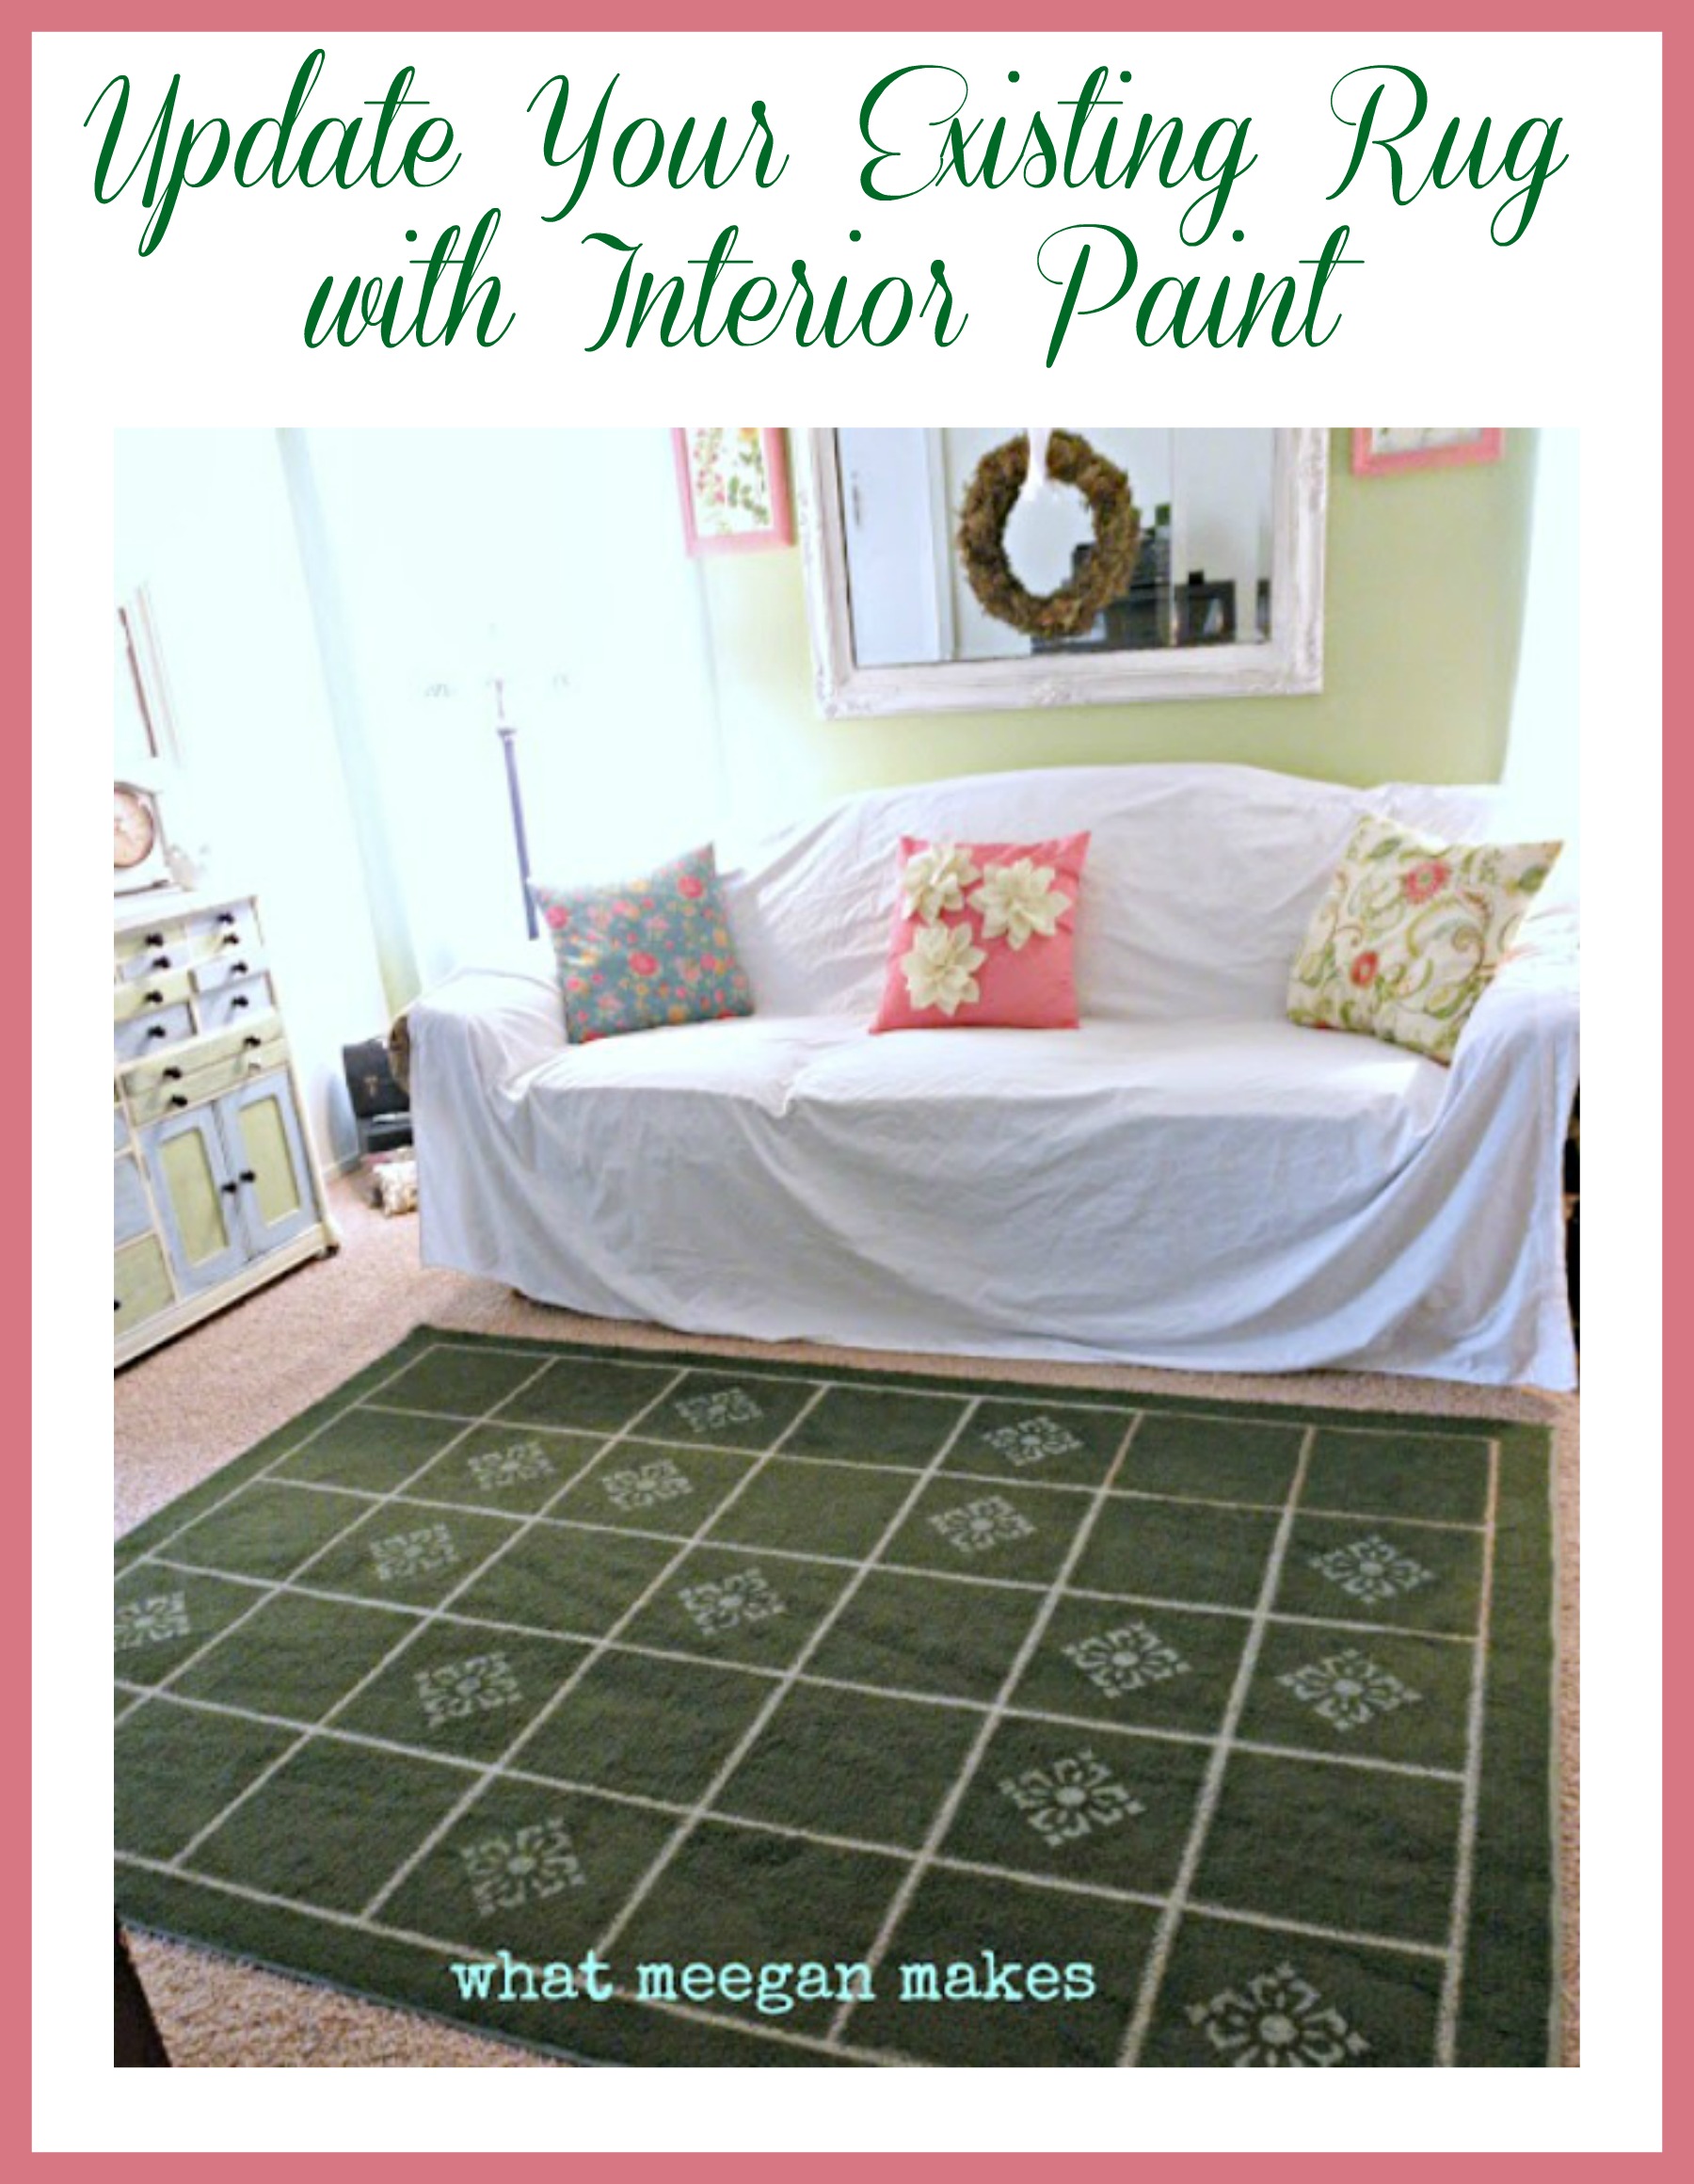
I bought this rug at Wal-Mart years ago for about $10. Steal of a Deal, right?

These became my tools.  A regular old paint brush, a stencil and paint:

These were my tools: A regular old paint brush, a stencil and paint.

Yes, I used interior satin paint.  I went to Wal-mart and had them color match “Summer Sonnet” by Ace Hardware.  Now I could get started.

I first traced along the lines that were already on the rug.  Easy.  I drew out a pattern on a piece of paper where I wanted each stencil to be placed. I tried really hard not to make each row the same.
Paint and Stencil Your Own Rug The EASY Way
With my regular paint brush I dabbed the paint through the stencil.  Seriously SO easy!
Don’t you just love my much desired make shift slip cover.  (I will get one soon)

As you Update Your Existing Rug with Interior Paint, it adds depth and dimension to a rather boring rug.

Update Your Existing Rug with Interior paint
Now I have a “NEW” rug.  I can’t believe how nicely it turned out.  Happy me. Happy new rug.  Yay!
FYI-In case I ever need to clean up an oily food spot, I used a wet sponge with Dawn soap over the paint. The paint remained in tact. The painted areas are a tiny bit stiff, but not unbearable or uncomfortable with bare feet. I have also vacuumed the rug and no damage was done to the paint.
This idea is fun, creative and inexpensive in comparison as to how much rugs cost.  Believe me-I know.

I hope you have enjoyed this tutorial on how to Update Your Existing Rug with Interior Paint.

Make it a wonderful day.
Meegan


Filed Under: crafting, DIY, refresh Tagged With: DIY, refresh, Rug

Comments

  1. Denyse @ Glitter, Glue & Paint says

    September 24, 2013 at 3:27 AM

    Oh goodness, Meegan! Your rug is so cute. I love the stenciled pattern you used. Thanks for sharing at throwback Thursday.

    xoxo
    Denyse

    Reply
    • Meegan says

      September 24, 2013 at 4:37 AM

      You are so nice Denyse! Thanks for hosting such a fun party. I love your Party!!

      Reply
  2. Kerryanne @ Shabby Art Boutique says

    May 12, 2016 at 2:47 AM

    Meegan, you amaze me… seriously, I’ve never thought of stencilling a rug. It turned out perfectly and must be a great focal point for your room.
    Thank you for sharing this post at Shabbilicious Friday. I’ve pinned it and I’m excited to feature your painted rug at the party tomorrow, so others can be inspired too.
    Hugs ~ Kerryanne

    Reply

Leave a Reply Cancel reply

Your email address will not be published. Required fields are marked *

This site uses Akismet to reduce spam. Learn how your comment data is processed.

Follow on Bloglovin

Recent Posts

  • How To Embellish Christmas Ornaments
  • Handmade Bead and Crystal Christmas Ornaments
  • How To Decorate Pumpkins with Vintage Doilies
  • Peppermint Snowball Cookies
  • Decorate an Olive Bucket for Fall

Purchase Beautiful Home Accessories for any style

Thrifty Style Team 2nd Friday Monthly

International Blogger Club-The 3rd Monday of Each Month

MY AFFILIATES

Fashion Trends for Over Fifty

DIY Bicycle Rim Halloween Wreath

Create and Decorate Pumpkins With Sea Shells

Fall Tablescape in Lavender and White

Vintage Bicycle Rim Wreath for Fall

How To Make a Faux Pumpkin Centerpiece

Glittery Welcome Embroidery Hoop Wreath

70+ Crafts and Decorating Tips for Fall

Top Ten Tips and Tricks for creating a Cottage Style Home

Pineapple Pecan Coffee Cake with Caramel Glaze

Raspberry Cream Sandwich Cookies

Cream Cheese and Shrimp Cocktail Dip

PERMISSIONS

What Meegan Makes and all it’s content, pictures, ideas, etc. are original ideas and copyright protected.

Using content including but not limited to: designs, original ideas, photos, posts, etc. is prohibited.

Please ask permission before using any content from my blog for any reason and if there is any question.

Search

FEATURED ON SHABBILICIOUS FRIDAY MAGAZINE

FEATURED IN EVERYTHING HOME MAGAZINE

FEATURED ON HUFFINGTON POST

FEATURED ON HUFFINGTON POST

MY OWN RECIPE WAS FEATURED

FEATURED ON GOOD HOUSEKEEPING

Designer Insights from Terry’s Fabrics

Copyright © 2023 ·Beautiful Pro Theme · Genesis Framework by StudioPress · WordPress · Log in