What Meegan Makes

vintage style, cottage living, home cooking

  • Home
  • Contact for Collaborations
  • Privacy Policy and Disclosure
  • Furniture Makeovers
  • 10 DIY Seasonal Banners
  • 15 Creative Spring Crafts

Search Results for: diy projects/page/159/meeganmakes.com/page/194/meeganmakes.com

Valentine Projects for $3 and under

February 9, 2013 By Meegan 7 Comments

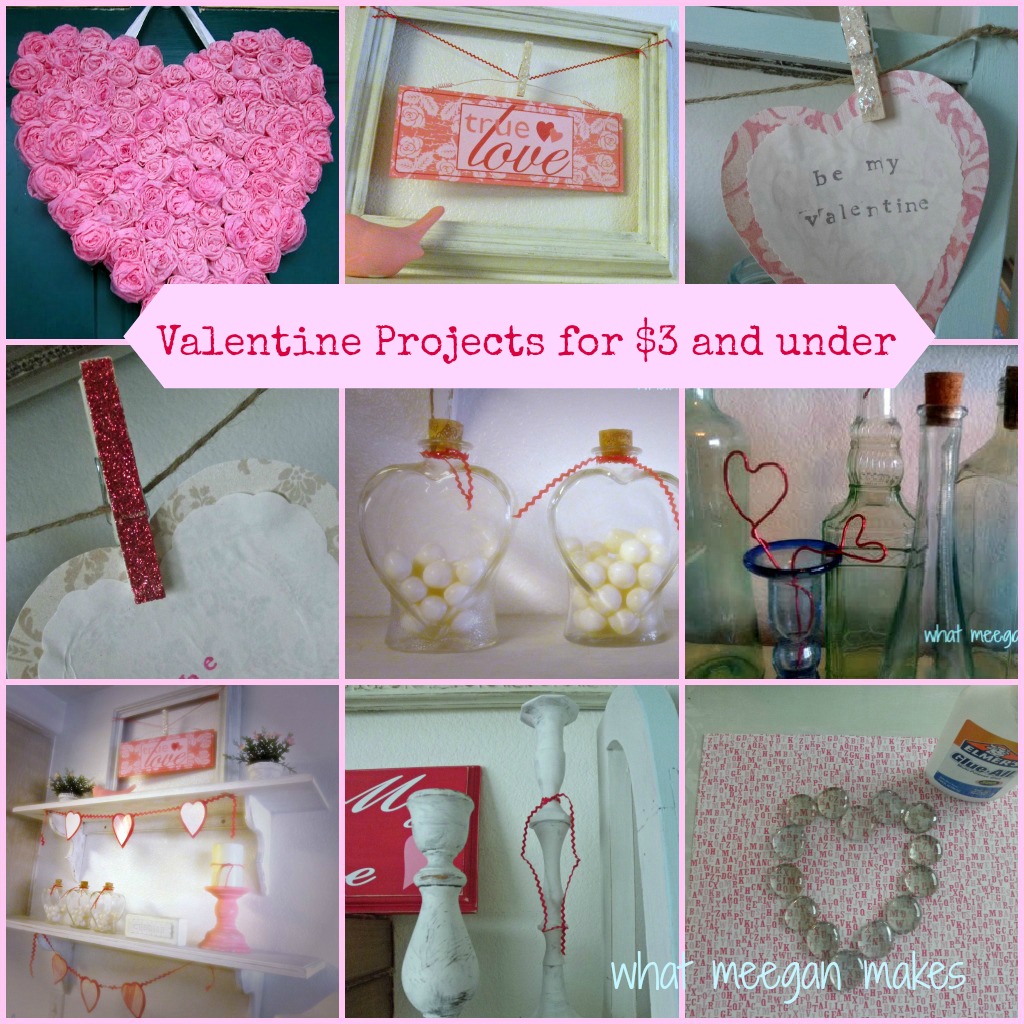
Valentine’s Day is coming and I am always looking for ways to cut costs.  That is why I came up with my Valentine Projects for $3 and under…

Valentine Projects for $3 and under

Pin It

Valentine Projects for $3 and under
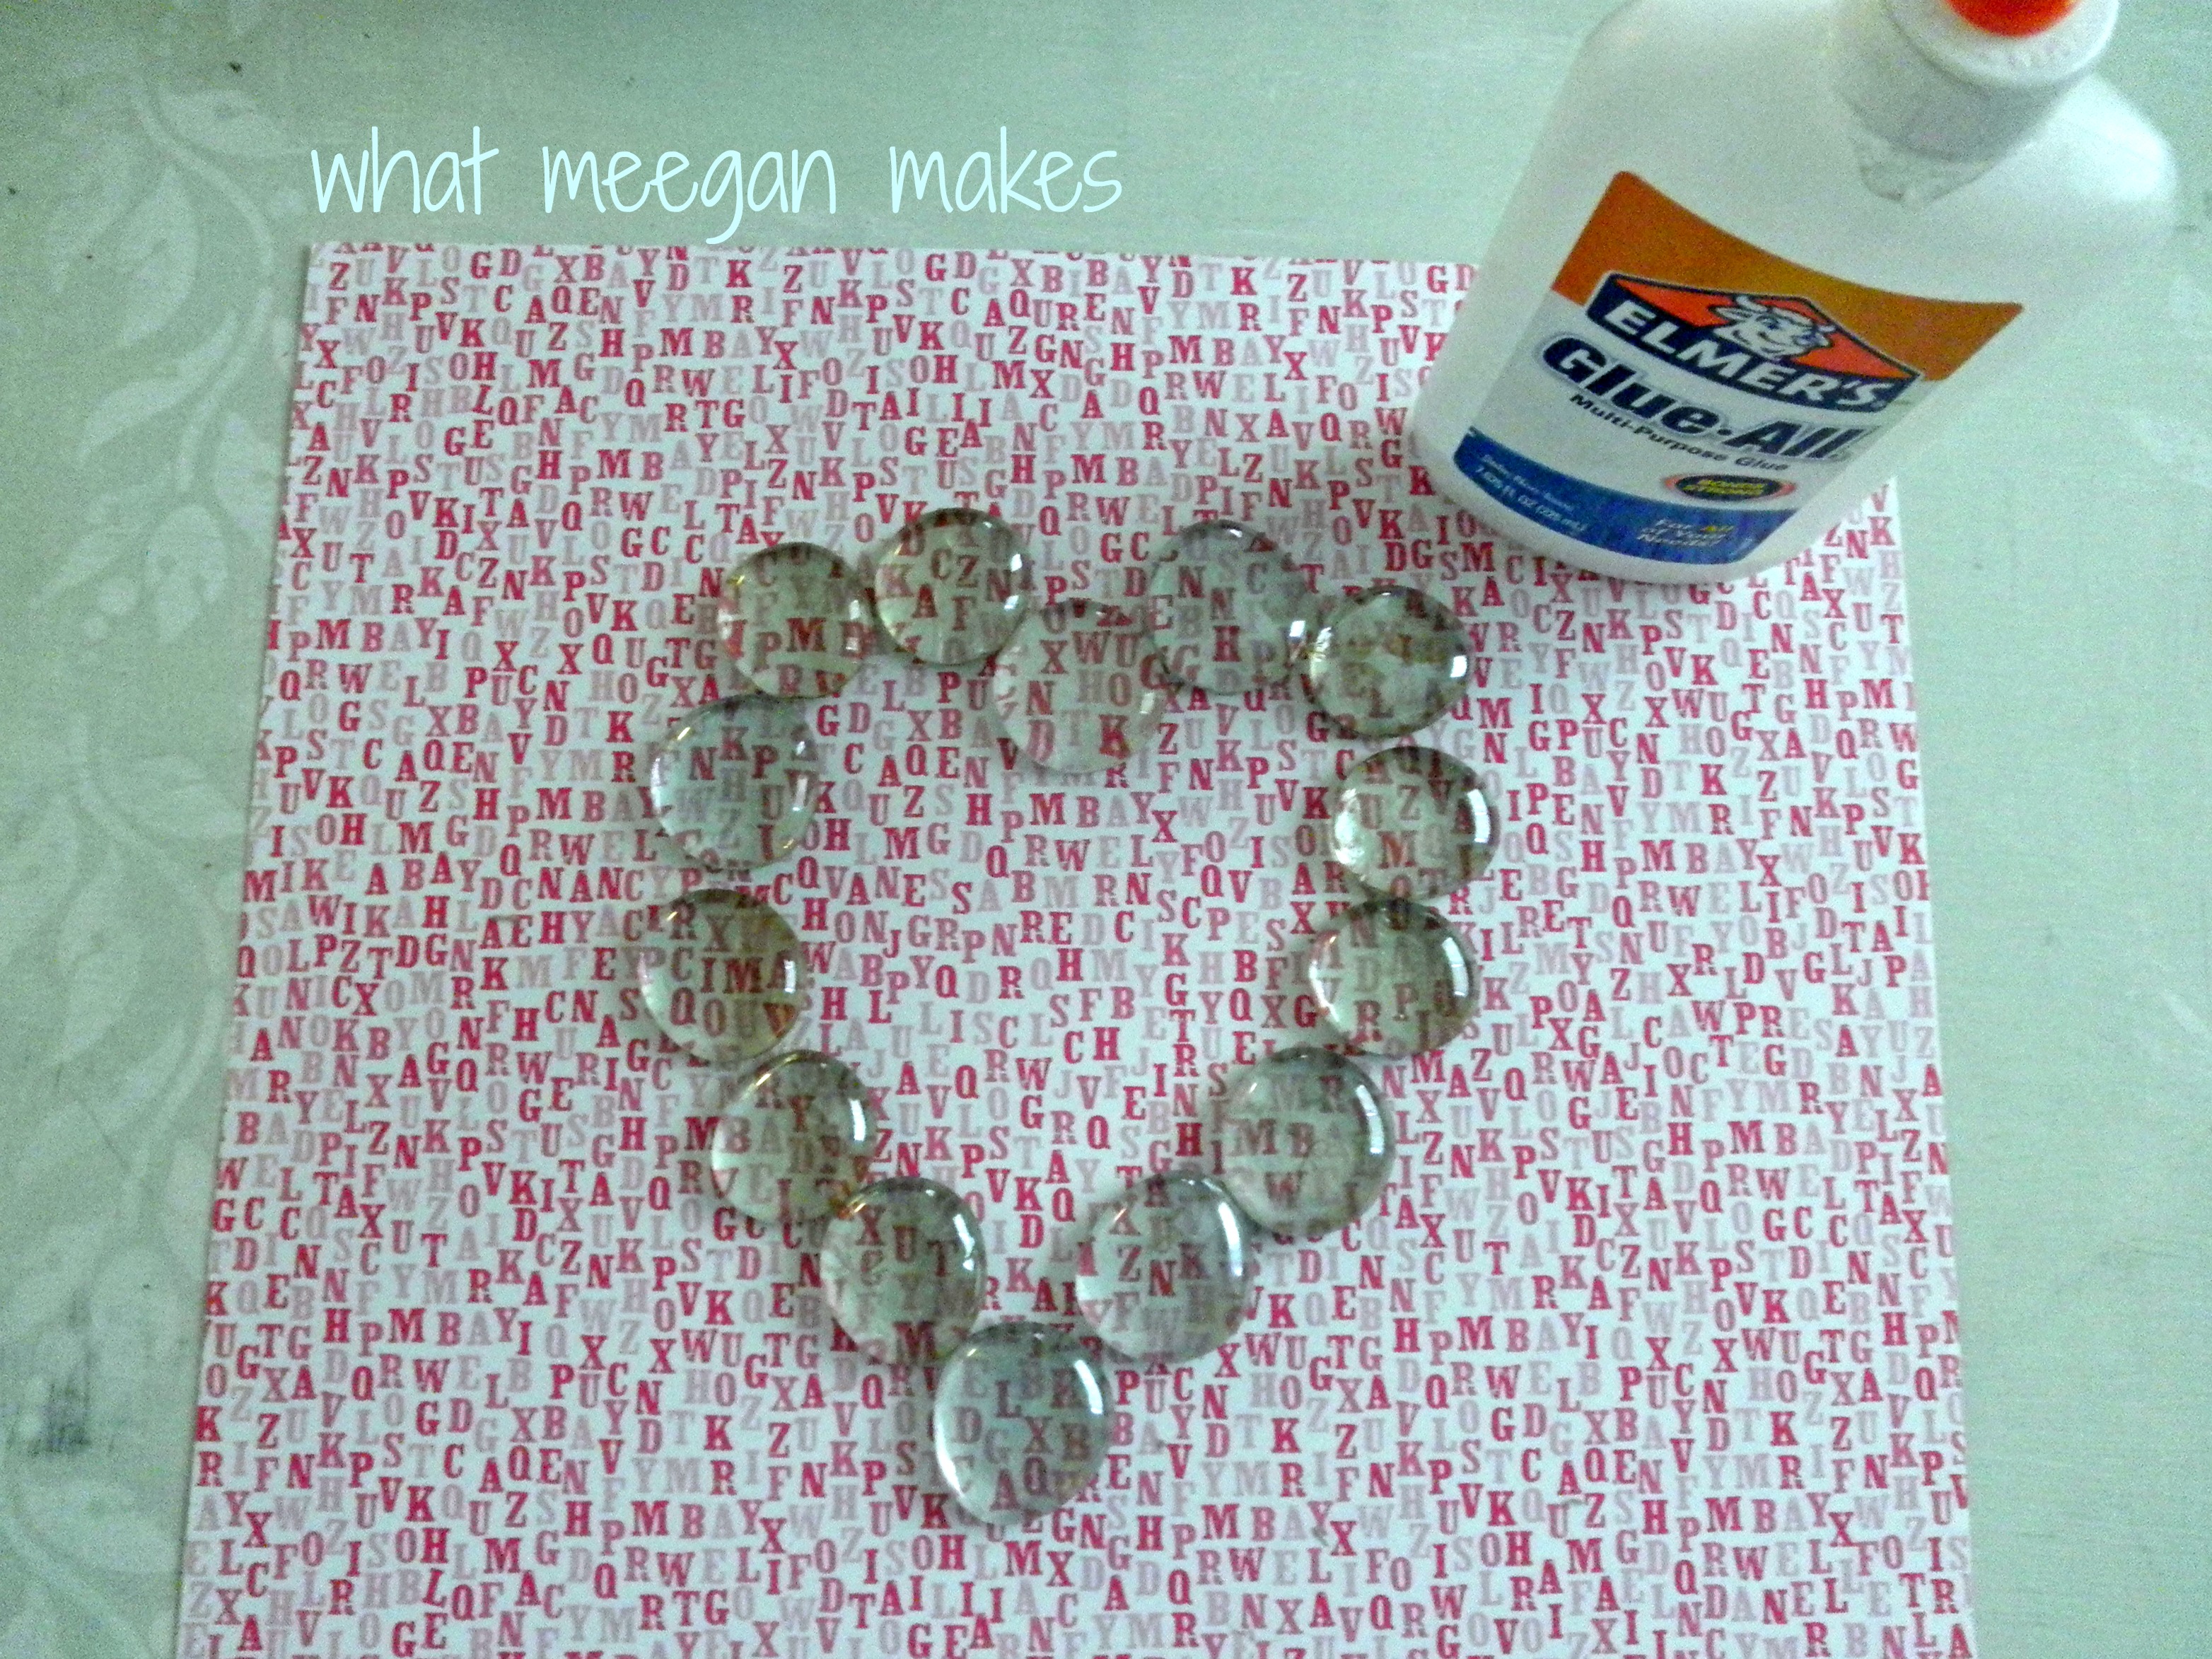
Make a Valentine Marble Art piece.  The marbles are a $1 a bag at Dollar Tree.  You probably already have scrapbook paper and glue.  Frame it using a frame you already own.  So, there ya go. Cost $1

Valentine Projects for $3 and under
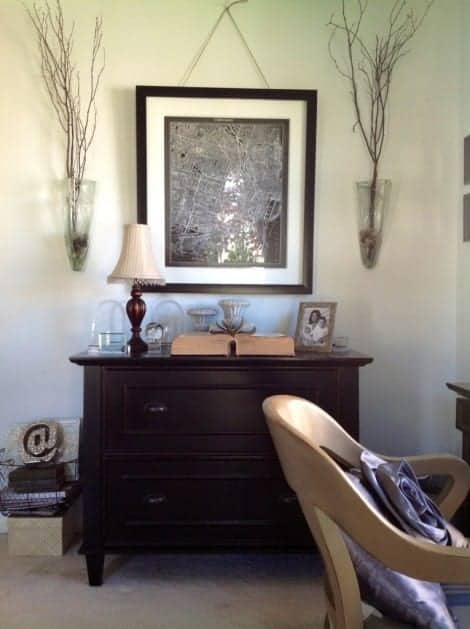
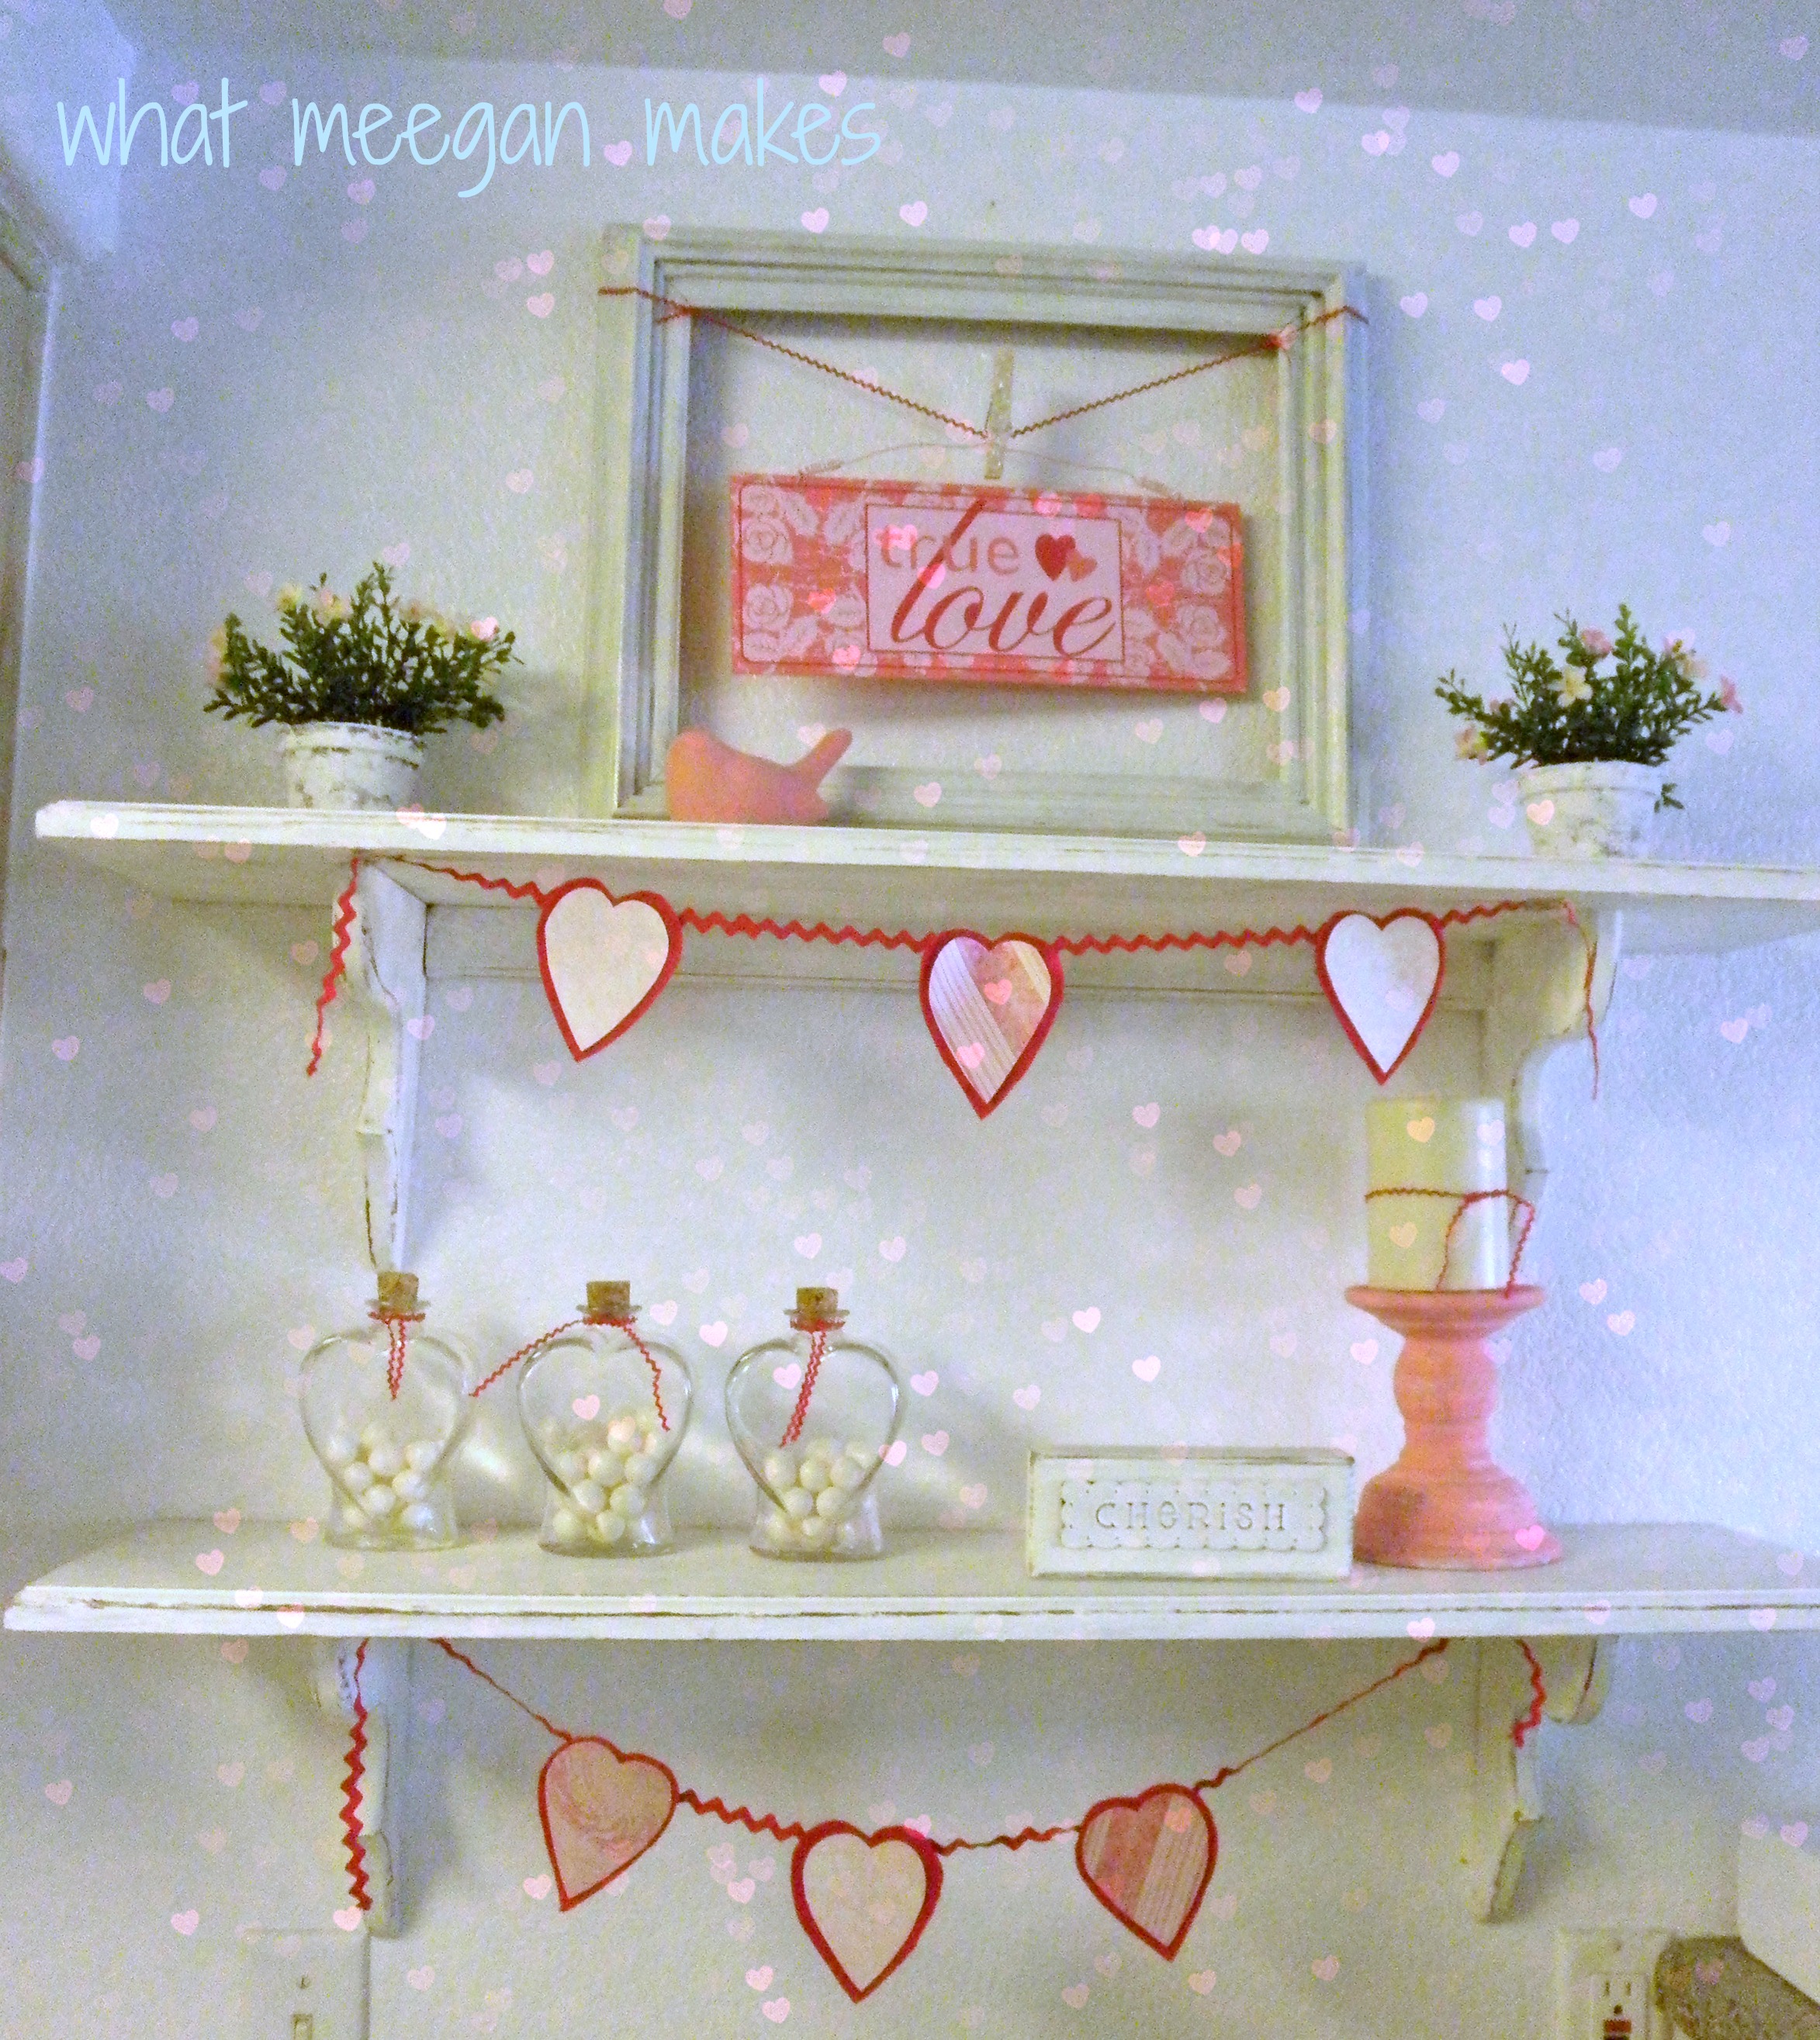
Decorate your shelves or mantel with Valentine decor you already have.  Make a Valentine banner with ric rac and cardstock.  Super easy!!  Cost $.00

Valentine Projects for $3 and under

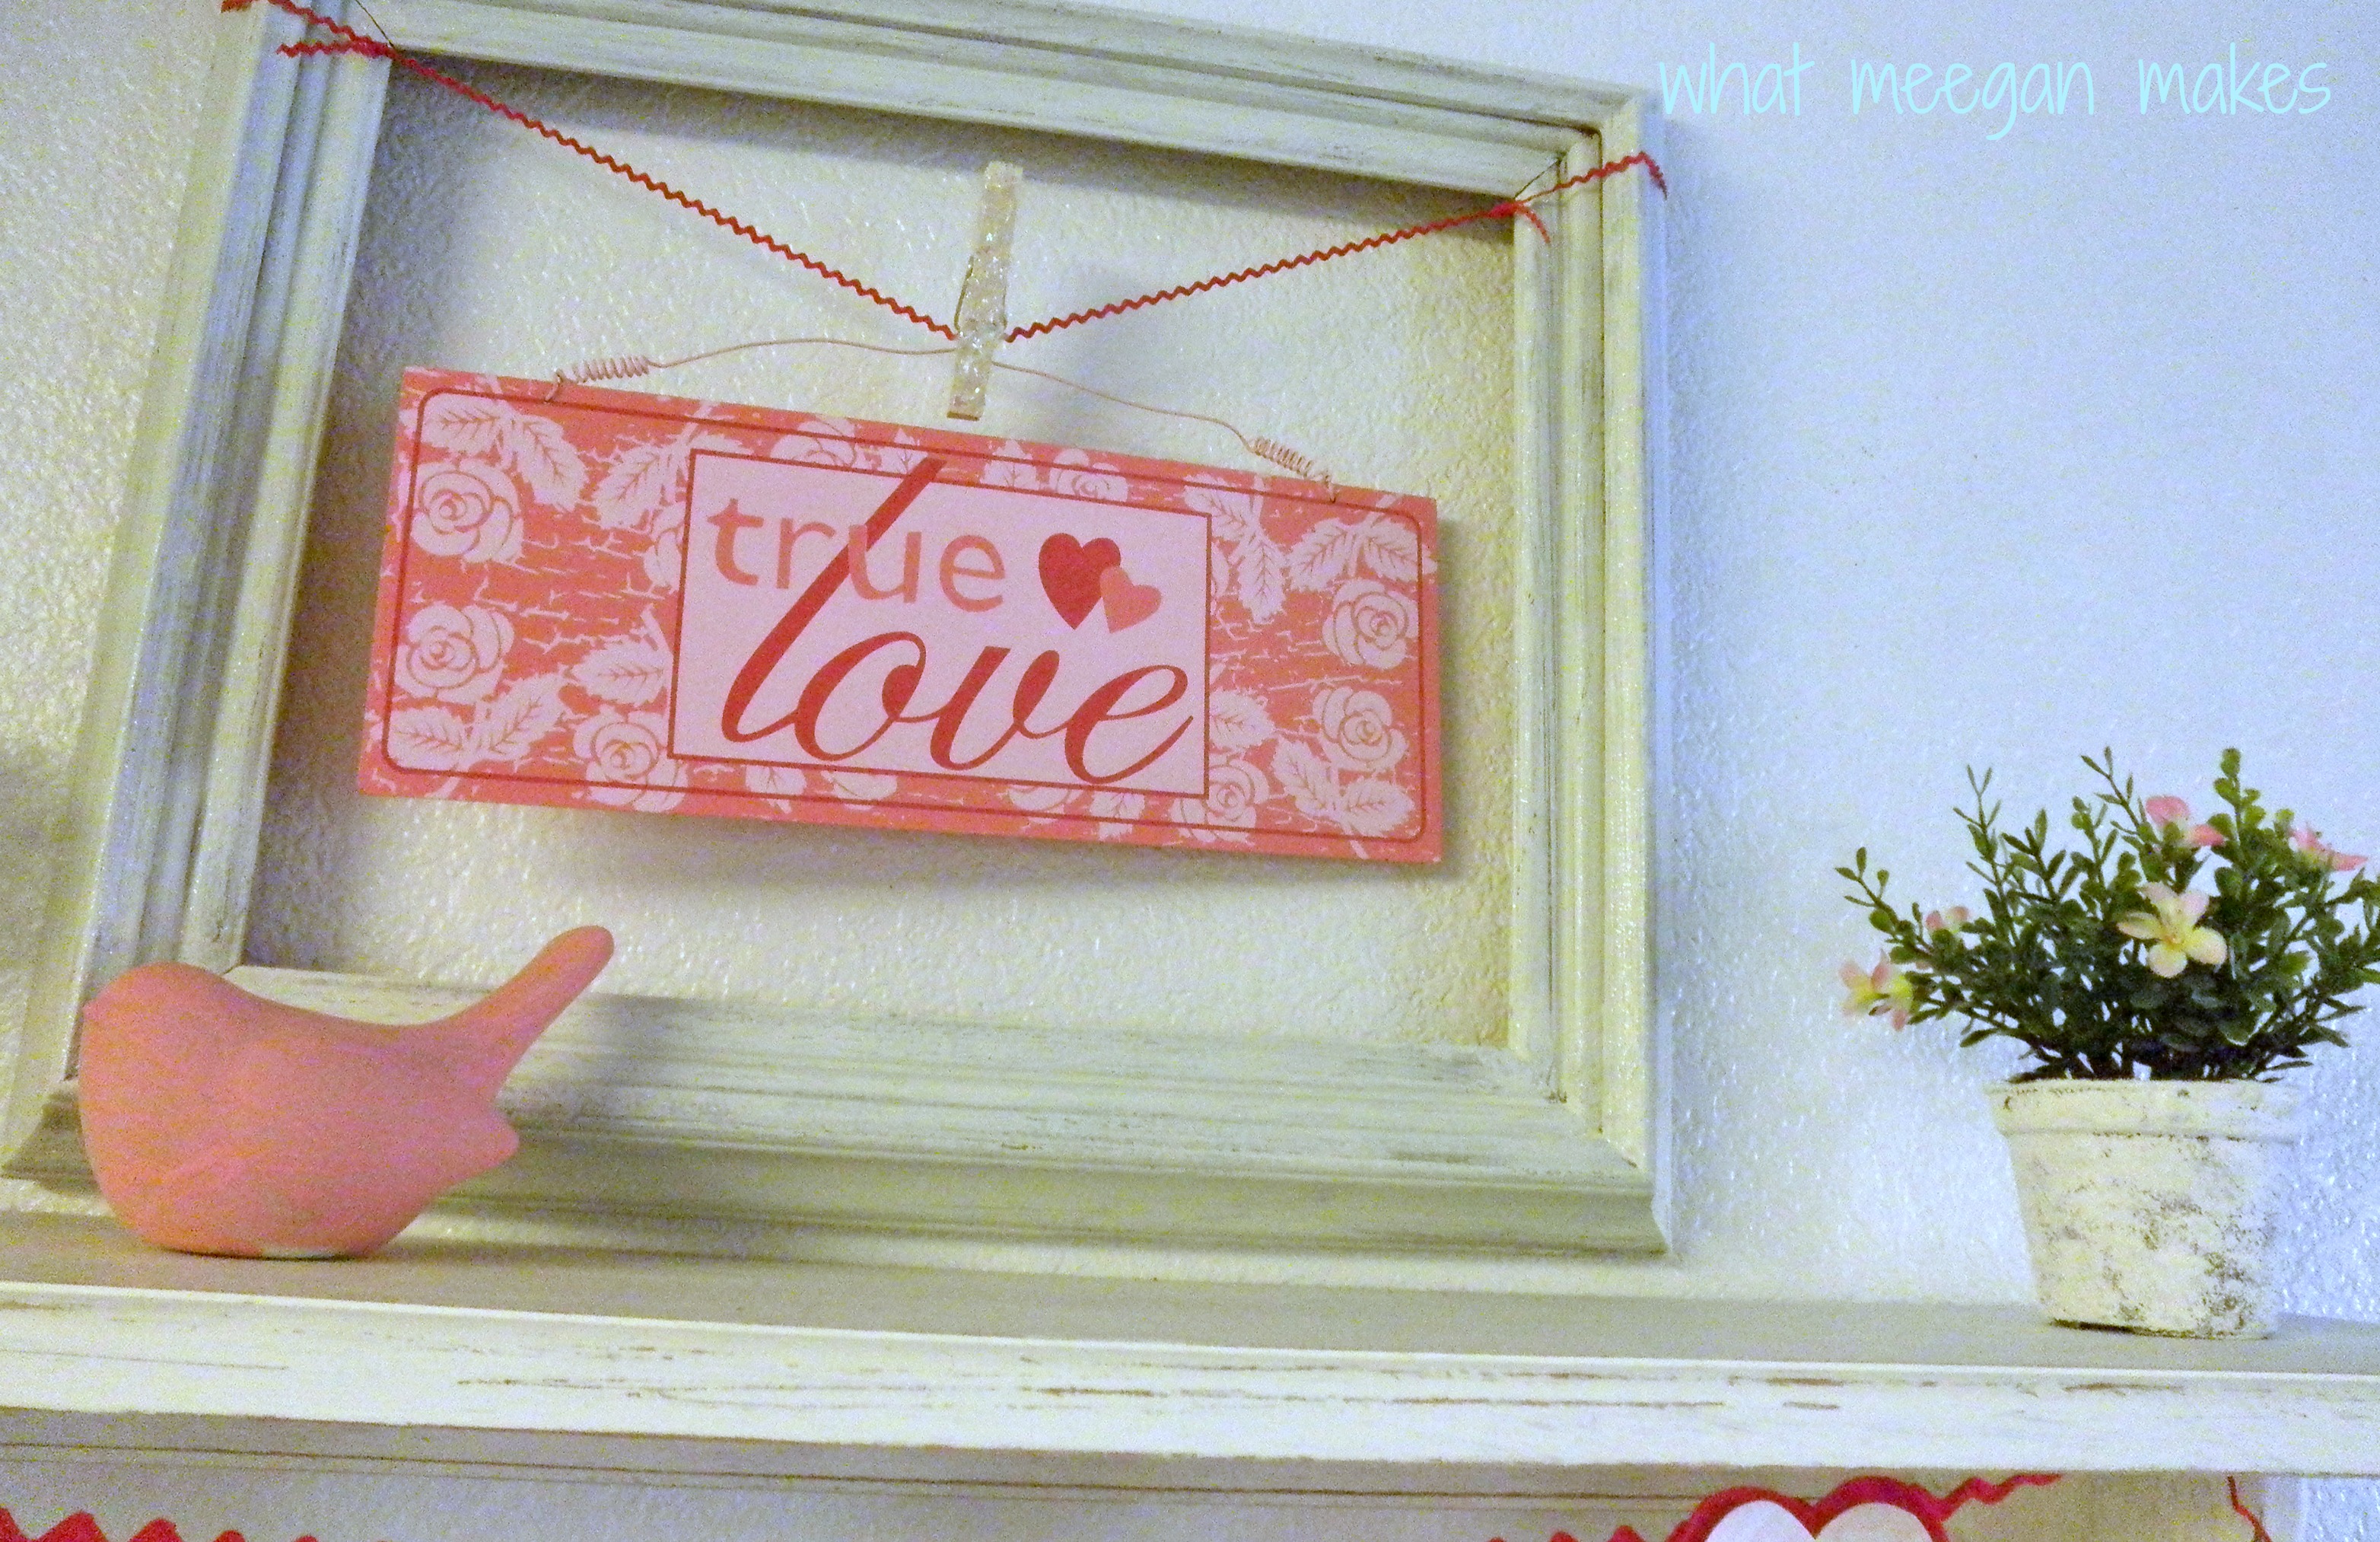
Use a frame you already have or buy one at a thrift store.  Paint it, add twine, ribbon, or ric rac.  Using a clothes pin, clip a Valentine sign to your frame!!  My cost $1.75.  The sign was a $1 and the frame was 75 cents.

Valentine Projects for $3 and under
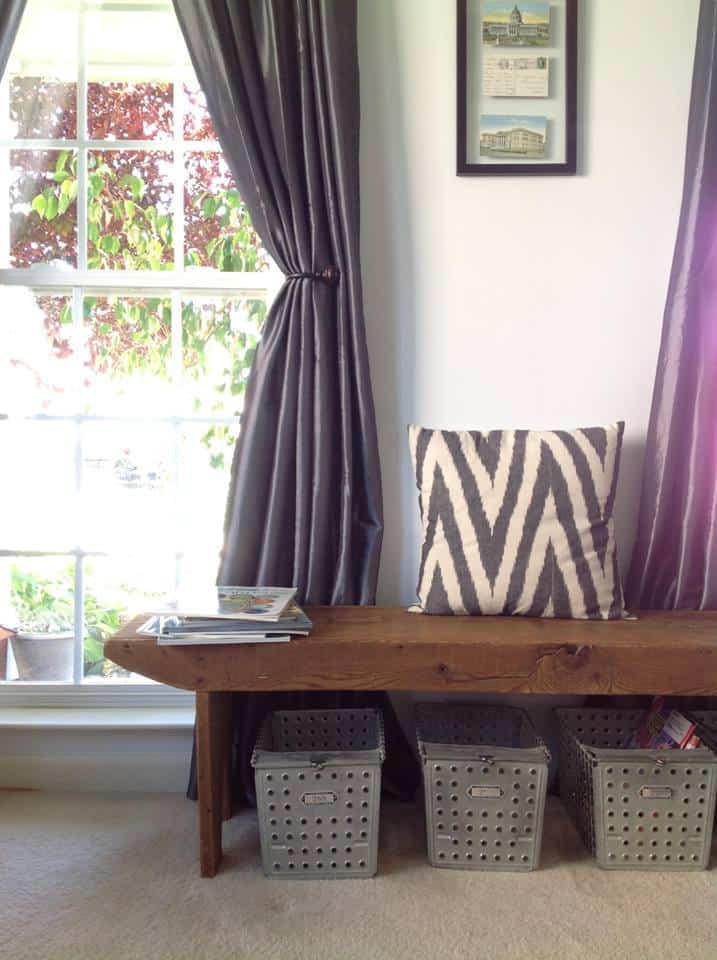
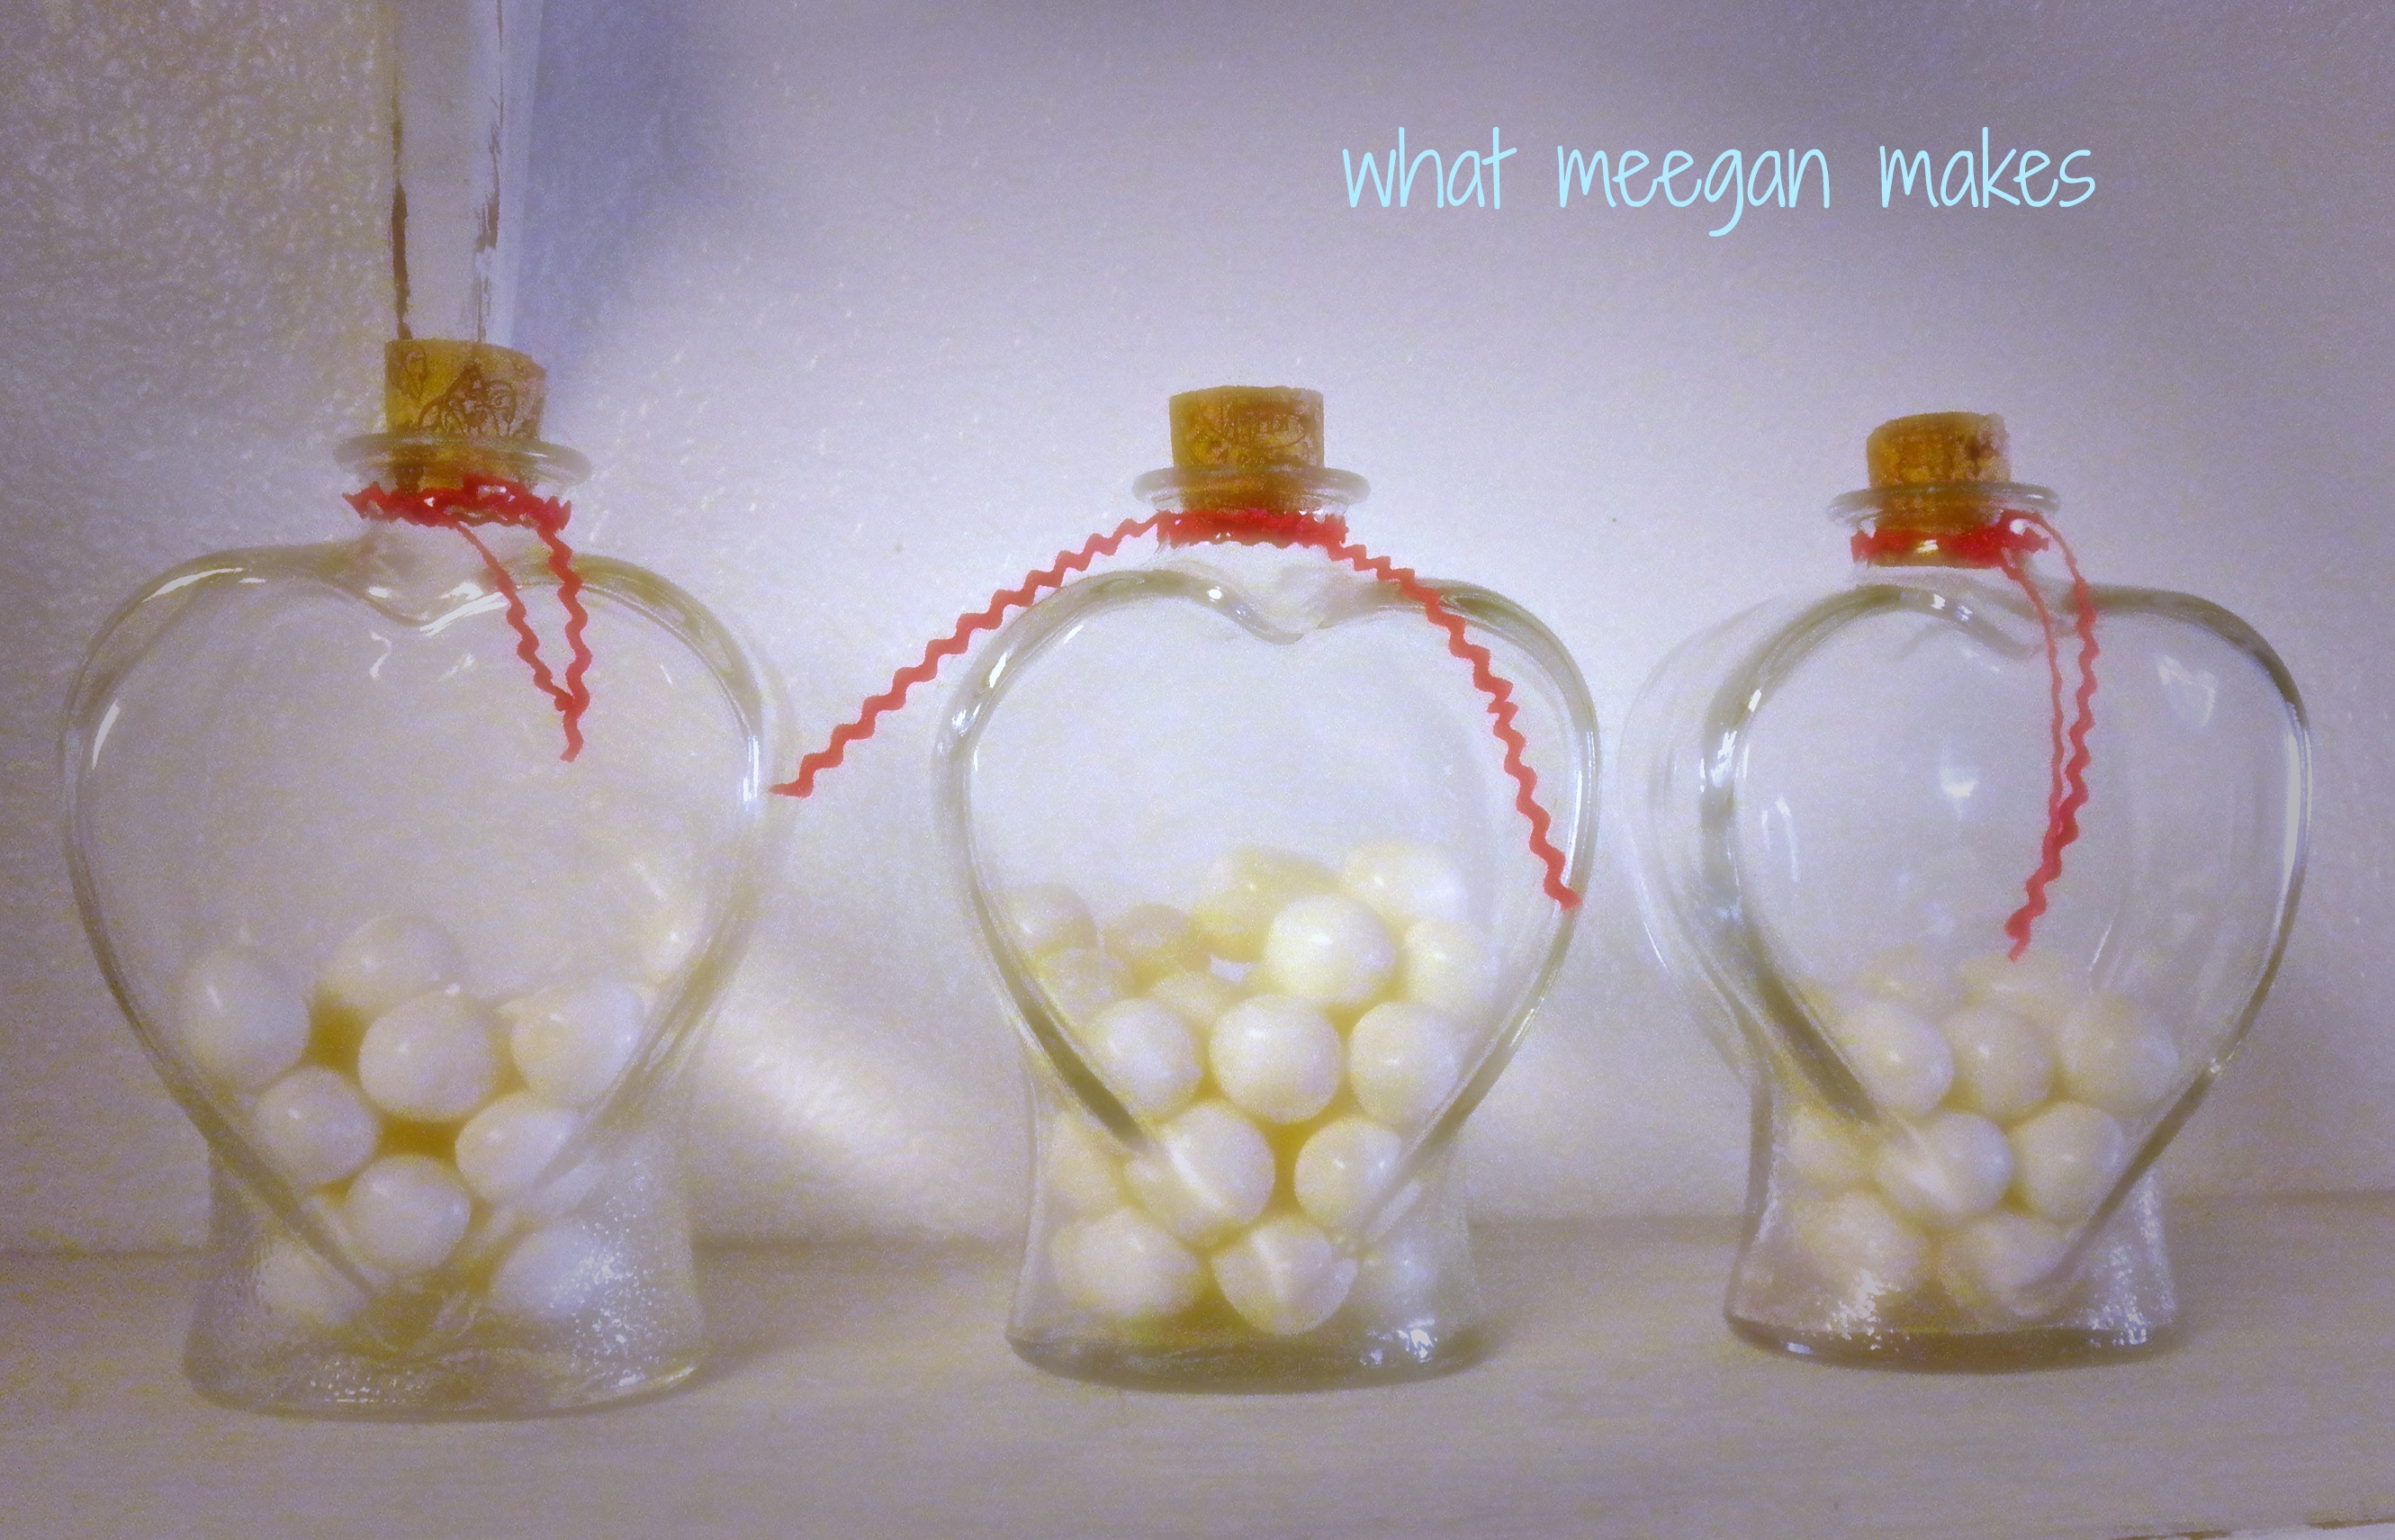
Fill some jars with candy to match your Valentine Decor.  They don’t have to be heart jars. Tie ribbon, twine, or ric rac for an added touch.  Cost $2 for candy.  I had the jars already.

Valentine Projects $3 and under
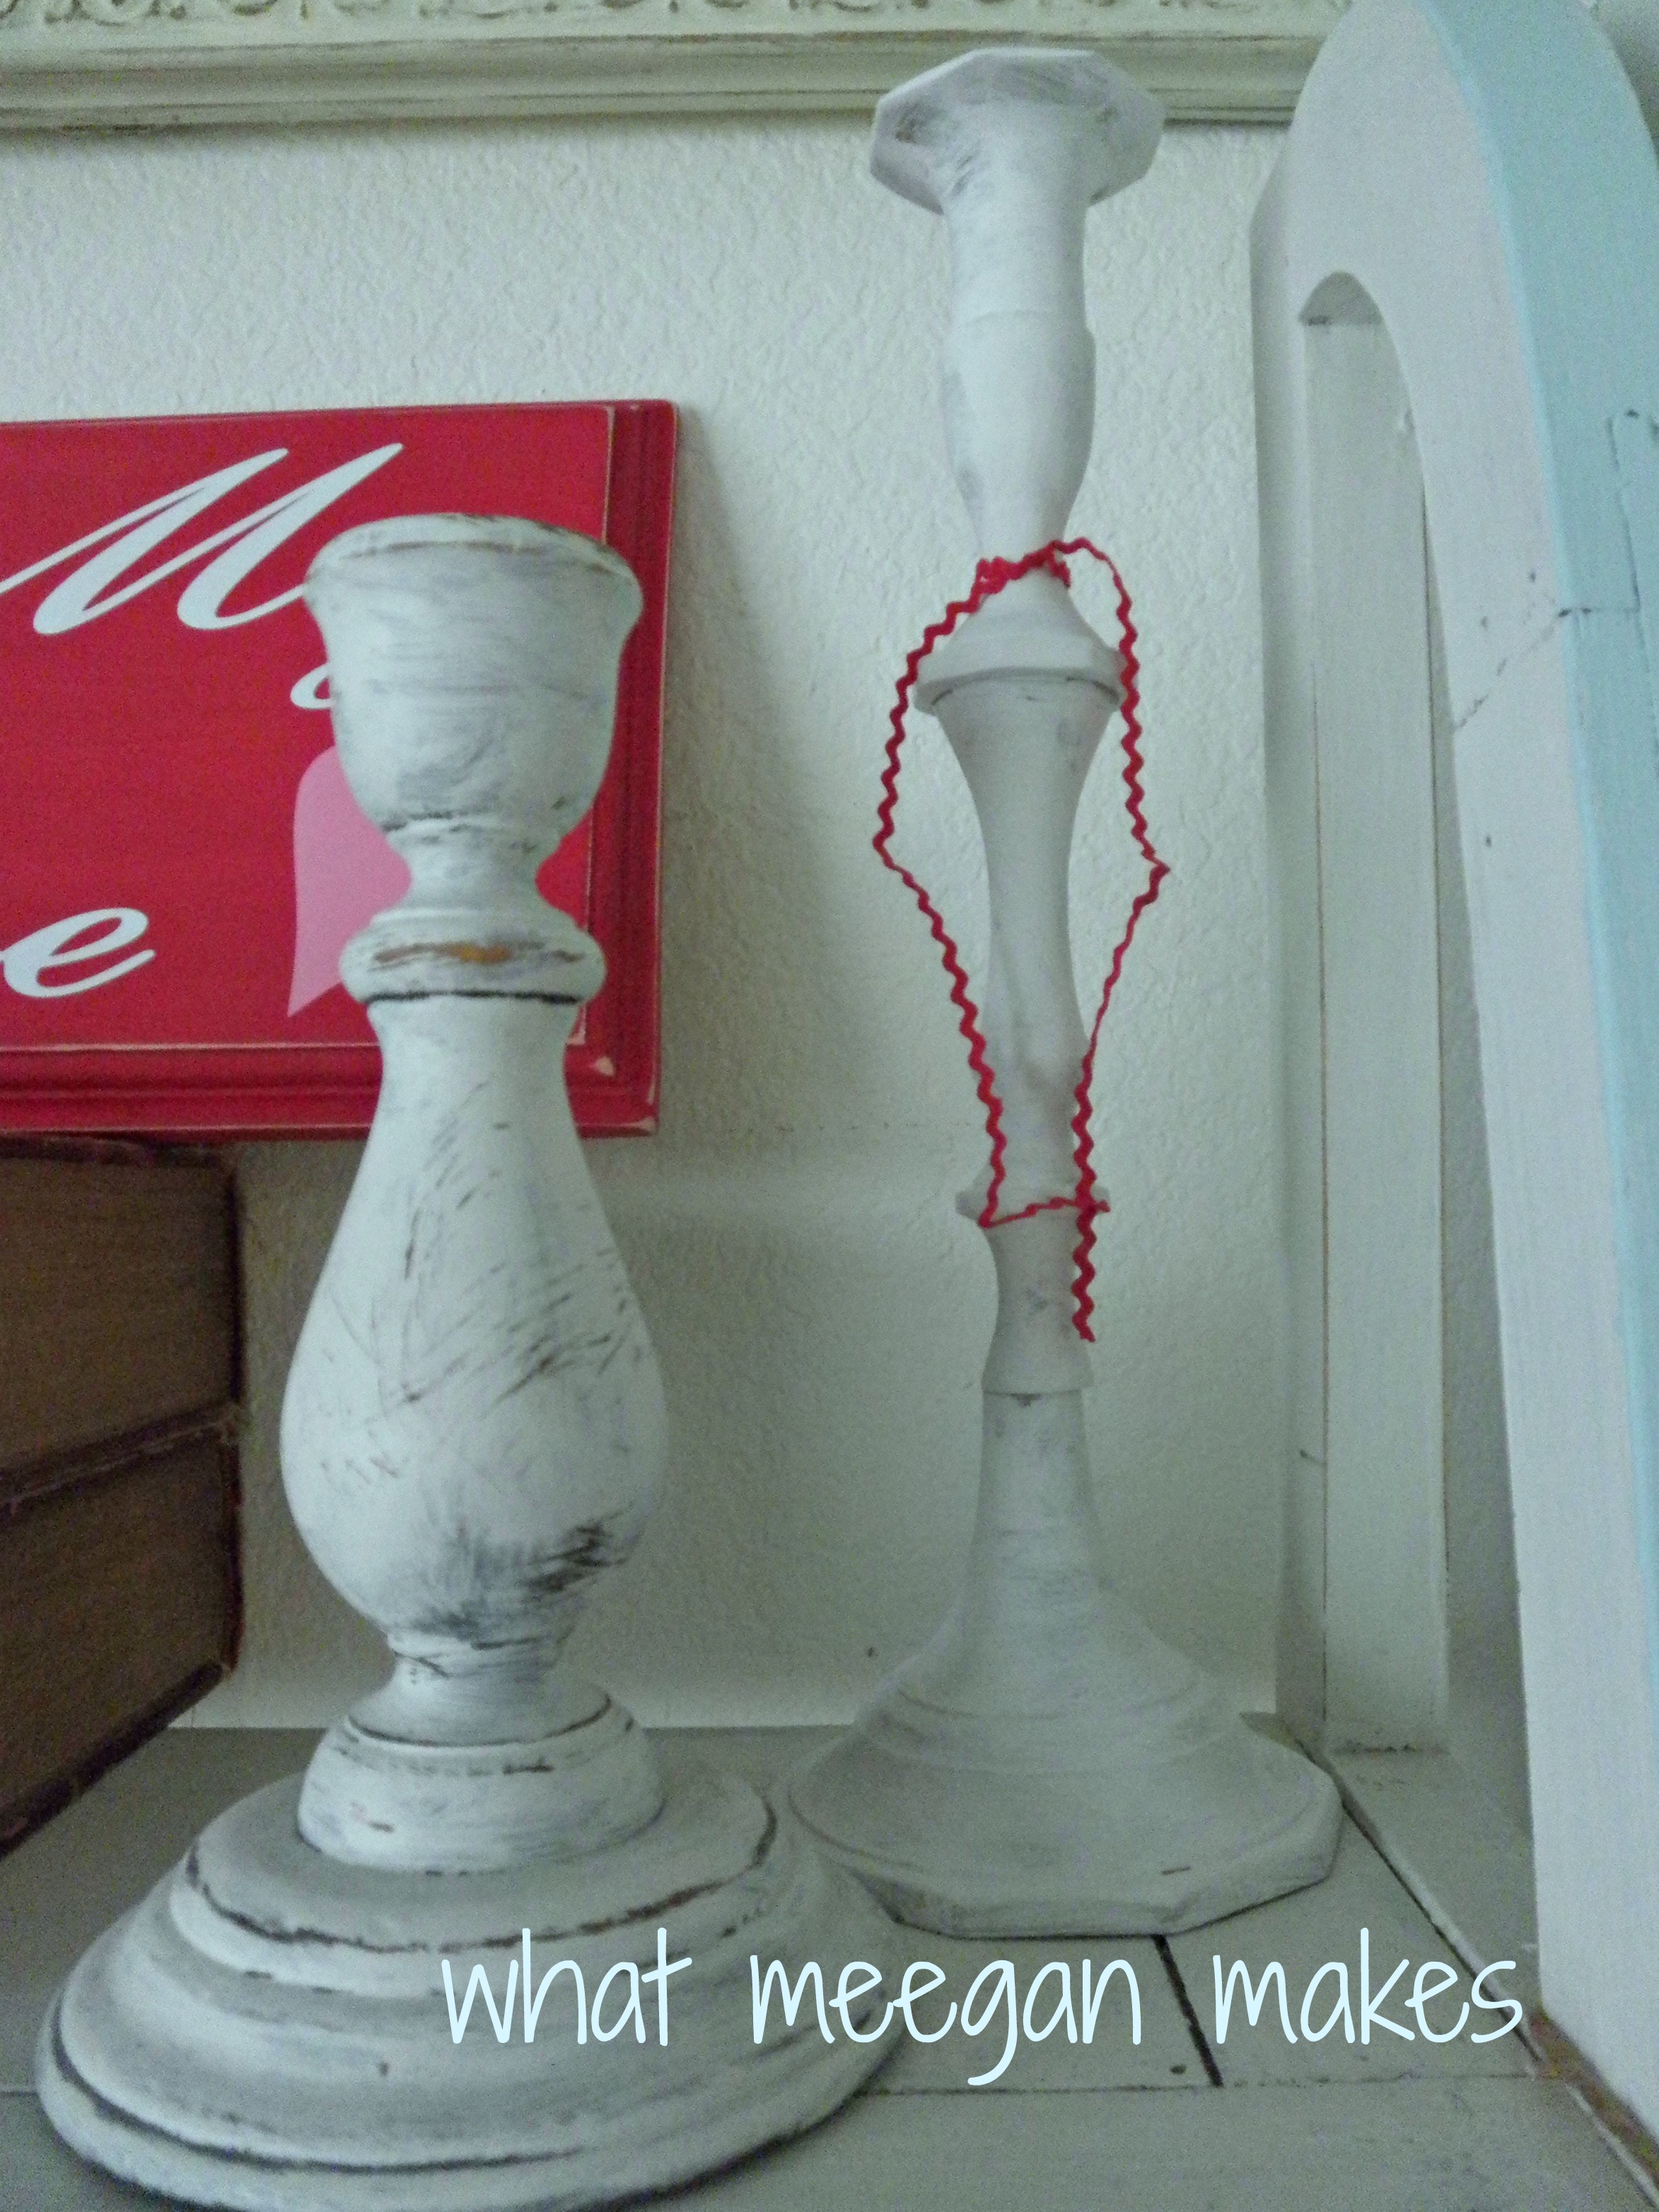
Buy some candlesticks, paint them your colors and tie them with some ric rac.  Cost $2.50.  I bought the candle sticks at the thriftstore.  I had the ric rac.  Easy Peasy!!

Valentine Projects for $3 and underDecorate some clothes pin with glue and glitter.  Super easy.  Cost $2.00 for glitter.

Valentine Projects for $3 and under

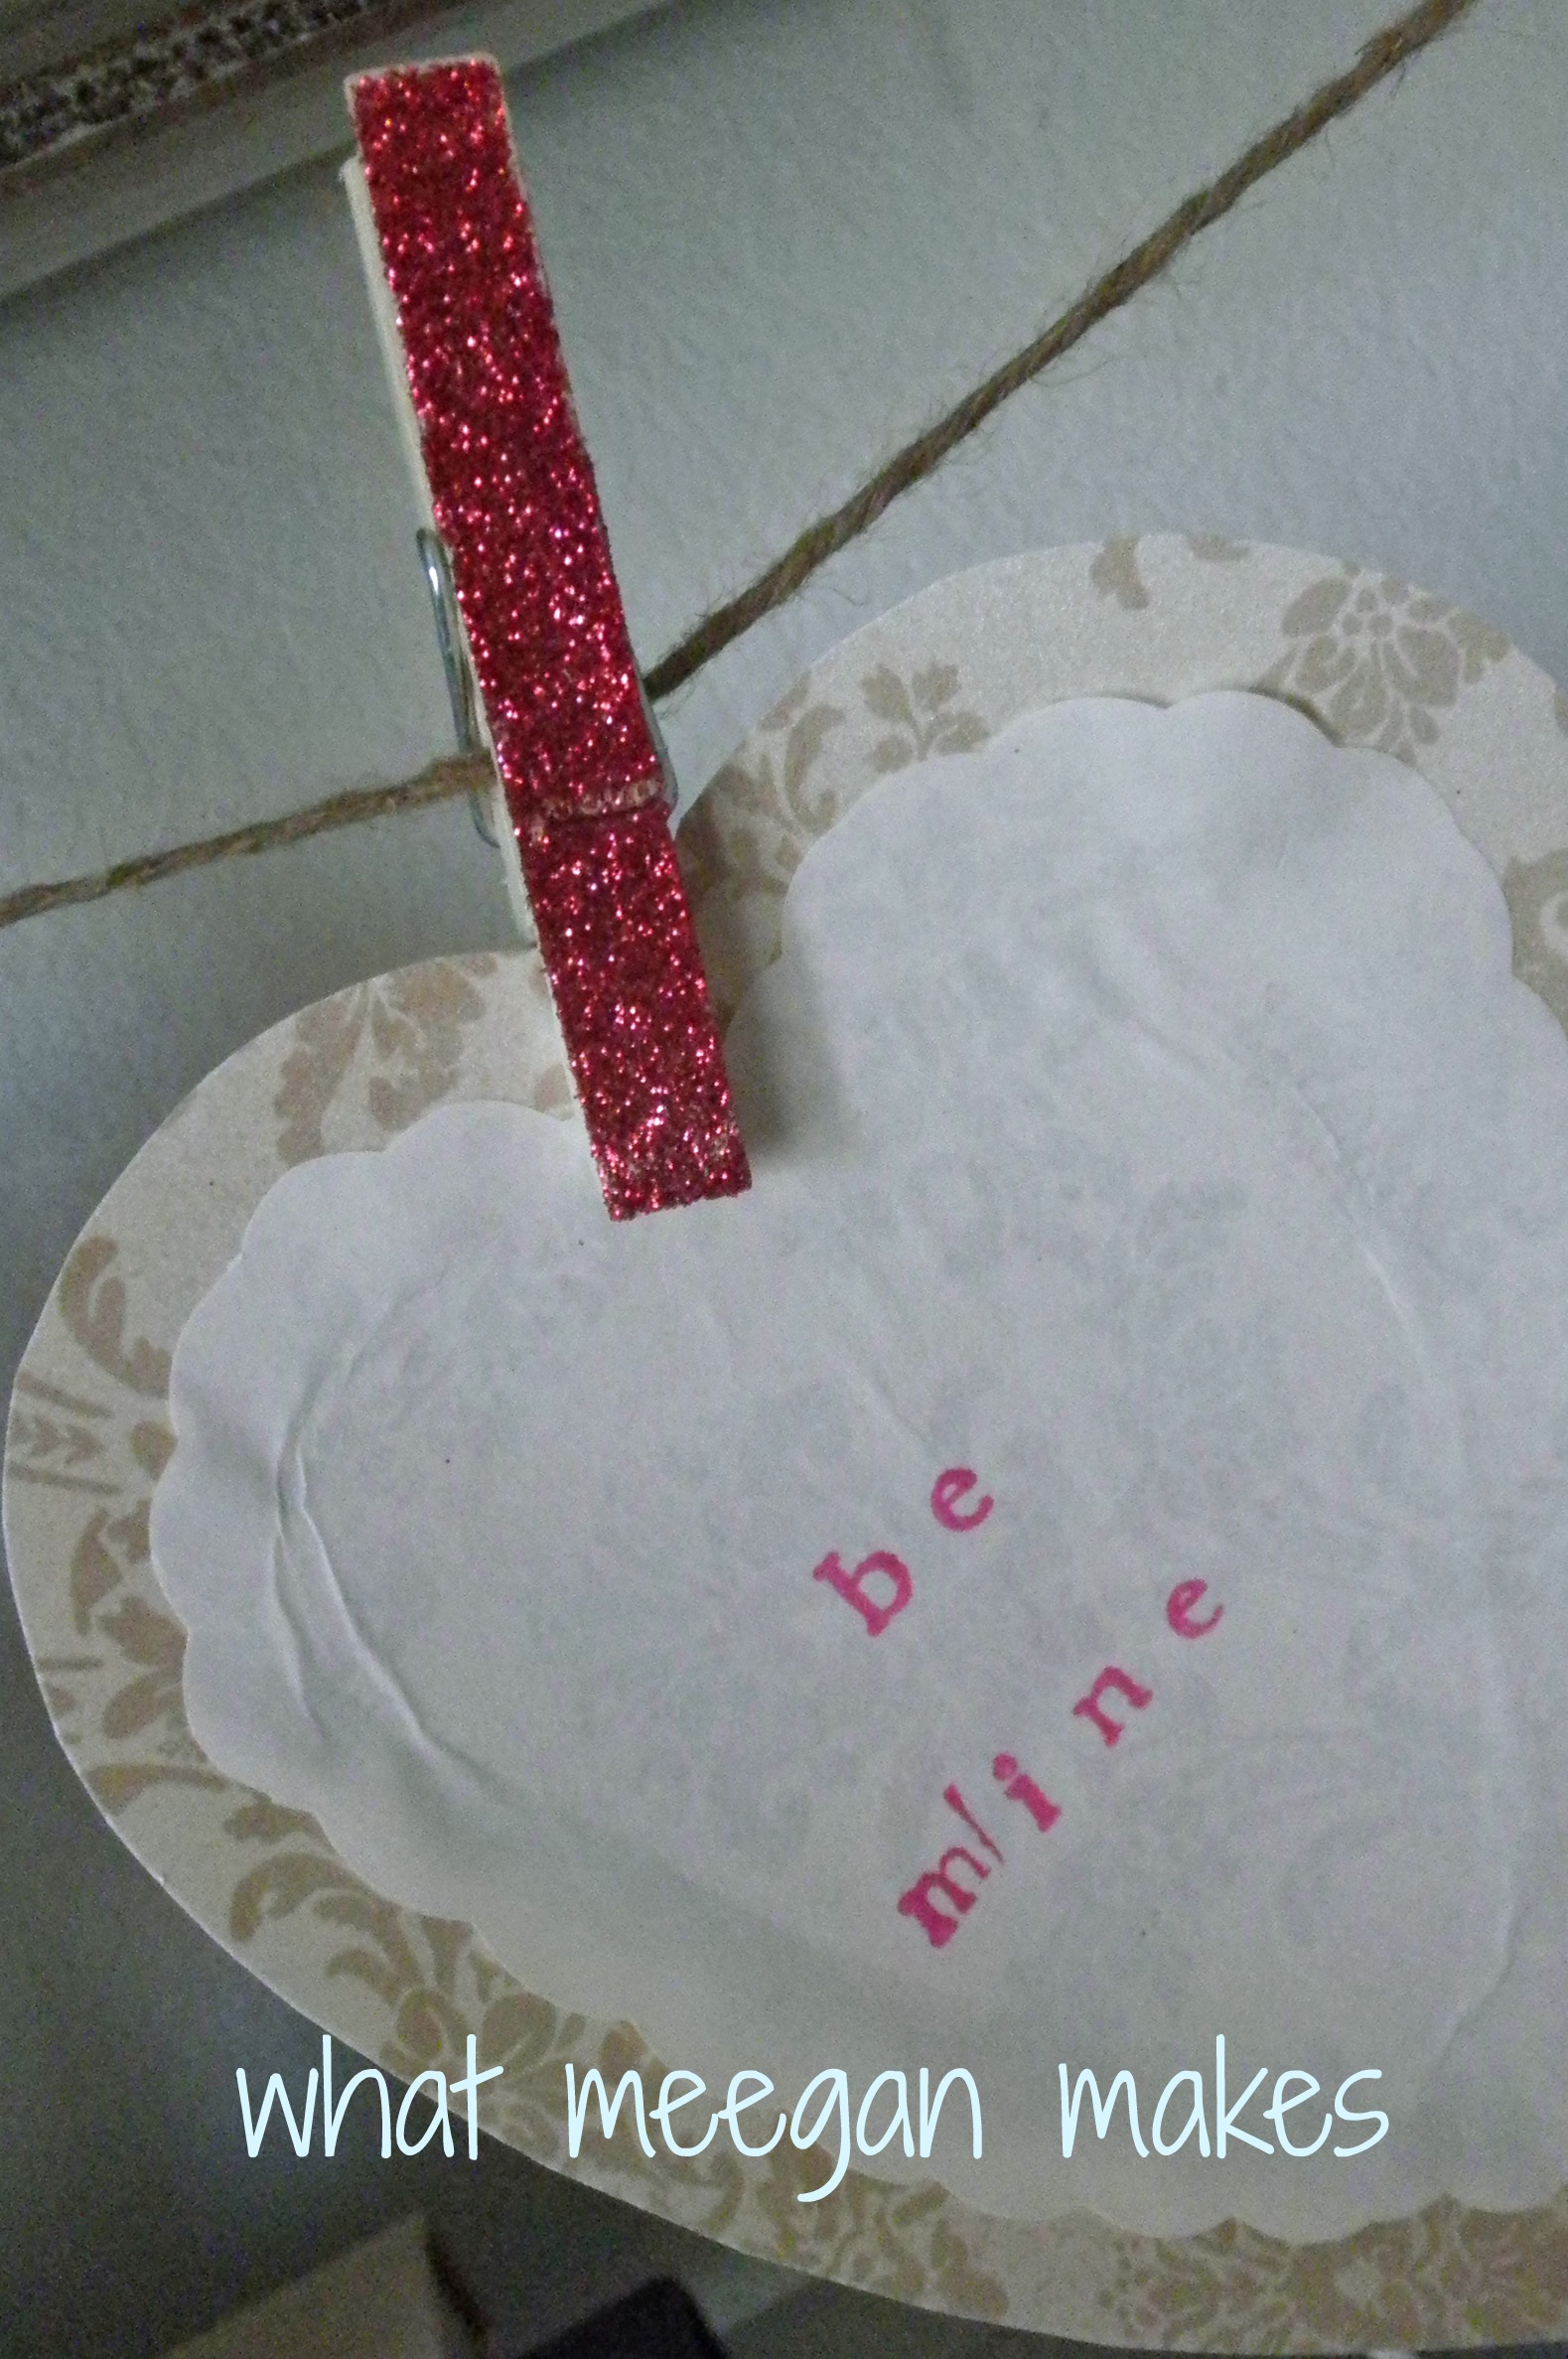
Cut out hearts from scrapbook paper.  They don’t have to be pink or red.  What ever you like.  Glue a white heart to your Valentine.  Using stamps write your message.  Cost $2.  $1 for stamps at Michaels Crafts.  $1 for scalloped scissors at Target Dollar Section.  Easy!!!

Valentine rojects for $3 and underMake a crepe paper rosette heart.  Backing is a cardboard piece from a cereal box, and the crepe paper was leftover from a party.  The ribbon was a remnent.  Cost $0.00

Valentine Projects for $3 and under
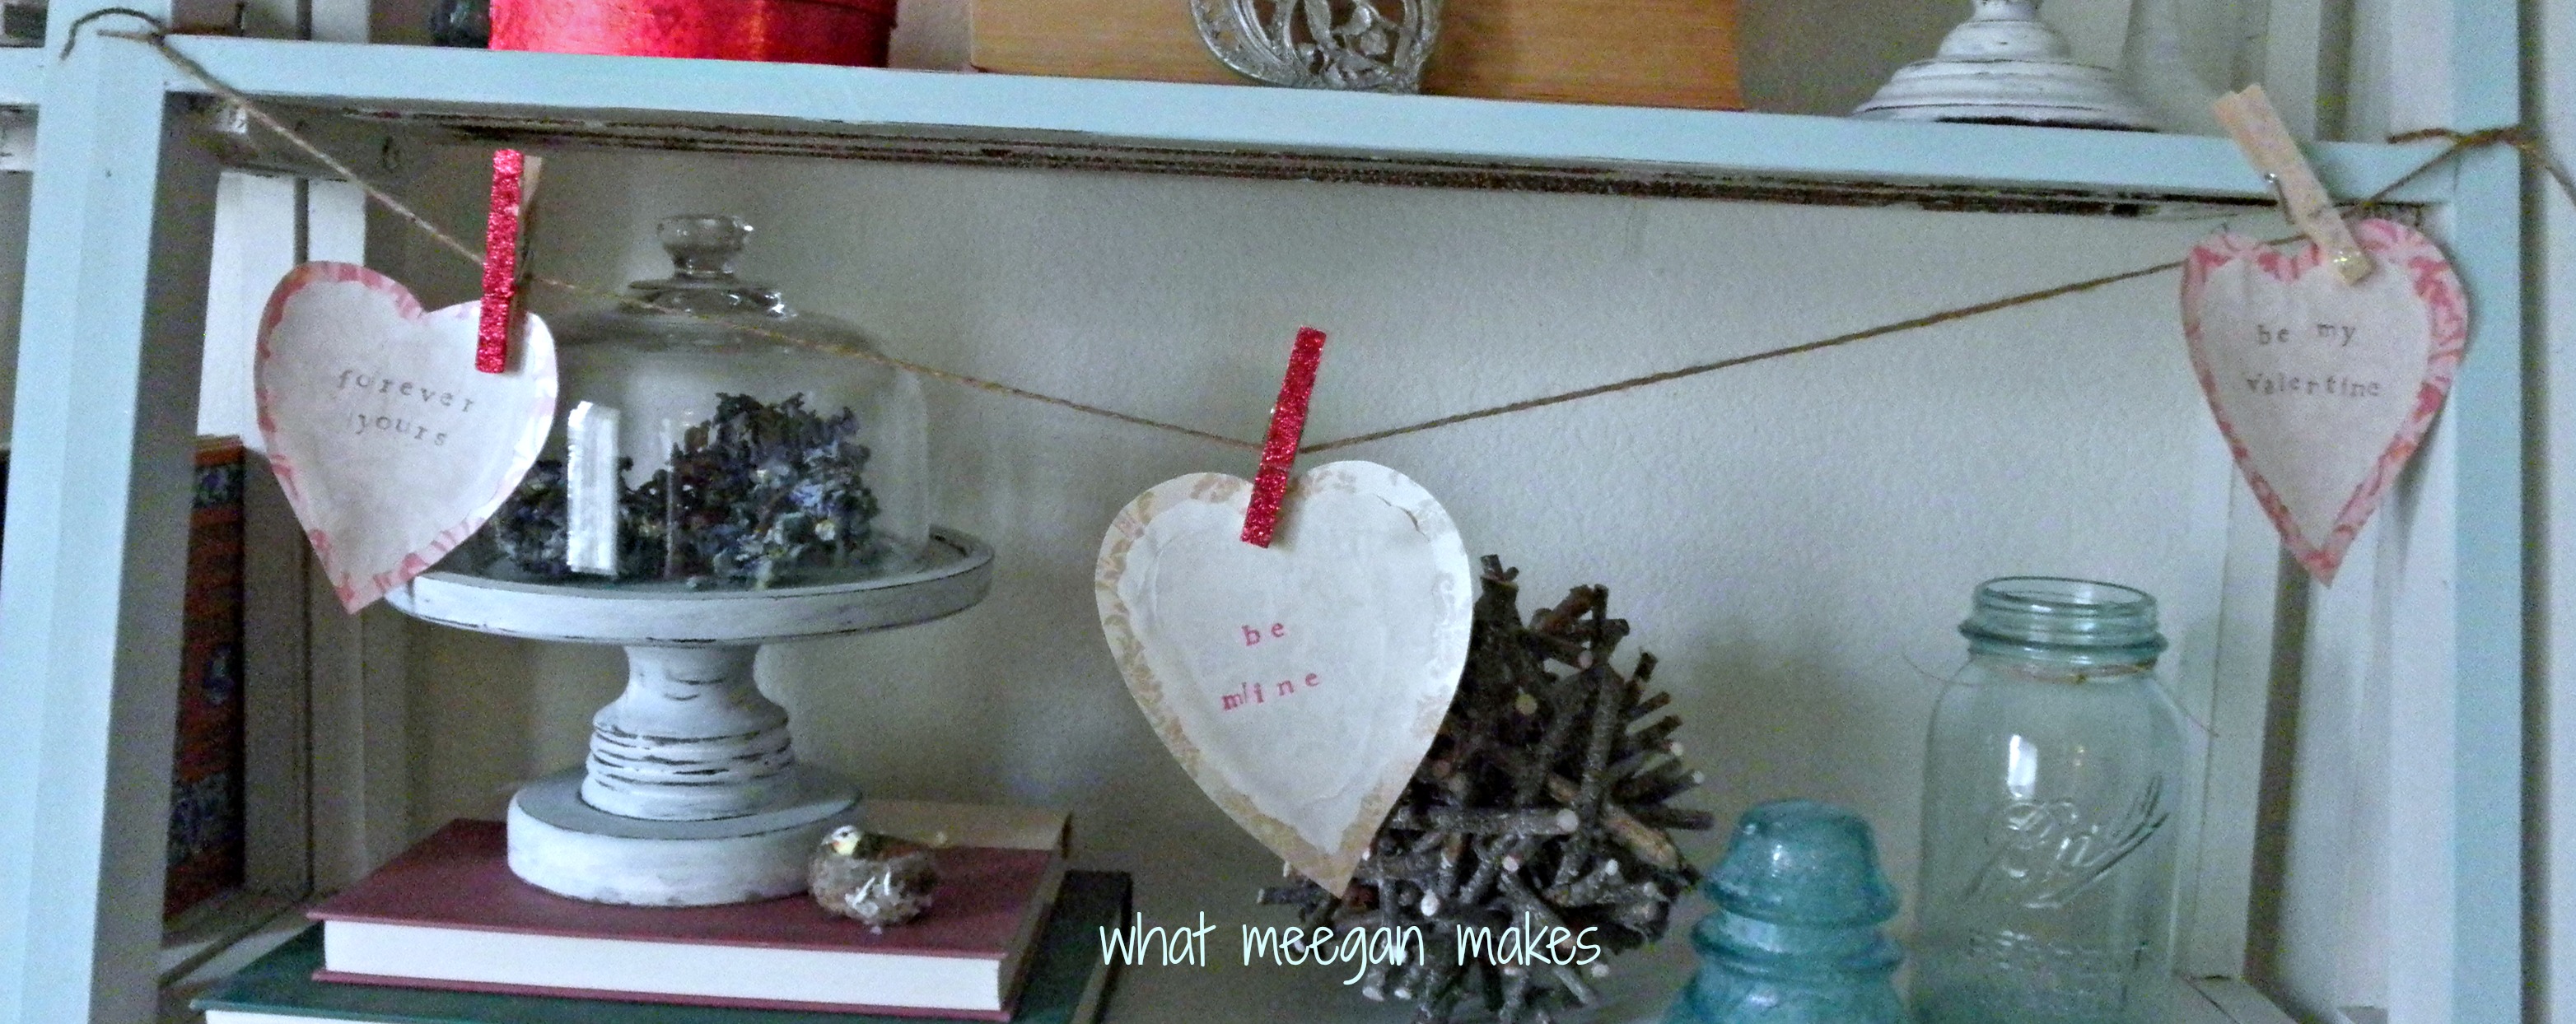
Using twine and your glittered clothes pins, make a banner to hang your homemade Valentines.  Cost $3.  $2 glitter. $1 scalloped scissors.

Valentine Projects for $3 and under

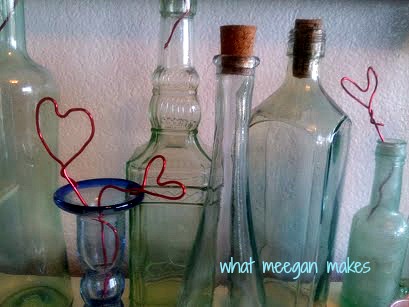
Using floral wire shape into Valentine hearts.   Use any color and as many as you want. Cost $1 at Dollar Tree.

There ya go!!  My ideas for Valentine’s projects $3 and under!!  I hope you have found some inspiration and ideas from visiting!!

Giveaway next week!!  I can hardly wait!!

Let’s keep connected:

Pinterest Facebook Hometalk Google + Stumble Upon Bloglovin’ twitter

And now I am on Instagram!!  woo woo!!

Make it a super day!!

Valentines Projects for $3 and under

 Linked with: Its Overflowing I Should Be Mopping Cowgirl Up Brassy Apple Coastal Charm Kammy’s Korner Elizabeth & Co Alderberry Hill Shaken Together Home Stories A2Z 504 Main Lil Luna Savvy Southern Style From My Front Porch All Stars Block PartyLiveLaughRowe House of Hepworths Freckled Laundry Whipperberry DIY Showoff Happy Hour Projects Ginger Snap Crafts No Minimalist Here White Lights On Wednesday 52 Mantels {Primp} Made In A Day Craftionary At The Picket Fence French Country Cottage The Dedicated House Creations By Kara Redoux Debbie Doos The DIY Dreamer My Uncommon Slice of Suburbia The 36th Avenue Funky Junk

Field Trip Friday with Jeanette from Snazzy Little Things

September 5, 2014 By Meegan 3 Comments

It’s once again my favorite day of the week.  Not, because it’s Friday, BUT because it is Field Trip Friday with Jeanette from Snazzy Little Things.  Jeanette has become one of my favorite DIY bloggers over the past year.  She is talented, has great taste, and keeps within her budget.  Her blog reflects her lifestyle and her talents.  You are going to LOVE my friend, Jeanette…

I’m Jeanette, and I’m a Mom, recently married, and the DIY blogger behind Snazzy Little Things. I’ve been documenting my DIY adventures as I add vintage character and architectural interest to my newer, builders-grade home. I enjoy expensive-looking DIY while maintaining an extremely conservative budget. My adventures are also documented on Facebook daily.

Today I’ll share my tips on how I “pulled it all together” over the years.

******

First, let me tell you the backstory…

Back in 2005, I took a gigantic leap of faith and built my very first home. This decision placed me smack-dab in the middle of a terrific neighborhood with excellent schools for my kids. But as you can see from the pictures below, I lived in a builders-grade, all-white “gymnasium” for several years. When I would call my kids’ names, you could hear my voice echoing throughout the house. :)

Draft for Guest Posts — Snazzy Little Things (1)

During the construction phase, I opted for square footage upgrades including a sunroom addition, bumping out the family room by 4 feet, and opening the basement crawlspace for a full instead of a partial basement. I avoided fancy, overpriced upgrades and architectural details (such as wainscoting or upgrading my kitchen cabinets) — even though I desperately wanted them. The final result was a home with 3000 square feet, which is great for resale — yet it was extremely overwhelming to decorate (especially as a single Mom on an extreme budget, which I was at the time). Paying for this new home + daycare for two kids…it was, quite frankly one of the hardest things I’ve ever done.

So…where did I start?

“First Impressions…FIRST”

The first few years I was here, I would often ask myself “what do visitors see when they walk in my front door?” So I focused on those spaces first and tackled DIY as my time and budget would allow. Small, inexpensive touches can go a long way, too, such as adding potted flowers to the front porch. Painting the front door. Installing a new floor in the entrance foyer. Later I added DIY wainscot, which made a major impact in the overall aesthetic.

My newly painted black front door. (Meet my dog, Buddy, in the window). Read about how to achieve a high-gloss finish on your front door, tips and tricks here.

gloss-black-door-diy

Over time, I saved for other exterior upgrades. Read more here.

stamped-concrete-before-after

Eventually, I decided to add the architectural detail that I LOVE the most — wainscoting! Here is my foyer upon entering.

Wainscoting by Snazzy Little Things

Above: See how you can upgrade your own space with a DIY wainscot project, inspired by my old Chicago brownstone apartment.

My office is immediately to your right when you walk into my home. As far as how I tackled all 3,000 square feet? I would work in “sections” and focus on that space for several months…then I’d move into the next room, or section.

home office

You can take a full home tour here.

vintage-bench-with-industrial-locker-baskets

Above: The office houses a thrifted, old weathered bench. The locker baskets serve a practical purpose-they hold my kids’ library books. I’m in the process of mixing “junque” with my more modern purchases. You can read more about that here.

framing vintage postcards

Above: Inexpensive, personalized DIY art using vintage postcards of some of my favorite places, vintage style.

“Salvage What You Own”

As far as furniture goes, I simply made due with what I had. As my tastes evolved, I would weed out pieces that no longer fit, but I was never hasty. I would salvage my favorite pieces and repurpose them. I even tried reupholstery for the sake of saving money. Over time and as I continued living in my home, I realized how I wanted each room to flow. When I shopped for new items, I did so with a vision and would only buy one piece at a time. Sometimes, rooms would sit empty and house a simple sitting area. A plant, and chair and a lamp is all you need sometimes to make a space beautiful. I would thrift and repurpose items to personalize each space. My DIY furniture gallery showcases some of the pieces I kept over the years. I always choose pieces with “good bones” and would serve me well if I repurposed them.

“Know When To Splurge”

Where did I splurge? I invested in key upgrades. I added a deck, stamped the exterior front porch and invested in some newer, key furniture pieces. We hired someone to also install our vision for an industrial-style basement. Sometimes you just can’t DIY, you have to give yourself a break and know when you’re in over your head and save for a splurge.

“Developing Your Style”

I recently began to describe my style as French-Industrial…and while I haven’t fully achieved this look…it is certainly something I am striving for. Historically, I have been a minimalist when it comes to decorating. My preference is a no-fuss approach, with clean lines and a simpler look. Although, lately I admit to trying my hand at busier, seasonal vignettes (and having a lot of fun with it). You can see how I decorate my home for the holidays as well…I tend to go all out. Even for Halloween. Mine is the “party house” according to my friends.

I find ways to mix in elegant pieces with industrial ironwork, old chippy windows, and I love ALL tufted furniture. Interesting vintage items almost always make their way into the trunk of my car after an afternoon of thrifting. And because of the exquisite craftsmanship of French-inspired opulence, I am always drawn to anything from France. The language, the wine, the food…and of course, the furniture.

Everyone gathers in the kitchen, don’t they? Here is a little accent I added – my kitchen backsplash. Approximate cost was only $150…$200 tops if you buy new brushes and supplies.

stenciled-backsplash

I only spent $1600 on all the kitchen upgrades. I painted the cabinets, and added an inexpensive backsplash with paint and stencils. I also weighed several options before settling on upgrading my island with Ikea butcher block.

I’m now working my way into the basement remodel which was unfinished for a number of years (yet it served as an excellent roller skating rink and dodgeball arena). Can you tell I’m embracing the industrial motif? You can see more of that “splurge” and the design process here.

industrial basement decor

It’s still a work in progress…acquiring pieces take time! In the background you might have caught a glimpse of a fun DIY project, an oversized piece of art made from a shower curtain. I had to learn how to increase the size and scale of my art in my open design home.

“Showcase Your Favorite Pieces”

Once I updated a piece of furniture, I would find a way to show them off! Such as my Victorian table. This beauty had a lot of stains and water marks when I bought it, but when I applied a coat of Paris Grey Chalk Paint…I was in love.

Annie Sloan Chalk Paint DIY Table

Above: A once damaged, $25 thrifted Victorian table that I refreshed with paint. It now serves as my sofa table.

I get such a kick out of finding an old, forgotten piece of furniture that has potential to become something “cool” or beautiful. A $25 Goodwill Upcycle

Above, this Goodwill transformation is a reader favorite, but an example of that “surprise element” in home decor that I love. It was THIS piece that got my blog recognized, and caught the eye of a local shop owner. I now sell my upcycled furniture creations in her store.

My Advice for Pulling It All Together?

To take your time. Relax and enjoy the journey of decorating and developing your style. Be patient when seeking the right pieces for your home, and avoid the temptation of buying the first item that comes along that happens to fit your dimensions. If something isn’t working, remove it from the room, and try it elsewhere in your home. Always visualize an item’s potential, whether it’s an old piece of furniture or a full room ensemble. This opens your mind to all the possibilities – even thrifted items.

And when in doubt…simplify. It’s the most economical option there is when it comes to DIY and decorating!

____

My entire blog was built with extreme budgets in mind, so I hope you’ll visit for more ideas…feel free to stop by often for inspiration!

Snazzy Little Things Black Logo

Full Home Tour

Furniture Transformation Gallery

Home DIY Gallery

All Projects

Screen Shot 2014-03-29 at 8.24.38 PM

Thanks SO much for sharing your journey with us, Jeanette.  It was an honor to have you post on my blog today. Thanks to everyone going on Field Trip Friday with Jeanette from Snazzy Little Things, today.  I hope you visit her blog and all of her social media outlets.  You WILL be inspired EVERYDAY.

Make it a Field Trip Friday!

signature


DIY Spring Ideas

March 31, 2019 By Meegan 1 Comment

We are so happy that you are joining us today! This week’s features are all about DIY Spring Ideas.

After our move this week, Spring is certainly in the air. And it has me itching for subtle changes in our new home! Today the features are all about DIY Spring Ideas! You will enjoy and be inspired by each and everyone…

spring ideas pin

This week’s features were selected by Christy from Our Southern Home.

Please PIN from the original source.

Continue Reading

DIY Framed Patriotic Wreath Tutorial

June 11, 2021 By Meegan 24 Comments

I love patriotic holidays. It’s fun to fly the red, white and blue inside and outside of my cottage apartment. This simple DIY Framed Patriotic Wreath Tutorial couldn’t be easier.

Using a vintage frame surrounding a handmade wreath is an innovative way to design a unique patriotic style.

Continue Reading

« Previous Page
Next Page »

Recent Posts

  • Vintage Spring or Easter Tablescape
  • Affordable Easter Dresses
  • Best Glass Kitchen Tools
  • Short Style Dresses for Spring and Summer
  • Chicken Broccoli and Rice Recipe

Purchase Beautiful Home Accessories for any style

Thrifty Style Team 2nd Friday Monthly

International Blogger Club-The 3rd Monday of Each Month

Fashion Trends for Over Fifty

DIY Bicycle Rim Halloween Wreath

Create and Decorate Pumpkins With Sea Shells

Fall Tablescape in Lavender and White

Vintage Bicycle Rim Wreath for Fall

How To Make a Faux Pumpkin Centerpiece

Glittery Welcome Embroidery Hoop Wreath

70+ Crafts and Decorating Tips for Fall

Top Ten Tips and Tricks for creating a Cottage Style Home

Pineapple Pecan Coffee Cake with Caramel Glaze

Raspberry Cream Sandwich Cookies

Cream Cheese and Shrimp Cocktail Dip

PERMISSIONS

What Meegan Makes and all it’s content, pictures, ideas, etc. are original ideas and copyright protected.

Using content including but not limited to: designs, original ideas, photos, posts, etc. is prohibited.

Please ask permission before using any content from my blog for any reason and if there is any question.

Search

FEATURED ON SHABBILICIOUS FRIDAY MAGAZINE

FEATURED IN EVERYTHING HOME MAGAZINE

FEATURED ON HUFFINGTON POST

FEATURED ON HUFFINGTON POST

MY OWN RECIPE WAS FEATURED

FEATURED ON GOOD HOUSEKEEPING

Designer Insights from Terry’s Fabrics

Copyright © 2026 ·Beautiful Pro Theme · Genesis Framework by StudioPress · WordPress · Log in