I am happy to have you visit today. After sharing my Intimate Thanksgiving Ideas yesterday, I promised I would show you how I made the DIY Eucalyptus  Candles
 .
.
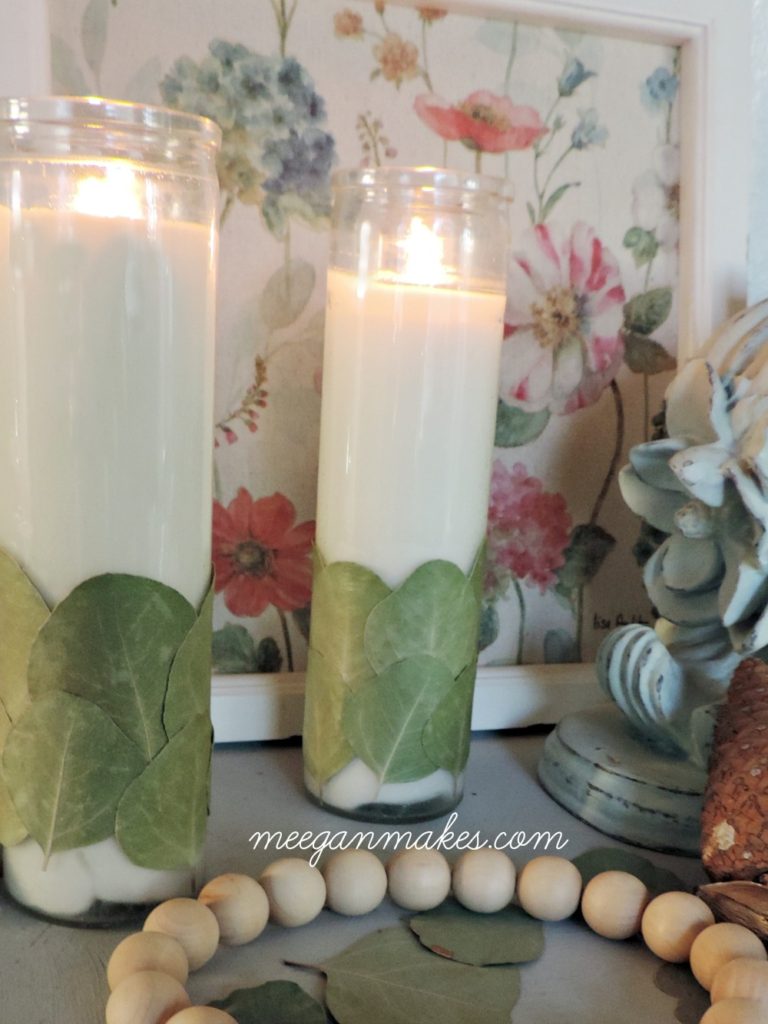
When purchasing the candles, I thought about making something like this. Eucalyptus leaves seemed to be my best option at this time.
Not even sure how the candles would turn out, I got started.
Before I forget to tell you, this is NOT a quick craft. It may take a few hours to make two candles. Because you are working with Mod Podge and glass, you need to be patient, take your time and enjoy the process.
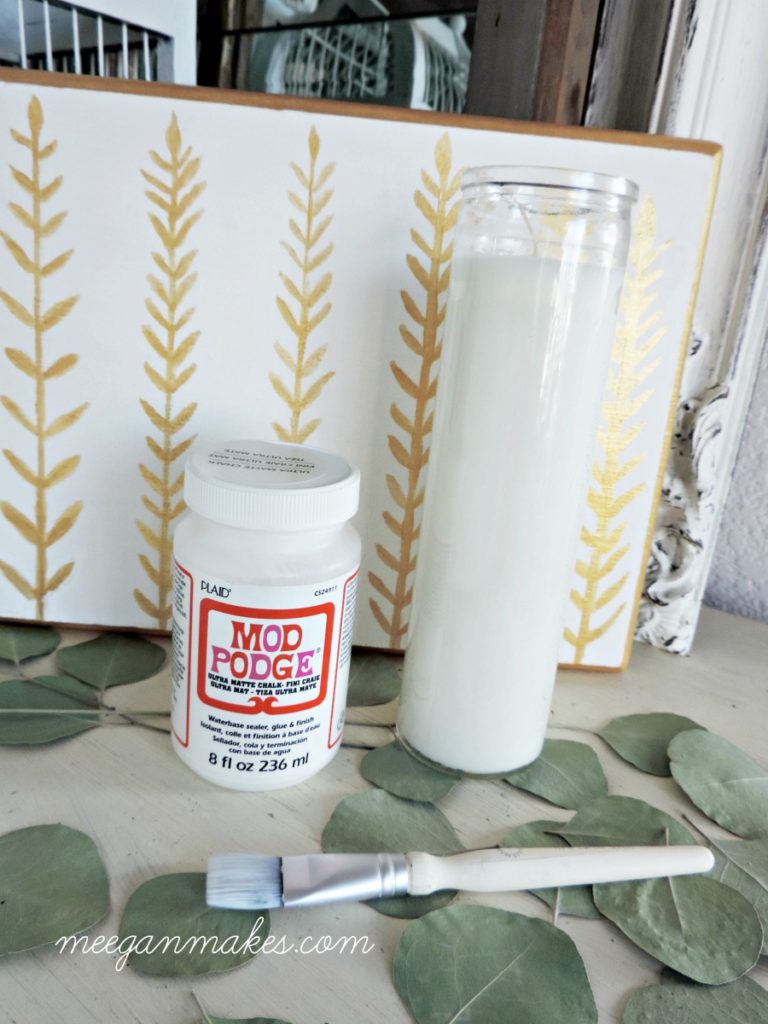
The components for my DIY Eucalyptus Candles
2 candles-you can use as many as you want
dried Eucalyptus leaves
latex gloves
That’s it. You can find the candles in a glass pretty much anywhere. My eucalyptus leaves were picked off my mom’s tree. So, you can see this project doesn’t even have to cost a lot of money. (That’s my kind of craft.)

Now on to the details of making your own DIY Eucalyptus Candles.
*Put on your gloves, because the Mod Podge is very sticky.
*With your craft brush “paint” a section of your candle with Mod Podge. My top row started about mid way from the top and worked my way down. Brush the Mod Podge around the glass, creating a band, leaving a space of approximately 1/2 inch from the bottom.
*I laid my first row of leaves 3 1/2 inches from the bottom of my candle.
*Because the leaves are dry, carefully “paint” the back of the leaf with Mod Podge. Try not to break or crack your leaf. But if you do, don’t worry. It is not the end of the world.
*Take a few seconds and blow on the leaf so the Mod Podge becomes tacky and/or sticky. This will help the leaf adhere to the glass better. (I tried it other ways and this worked best)
*As you place the leaf on the glass gently, press it to curve with the shape of the candle. Hold it in place for a few seconds until the leaf is sticking to the glass.
*It may take a few tries of holding it to the glass, before it actually stays. Like I said before, be patient.

After my top row was done, I started with the second row. Layering the leaves onto the first row, press them to adhere to the glass and to each other.
You can also add more Mod Podge if necessary. If you detect gaps or lifting, using your craft brush to add more Mod Podge. Be patient and hold your leaves in place.
I allowed my candles to dry over night. This way the Mod Podge is completely dry and there aren’t any white, wet spots of Mod Podge.
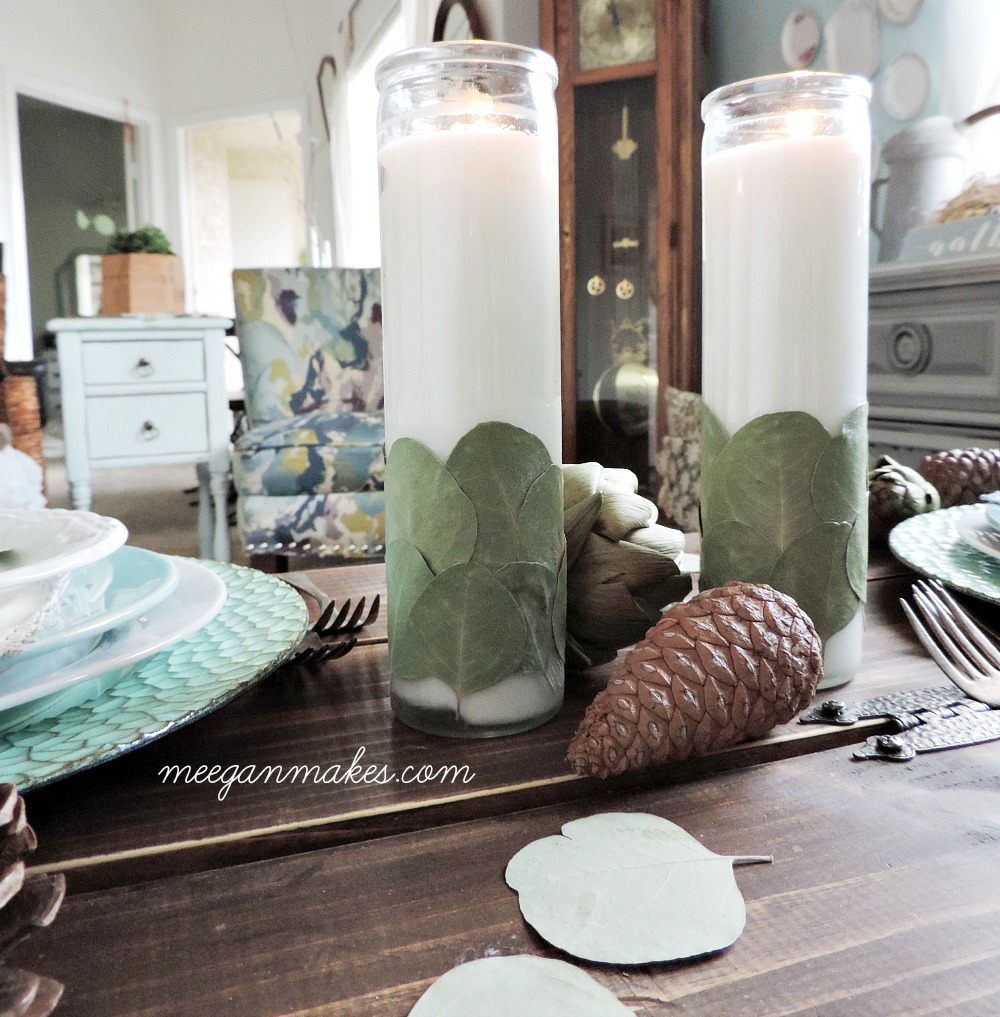
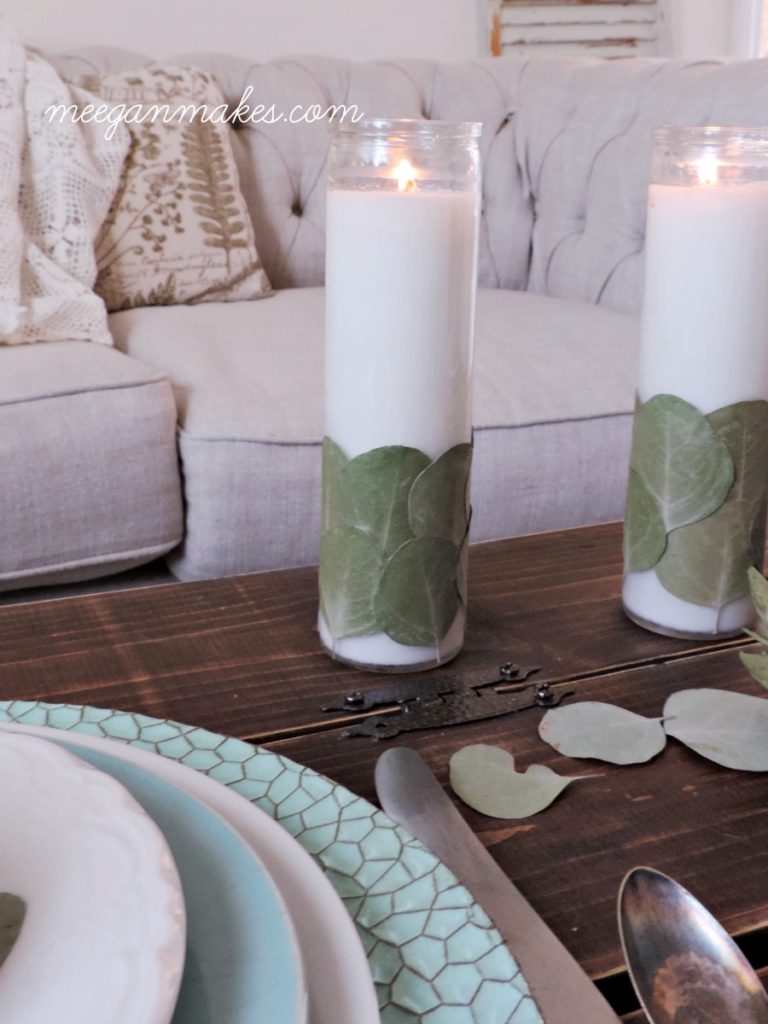
Now you have created your own DIY Eucalyptus Candles.
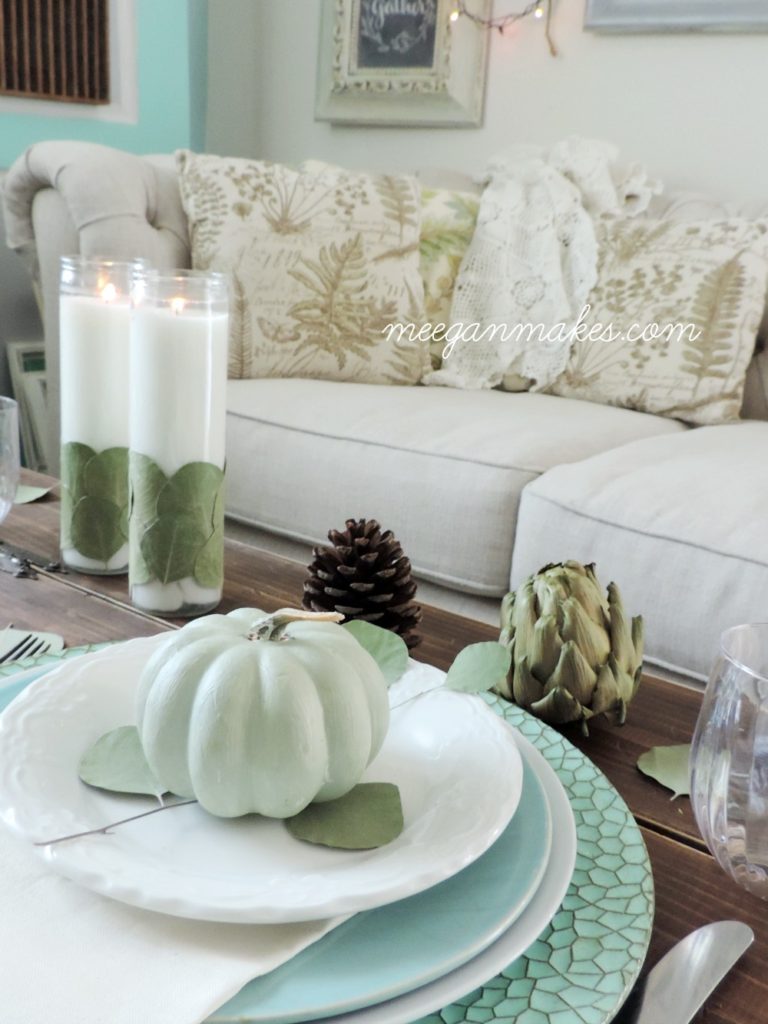

How fun is that? I am so pleased with how my DIY Eucalyptus Candles turned out. They actually remind me of something you might find at Pier 1 or Home Goods.
Thanks again for stopping by today. I can’t wait to hear how your candles turned out.

Some other blog posts you might be interested in:
Vintage Muffin Tin Filled with Christmas Notions


[…] What Meegan Makes […]