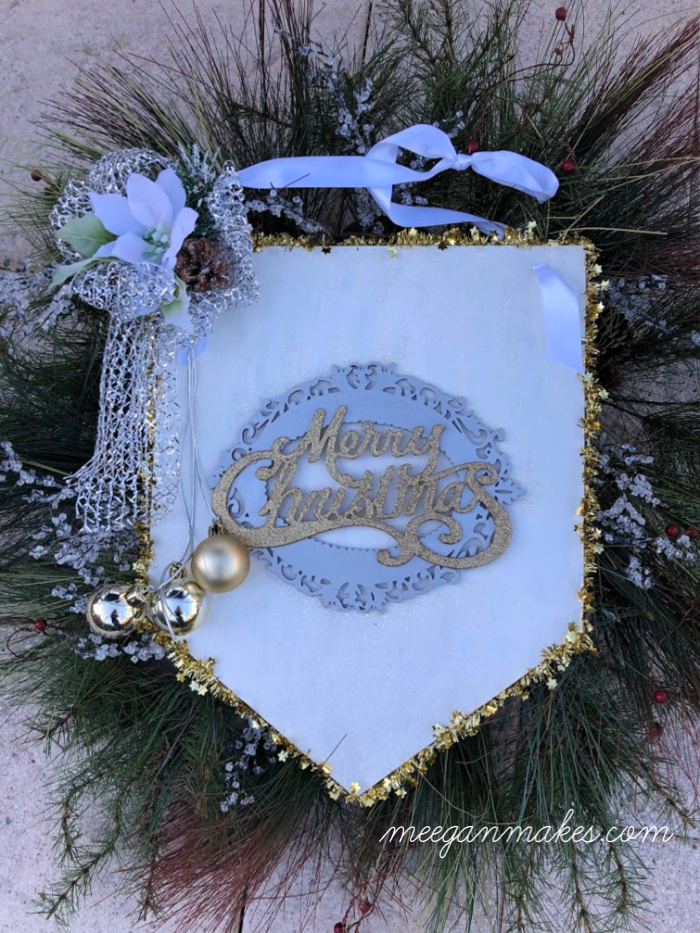
I am sharing my tutorial for a DIY Glittery Merry Christmas Sign. This was actually a monogram sign that I purchased at Hobby Lobby a few years ago. And NOW it’s ideal for Christmas decorating, with some glitter, glitz and glam.
*This post was updated Nov 2025.
The wood sign looks great for Spring or Summer months. But it is getting battered from the wind and heat.
So it’s time to re-purpose and make something fresh for Christmastime.
What You will Need:
4-Sponge paint brushes
1-bottle iridescent white or clear glitter
1-Merry Christmas ornament with gold glitter
3 yards silver cording
3 yards silver mesh ribbon
3-gold or silver bobble ornaments
1 1/2 yards white ribbon
4 yards gold sparkly trim
1-white poinsettia flower with leaves
1-small pine cone

Start off by painting the back of the wooden sign. It took 3 coats to cover it completely.
Cut off cording hanger with scissors.

With a sponge brush, use silver glittery paint for the frame. This took about 4 coats.
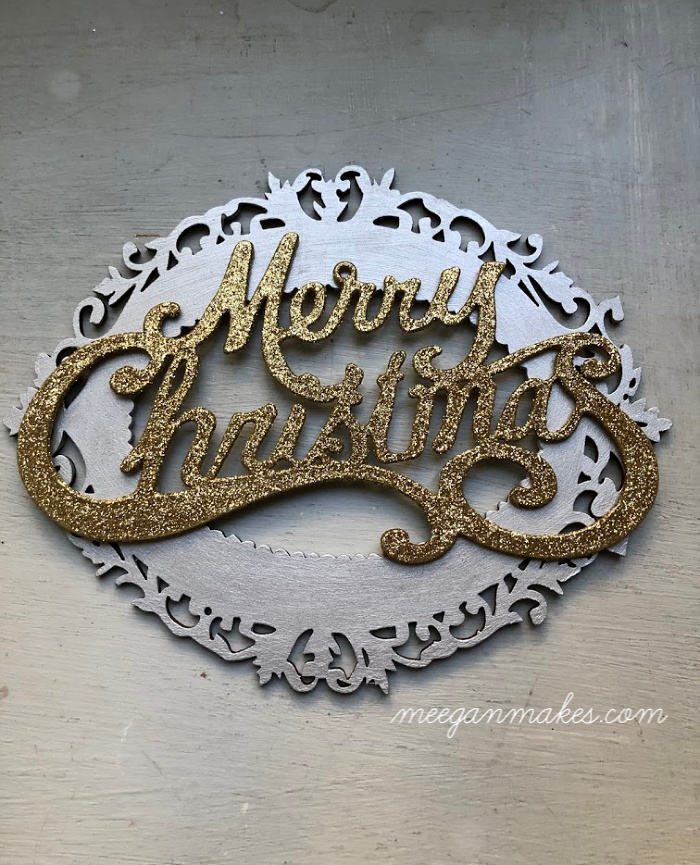
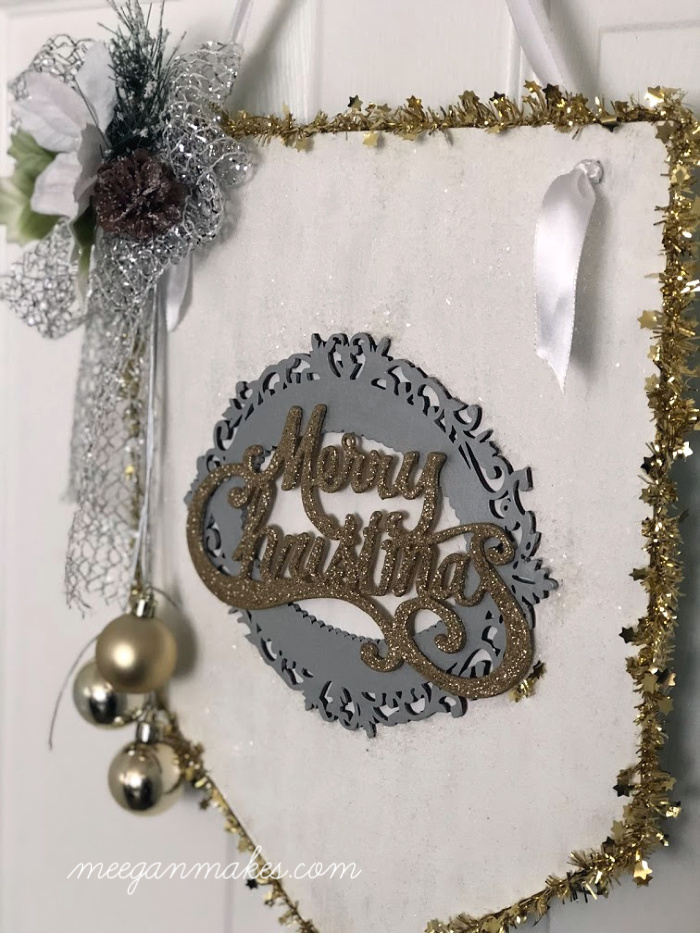
After the silver paint is dry, attach the Merry Christmas ornament to the frame with hot glue.

When the white craft paint on the wood sign completely dries, brush a thick coat Mod Podge all over it.
Sprinkle the iridescent glitter as you go. (I just love the sparkle in the sunlight!)
When the glitter is completely dry, use hot glue to adhere the frame to the sign.
Now it is time to add the trimmings.
For a hanger, tie the white ribbon through each hole in the wood sign. Making it as long or short as you desire.
Using hot glue, carefully add the gold trim around the edges.
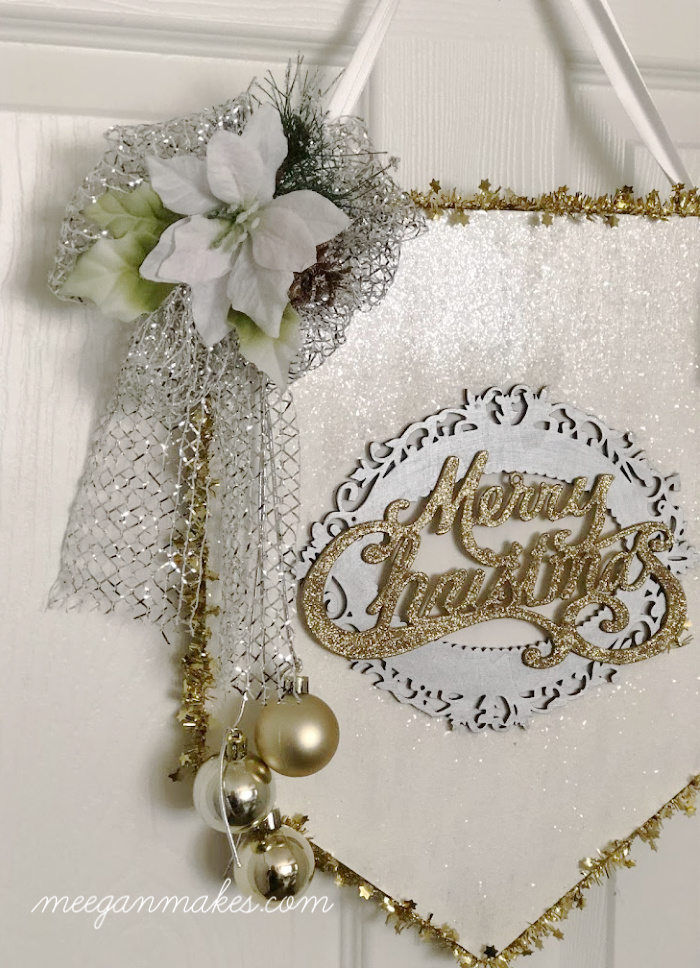
Use the silver mesh ribbon to make a six loop bow. This can be as long or small as you want. Attach the bow to the corner of the sign.
With a hot glue gun attach the faux pine sprig and pine cone onto the bow.
Attach the leaves and white poinsettia on the center of the bow.
I like the natural touches with the pine cone, pine sprig, leaves and the poinsettia. But it is NOT necessary. If you like something else, by all means, use it.
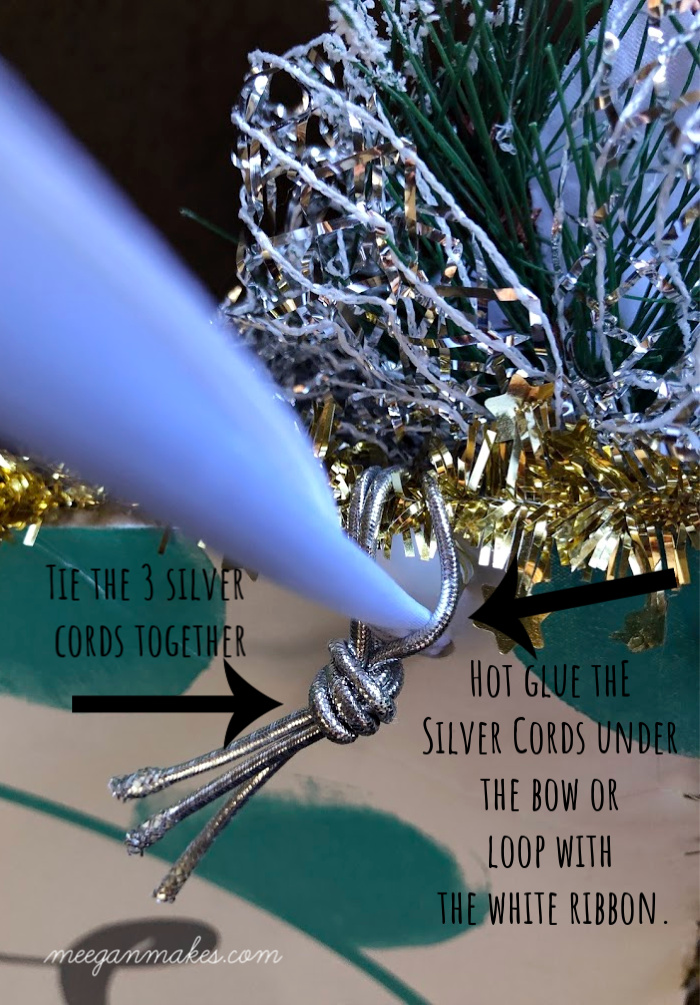
At 3 various lengths, tie the bobbles to the silver cording. Making a knot attach them altogether at the top. Hot glue this under the bow or to the white ribbon.

It should look similar to this.

I just love how this “new” sign for our home to welcome our family, friends and neighbors. Especially during this festive time of year!
If you made a DIY Glittery Merry Christmas Sign, what colors would YOU use? I would love to hear all about your ideas, too.

More ideas below…
Cotton Ball Christmas Tree Tutorial


How to make Crystal and Bead Ornaments.


Christmas is all about sparkle! So pretty and I love all the layers of the sign.
I love every single detail of your glittery Christmas sign Meegan!! So shimmery and beautiful!
Very beautiful. I will try to make something similar. Thanks for sharing it.