Well, well! We finally moved into our new place almost two weeks ago. But, time has flown by me without even a blink. The day after we moved in, I was HIT by the flu. I mean, it rocked my boat. Feverish, nausea, sleeping continually. I haven’t been that sick in years. It took me about ten days before I could even walk outside to see our new surroundings. Whew! I am glad my husband didn’t get it, and I hope you don’t get it either! But, while I was lying around, I thought about decorating our new home. I thought about the style I want to create, the colors and crafts to make our home fresh. One thing that I did was to make an Easy DIY String Fringe Tutorial.
I could see it i my mind before I even made it. I knew I had the string and all I would need would be a few other components to make an Easy DIY String Fringe Tutorial.

It is really simple and super easy to make. You can use it for party decorations, Boho style decor, adding some flair to your vintage pieces or even as a garland for a mantel.

This is what you will need:
20 yards-3 Ply Cotton Bakers Twine
Strong Scissors
Ruler
To prepare:
*Cut 1 string long enough to go around a jar neck (like I did) PLUS 5 inches, for tying to the jar. OR a length that you prefer.
*Measure 8 inch lengths for fringe. I used 65-8 inch pieces for around my jar top.
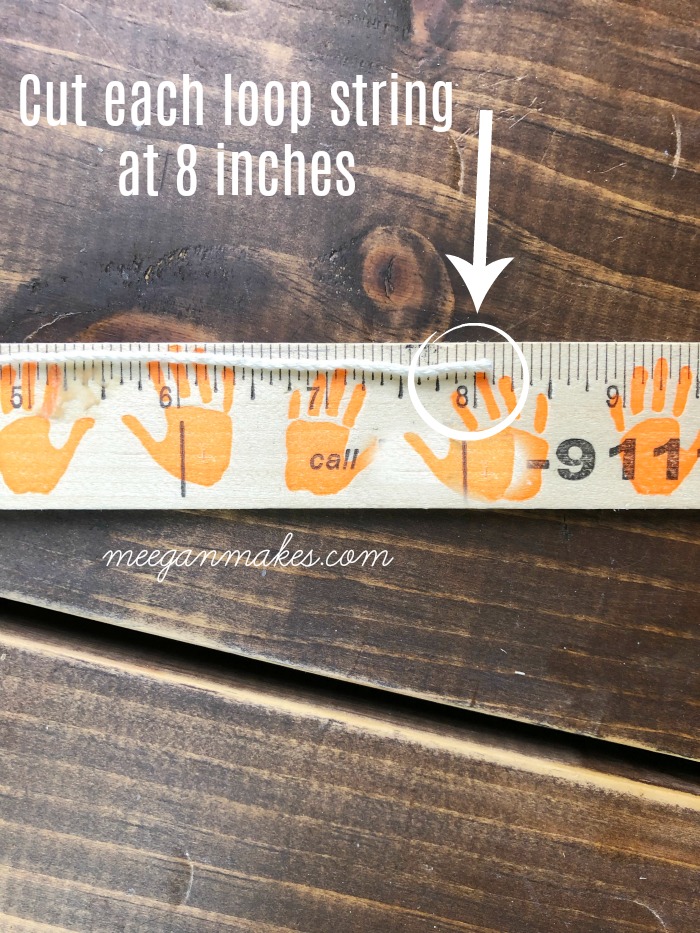

Lay out your MAIN string length. Place an 8 inch string (folded in half) under the main string, making sure the ends are even.

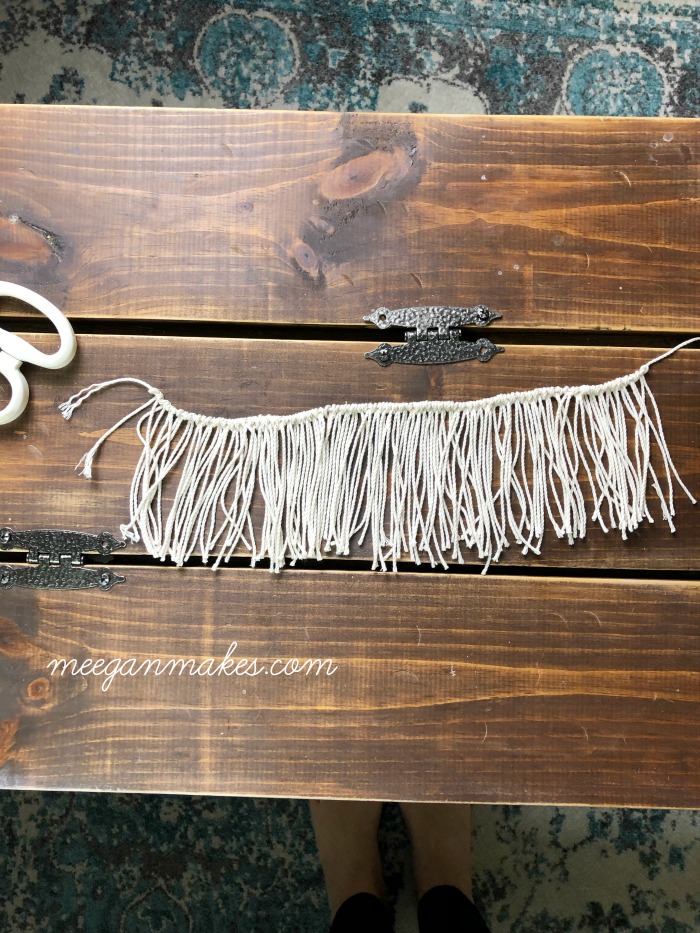
Place the OVER the main string, then through the top loop.

Pull as tight or as loose as YOU like. The more tight, the more 8 inch length strings you will need. So, as with the looser, the least amount of string. Does that make sense?
You can crowd them very close or as far as YOU like. Once again, this is what you will like for decorating or accessorizing.
I made my Easy DIY String Fringe in a few hours while watching a movie. I think cutting ALL the 8 inch pieces would be a faster way to create this fringe. Although, I did about 20 at a time, not being real sure how many I would need.
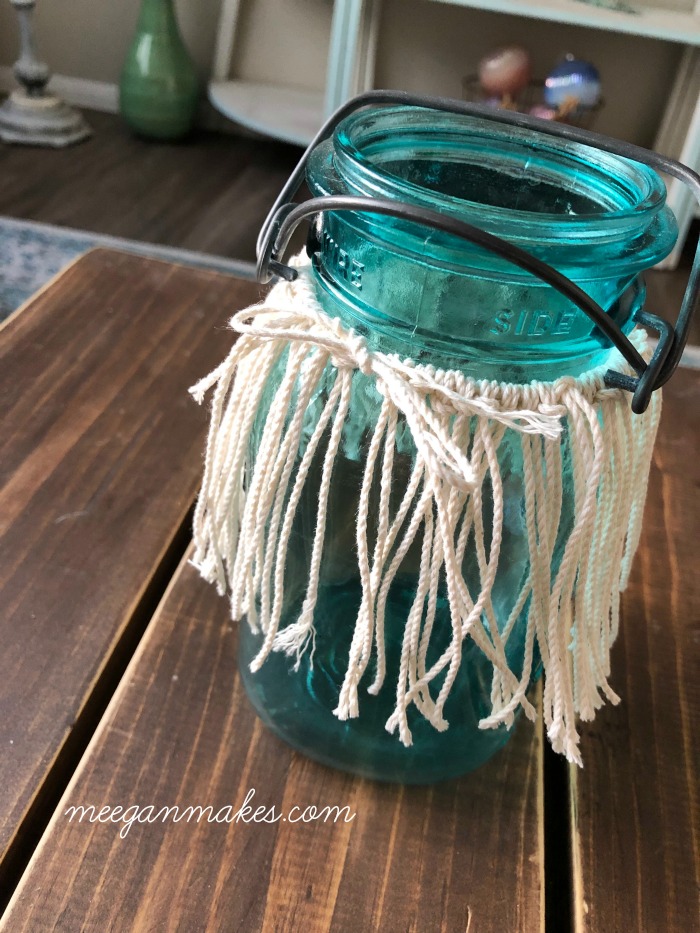
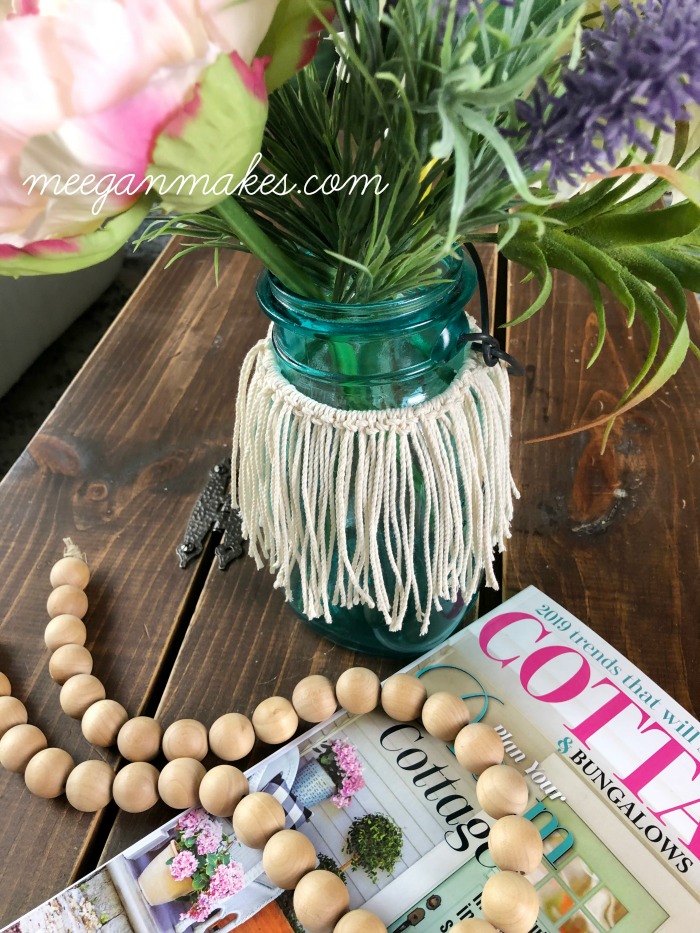
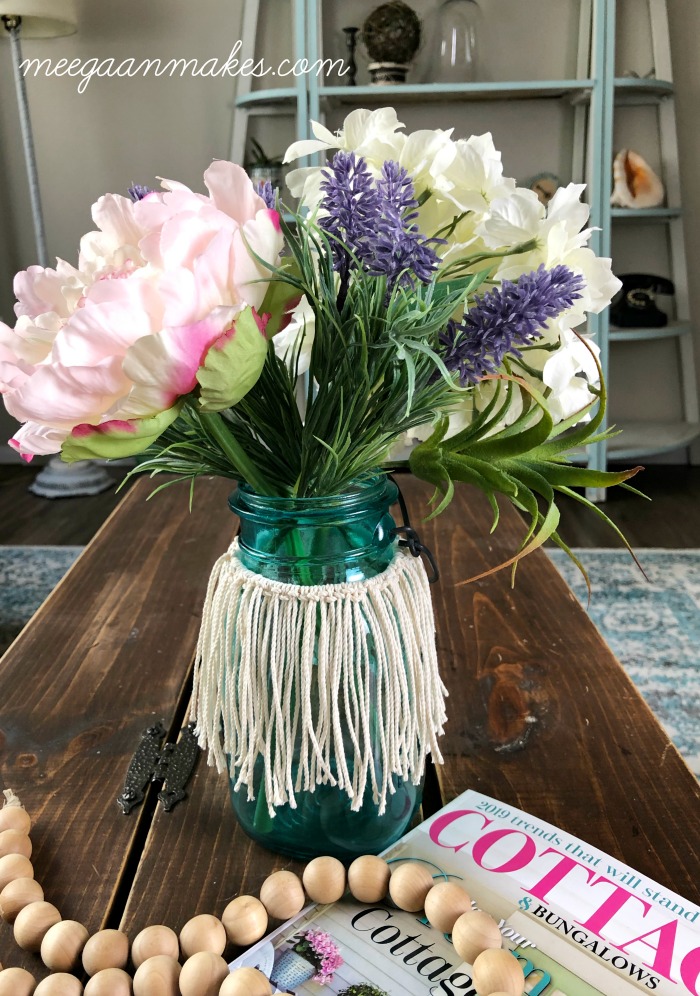
Once I was done adding all 65-8 inch strings, I tied my string fringe around my vintage jar in a small bow. A simple square knot would work, as well.

You can see that each string length varies. It’s because it is cotton string and can stretch, if pulled.
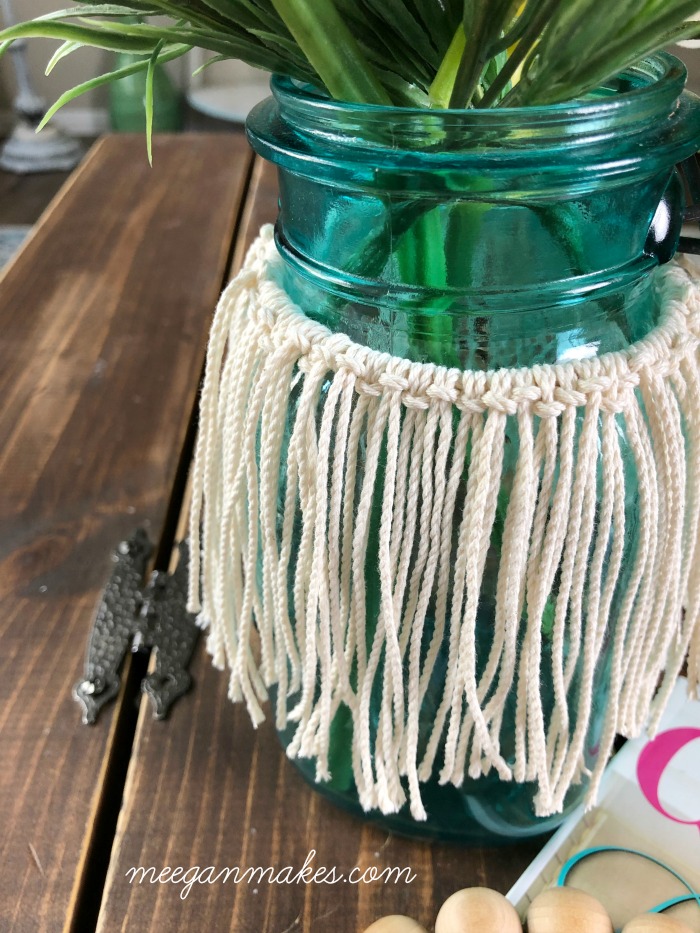
If you want, you can trim the fringe to all be the same length or even into a wavy pattern. I like the various lengths and kind of dis-shoveled Boho style.
I think it kind of looks like a lion’s mane and my husband thinks a hula skirt. Either way, I love it and can’t wait to make more!

As it is the second Wednesday of the month, it is time for the Thrifty Style Team Projects!
![]()
This month we have all new thrifty projects and ideas for Spring. Along with a few more contributors for you to follow and enjoy.

Clink on each link below to see all of the creative ideas from the Thrifty Style Team…
Easy DIY String Fringe Tutorial by What Meegan Makes (me)
How to Create an Inexpensive Plate Wall done by Creekline House
Easter Egg Craft Ideas designed by DIY Beautify
Dollar Store Spring Centerpiece created by The How To Home
Vintage Linen Uses and Care Tips from I Should Bee Mopping The Floor
DIY Mason Jar Chandelier made by Hearth and Vine
Quick and Easy Embroidery Hoop Easter Wreath crafted by Homeroad
Thrifted Prayer Basket with Printable Prayer Slips handcrafted from Salvage Sister and Mister
Thrifty Spring Foyer designed by Redhead Can Decorate
Thrifty and Stylish Bathroom Refresh from Duke Farm Manor
Route 66 Drink Tote made by Bliss Ranch
Simple Thrift Store Shelf Makeover done by The DIY Village
Cottage Style Magazine Rack designed by Cottage At The Crossroads
Painted Shelf Makeover by Two Bees In a Pod
Thank you for joining me today! I hope you will be back soon for even more home decor, crafts and recipes from me to you…


I’m on the hula skirt team, and it makes me think I want to make one to wear around the house. Glad you are feeling better and didn’t share the flu! Pinned. (And just kidding about wearing one but that would be funny!)
Meegan – not only is your fringe beautiful, it is giving us dreams of a Polynesian themed party. Love how you put the fringe on an aqua Mason jar. So creative!
Meegan, this is just the cutest! I am going to save this idea and hopefully make a few of these fringes for my mason jars to use while entertaining this summer. Thanks so much for the inspiration.
Meegan, glad to see that you are feeling better. I’ve only had the flu once and it can really knock the life out of you. You fringe is so cute and festive looking. It also reminds me of this long fringe I bought a long time ago to create a pretty Christmas ornament. I can never find that long fringe anymore in the stores. But, wait, you just showed me how to make my own. Thanks!
And who couldn’t use a little fringe on everything? This girl that grew up in the 70’s is a big fan of fringe xo
Love this simple idea! I can definitely see this looking perfect on a table on my deck this summer!
I LOVE this idea! I’m going to have one all all the jars at my house, lol! You always have such fun and creative ideas, Meegan! It’s so great getting to team up with you! xoxo
Meegan, first of all, I’m glad you’re feeling better! Congrats on the move, how exciting! And I’m loving this sweet little project…reminds me of a hula skirt ;)
Congrats on your move and this is so cute!
I’m glad to know that you’re feeling better and getting settled in your new place. This is such a fun project! I’m thinking that this would be so cute with a candle down inside. Your clear photos make it easy to understand how to make the fringe!
So happy to hear you are feeling better now Meegan. I guess the timing couldn’t have been worse with moving and unpacking at the new house.
I adore this fun and simple fringe project…. how clever you are!!
Thank you for sharing your DIY string fringe tutorial at Create, Bake, Grow & Gather this week. I’m delighted to be featuring it at the party tomorrow night and pinning too.
Hugs,
Kerryanne