What Meegan Makes

vintage style, cottage living, home cooking

  • Home
  • Contact
  • Privacy Policy and Disclosure
  • Furniture Makeovers
  • 10 DIY Seasonal Banners
  • 15 Creative Spring Crafts

Groom’s Wedding Dinner Decorations And Ideas

November 8, 2012 By Meegan 16 Comments

I am finally getting a little rest after the wedding this past weekend when our son married the love of his life.  It was a beautiful and happy occasion.

As the groom’s parents it was up to us to provide and host the Groom’s Dinner.  These are just a few pictures from the dinner.

Pin It
The wedding colors were light aqua, ivory, white and black.  I incorporated all of the colors for the dinner as well.  I used ivory chair covers with white chair ties.  I opted to tie them in a knot on the side rather than a bow in the back.  Real silverware adds to the formality of the occasion, rather than plastic.

Pin It
I used white round floor length table cloths with a large lack silky overlay.  Then on top of that I place a bluish/aqua 28 in. fabric square, and on top of that a few dictionary pages laying in a pile.  I found these perfect napkins to place on the plate.  Don’t you just love the mercury glass center pieces??  They each had lit tea lights during the dinner.

Pin It
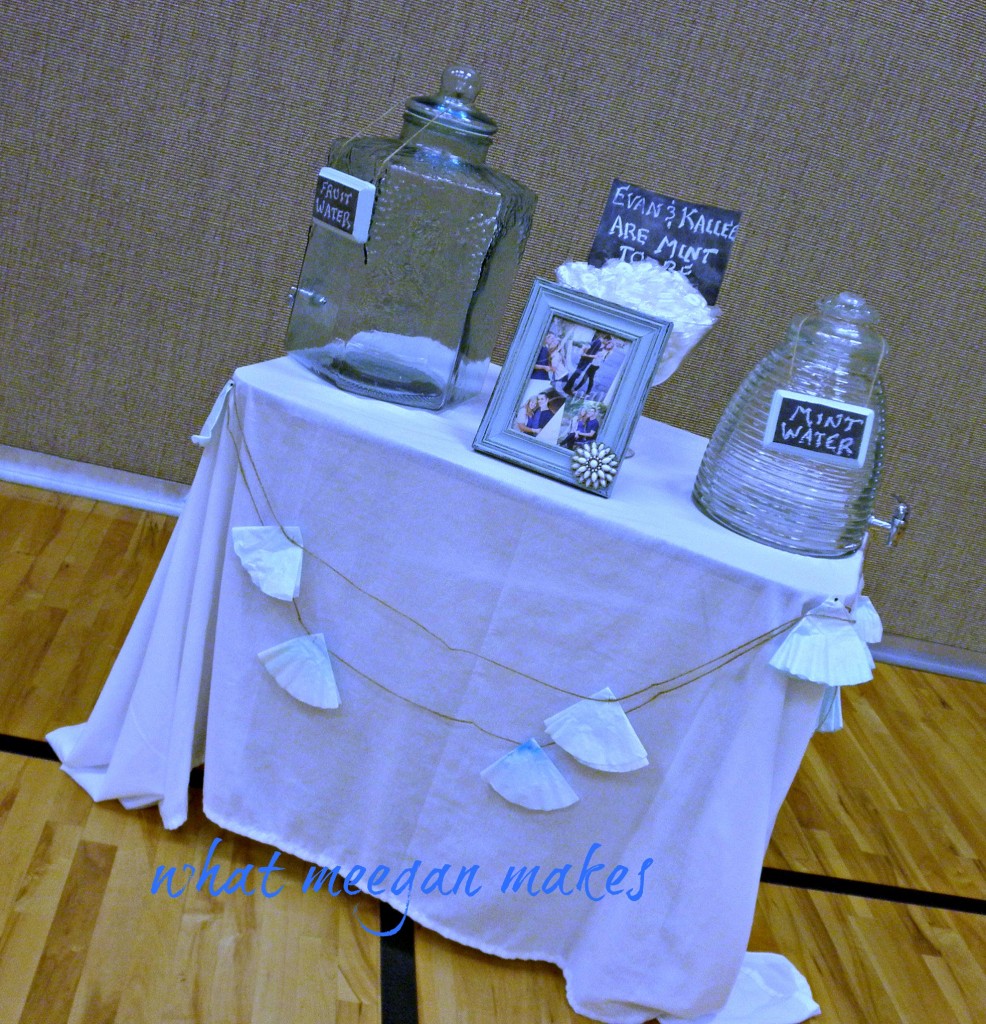
This is the drink table.  I used 2 types of jugs and labeled them with homemade chalkboards (Tutorial for that later).  We served flavored water.  The fruit water had strawberries, lemons, and limes.  The mint water was fresh mint leaves and water.  Easy simple and pretty.  I also filled a vessel with mints and added the chalkboard sign.  Cute!!

A view of the whole drink table.

Pin It
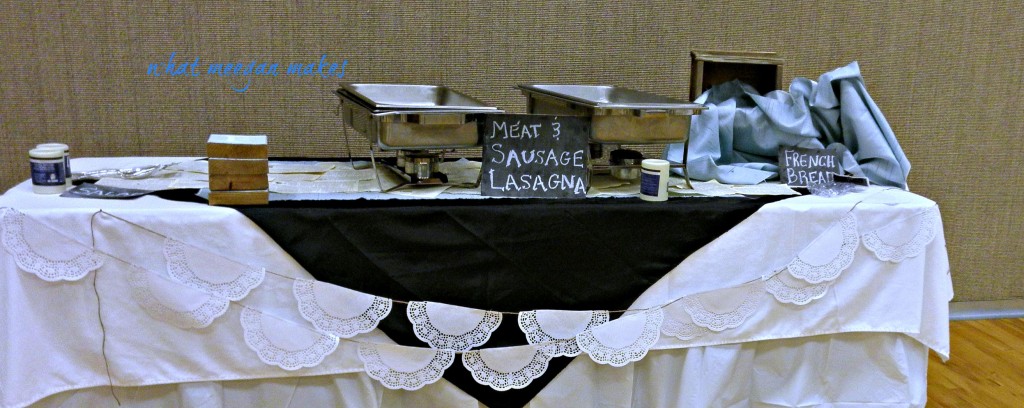
The was the buffet table.  (I was almost finished decorating it)  I made doily banners with twine (Tutorial for that later, too).  I also used the white and black table cloths as I did with the guests tables.  As you can see, I used more chalkboards to label our food.

Pin It
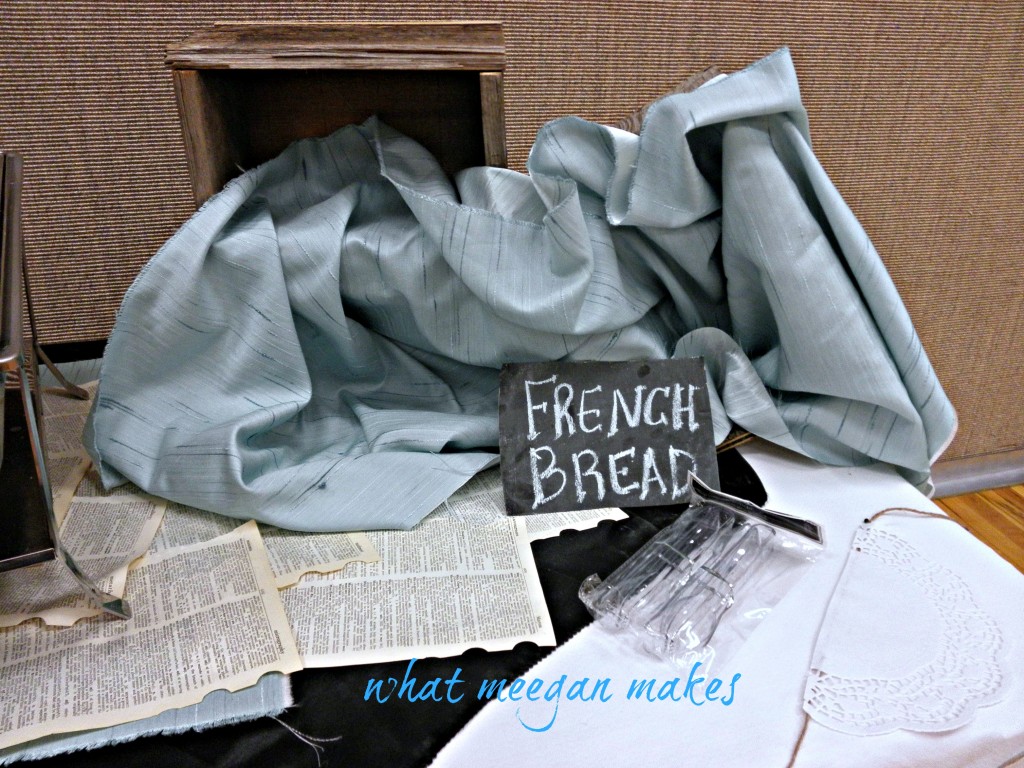
This is a closer view.  I added the barn wood boxes similar to what was used for this wedding and for our son’s reception.  I added the bluish fabric, so the bread would stay clean.   I loved using the dictionary pages so much, I made a runner for the buffet table as well.

Pin It
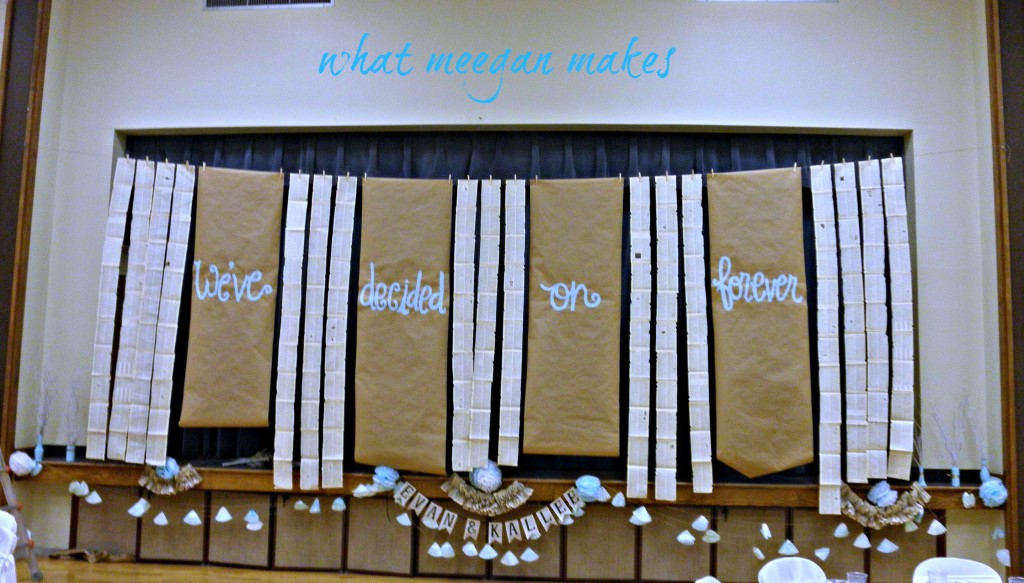
This was my favorite part of the whole room.  My friend Ashley is so very talented and painted the banners for me.  I used more dictionary page banners to fill in-between.  I also made book page banners (Yep, another tutorial for that soon, too), tissue paper puffs, and added some coffee filter banners to bring color to the vignette.

Pin It
For the center, I added a simple book page banner with their names stenciled on each page.  Simple and yet, so effective.

Pin It
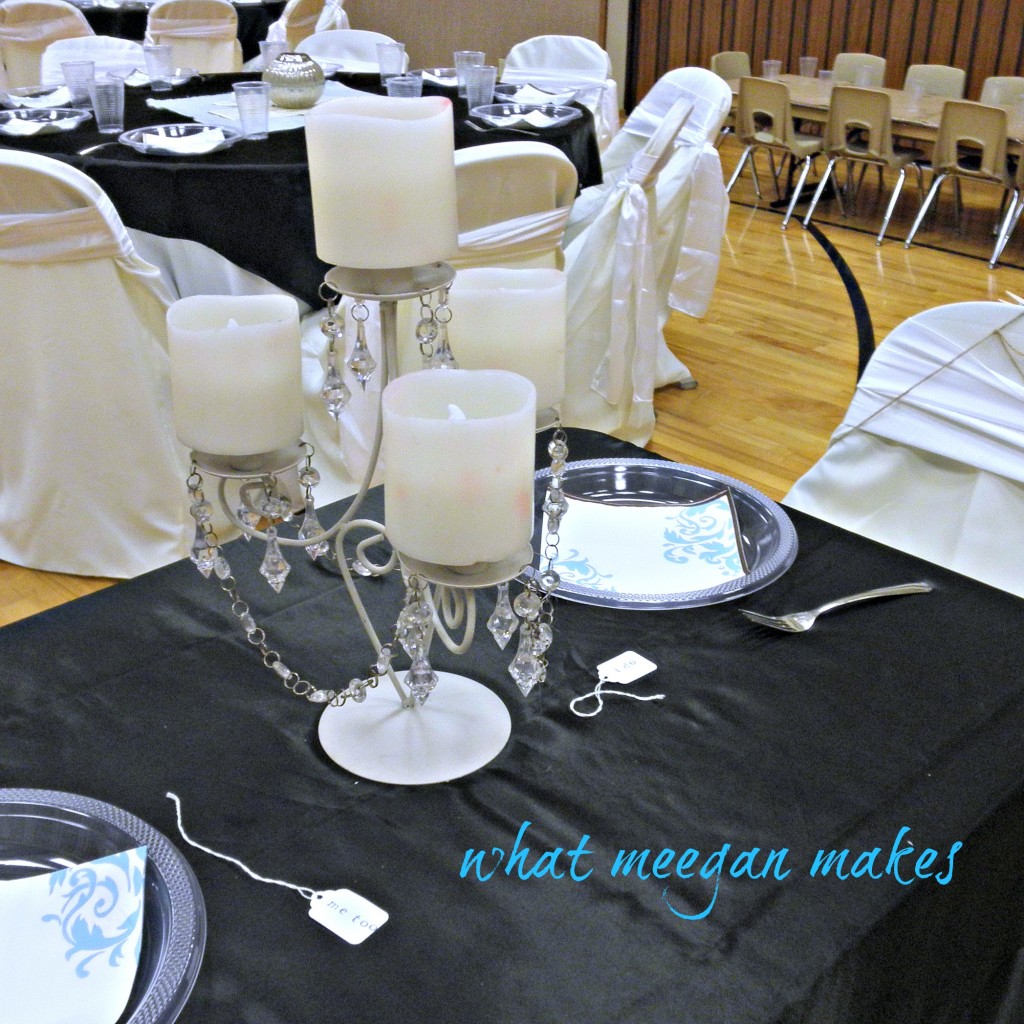
This is the Bride and Groom table.  All in black with a candelabra.   The little tags were added to their champagne glasses.  One says “I do” and the other says, “Me, too”.  I just used some left over tags for that, and $1 stamps from Michael’s.  Easy!!
In the background you can see some small chairs   Since we have SO many small children in our family.  I covered a long table with the same banner paper, added 4 boxes of crayons and the kids we so happy to have their own special place to sit!!

Pin It
To add to the flow of using the chalkboards I made the “Mrs. and Mr.” signs for their chairs.
Pin It
This was our son’s view for the evening.  I was pleased with the over all look.  We had the lights dimmed with the tea lights lit, it was very nice.
I hope you had fun seeing what I have been up to.  It has been fun to share it with you.  Next weekend we are hosting an open house here for the newlyweds.  So more creativity and more pictures!!
Are you following me on  Pinterest, Facebook, Hometalk and Stumble Upon?  Please do!!  See you there!!

Linked with: Its Overflowing I Should Be Mopping CraftOManiac Get Outta My Head Please Practically Functional Cowgirl UpRustic Anthology Brassy Apple DIY HSH Polly Want A Crafter Homemaker On A Dime Coastal Charm Kammy’s Korner Blackberry Vine A Diamond In The Stuff Elizabeth & Co Alderberry Hill Tales of A Trophy Wife Shaken Together Home Stories A2Z 504 MainTiaras & Bowties My Girlish Whims Lil Luna Savvy Southern Style From My Front Porch Someday Crafts All Stars Block PartyLiveLaughRowe House of Hepworths Freckled Laundry Keeping It Simple Whipperberry DIY Showoff Happy Hour ProjectsPrimitive and Proper Todays Creative Blog Ivy and Elephants Domestically Speaking Whimsy Wednesdays Ginger Snap Crafts No Minimalist Here White Lights On Wednesday 52 Mantels {Primp} Homestead Simple Restore Interiors Made In A Day CraftionaryAt The Picket Fence French Country Cottage The Dedicated House Not Just A Housewife Creations By Kara Cherished TreasuresRedoux Debbie Doos Kurtz Corner The DIY Dreamer My Uncommon Slice of Suburbia Uncommon Designs Knick of Time Positively Splendid ADD Housewife

Filed Under: crafting

Comments

  1. Janel@nelliebellie says

    November 8, 2012 at 2:50 AM

    very sweet!! Love the dictionary pages added!

    Reply
    • Meegan says

      November 12, 2012 at 7:37 PM

      Thanks Janel!! I LOVED using the dictionary pages!! So fun!!

      Reply
  2. Joel Jones says

    November 8, 2012 at 2:56 AM

    So much planning and organizing. Great job! My favorite part was the banners, also. They came out fantastic, beautiful, and so creative. Glad you have pictures. Unless someone has been involved with an event like this, they have no idea how much it takes to make it happen. And, then, it takes no time at all to take it down.

    Reply
    • Meegan says

      November 12, 2012 at 7:37 PM

      Thanks for all of your sweet compliments!! We couldn’t have done it without you either! It was a really great day!!

      Reply
  3. Heather @ new house new home new life says

    November 8, 2012 at 1:09 PM

    It looks lovely, Meegan. Congratulations on the wedding and a job well done. Now I have one question: what is a groom’s dinner (was it the rehearsal dinner usually hosted by the groom’s parents the night before the wedding)? It’s a tradition I’m not familiar with here in Canada.

    Reply
    • Meegan says

      November 12, 2012 at 7:34 PM

      Thanks Heather!! I appreciate your sweet compliments! I love your blog and your ideas! Thanks for stopping by!! I will email you about your question :)

      Reply
  4. Sharon @ Elizabeth & Co. says

    November 12, 2012 at 11:59 PM

    Just beautiful! I love the soft colors and again all the personal touches! Aren’t weddings such fun! Huge congratulations to the bride and groom!

    Reply
  5. Jessi @ Practically Functional says

    November 13, 2012 at 7:26 PM

    It all looks wonderful! I love the candle centerpieces, very stylish. :-) Thanks for sharing at The Fun In Functional!

    Reply
  6. Pamela says

    November 14, 2012 at 1:55 PM

    Meegan everything looks fabulous. I know you put a lot of work into it!

    Reply
    • Meegan says

      November 14, 2012 at 5:02 PM

      Thanks Pamela!! It was fun!! I appreciate you coming by!!

      Reply
  7. Aimee - It's Overflowing says

    November 14, 2012 at 2:51 PM

    Everything looks GREAT! I love the chalkboard labels…so cute! XO, Aimee

    Reply
    • Meegan says

      November 14, 2012 at 5:03 PM

      Thanks Aimee! It was a lot of fun to pull it all together!! I LOVE your compliments!!

      Reply
  8. Holly Lefevre says

    November 15, 2012 at 5:34 AM

    So many special details. I bet you had fun planning! I love the “mint to be together.” Congrats on a wonderful event in your lives!

    Reply

Trackbacks

  1. Cardboard Chalkboard Signs — MeeganMakes says:
    November 13, 2012 at 2:46 PM

    […] our son’s wedding, I made chalkboard signs for the food, and I promised you a tutorial for it.  They are so easy and […]

    Reply
  2. Wedding Open House Tour — MeeganMakes says:
    November 20, 2012 at 3:25 PM

    […] you love these “Mr and Mrs” signs hanging by the front […]

    Reply
  3. An Obsession With Book Pages — MeeganMakes says:
    December 15, 2012 at 3:34 PM

    […] or glue book pages together to make a back drop, a banner, or a […]

    Reply

Leave a Reply Cancel reply

Your email address will not be published. Required fields are marked *

This site uses Akismet to reduce spam. Learn how your comment data is processed.

Follow on Bloglovin

Recent Posts

  • How To Embellish Christmas Ornaments
  • Handmade Bead and Crystal Christmas Ornaments
  • How To Decorate Pumpkins with Vintage Doilies
  • Peppermint Snowball Cookies
  • Decorate an Olive Bucket for Fall

Purchase Beautiful Home Accessories for any style

Thrifty Style Team 2nd Friday Monthly

International Blogger Club-The 3rd Monday of Each Month

MY AFFILIATES

Fashion Trends for Over Fifty

DIY Bicycle Rim Halloween Wreath

Create and Decorate Pumpkins With Sea Shells

Fall Tablescape in Lavender and White

Vintage Bicycle Rim Wreath for Fall

How To Make a Faux Pumpkin Centerpiece

Glittery Welcome Embroidery Hoop Wreath

70+ Crafts and Decorating Tips for Fall

Top Ten Tips and Tricks for creating a Cottage Style Home

Pineapple Pecan Coffee Cake with Caramel Glaze

Raspberry Cream Sandwich Cookies

Cream Cheese and Shrimp Cocktail Dip

PERMISSIONS

What Meegan Makes and all it’s content, pictures, ideas, etc. are original ideas and copyright protected.

Using content including but not limited to: designs, original ideas, photos, posts, etc. is prohibited.

Please ask permission before using any content from my blog for any reason and if there is any question.

Search

FEATURED ON SHABBILICIOUS FRIDAY MAGAZINE

FEATURED IN EVERYTHING HOME MAGAZINE

FEATURED ON HUFFINGTON POST

FEATURED ON HUFFINGTON POST

MY OWN RECIPE WAS FEATURED

FEATURED ON GOOD HOUSEKEEPING

Designer Insights from Terry’s Fabrics

Copyright © 2022 ·Beautiful Pro Theme · Genesis Framework by StudioPress · WordPress · Log in