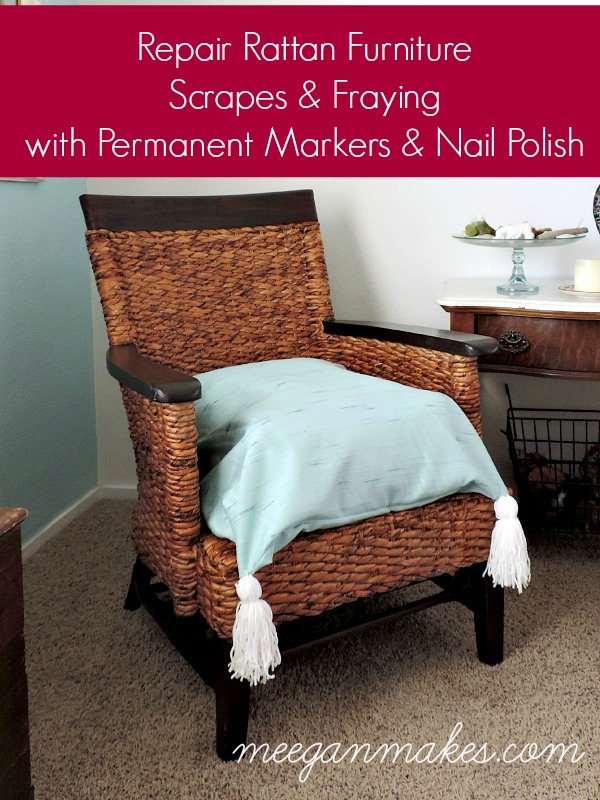
Happy Thursday, and Welcome to Themed Furniture Makeover Day! It’s the time of month when several talented bloggers share their amazing furniture makeovers. TODAY, I am sharing How To Repair a Rattan Chair with scrapes and fraying.

Let me tell you a little bit about my adventure…
I started out by purchasing this incredible chair at Salvation Army. I was a little leery of buying it at first. Because I wasn’t sure if I could repair it fully. I had even considered painting it white or cream.
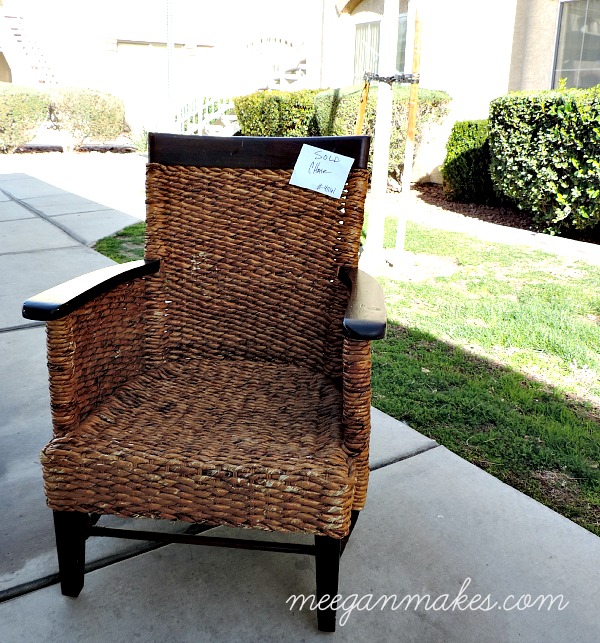
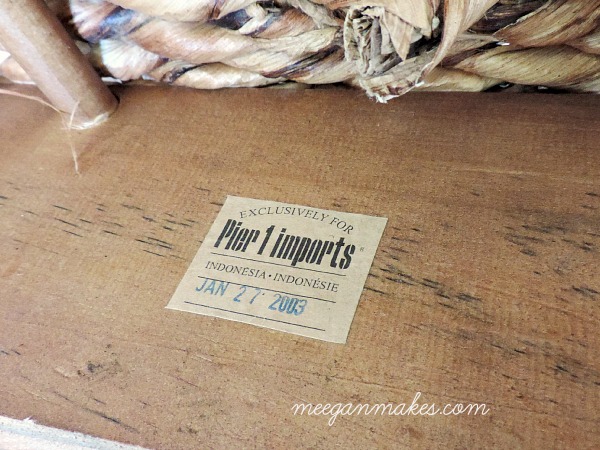
Can you see the scrapes and frays? BUT, it was from Pier1, and it is a quality chair. So, you guessed it, I bought it. I almost danced to my car as I walked out.
I actually grew up living next door to my parents’ furniture store. So, I know a LITTLE bit about furniture repair. REALLY, I don’t know a lot, but I do know that permanent markers work wonders to cover scrapes and scratches.
For this particular chair I used BIC fine point markers. Woodsy Brown and Honey Brown. I was amazed at how well these colors blended into the rattan.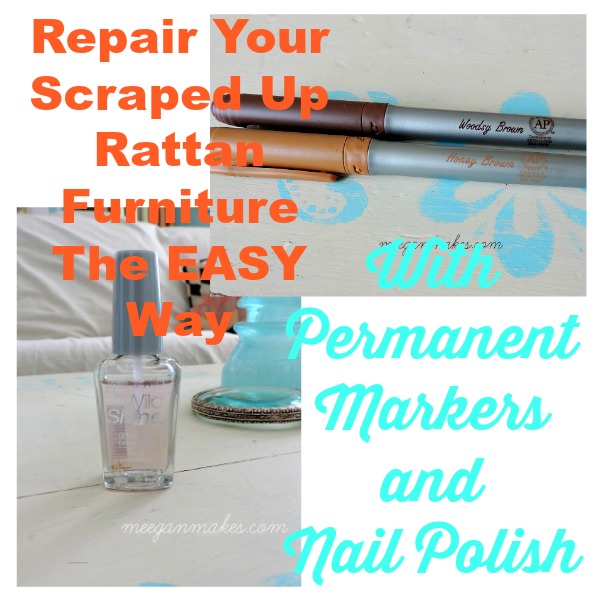
And clear nail polish? What would I use that for? Well, that is to stop the fraying on the rattan furniture.
You know how you can get a run in your nylons or tights? And then you stop the run with clear nail polish? Well, why not stop the fraying on rattan furniture with nail polish, too?
Here is the front of my scraped and frayed rattan chair before the permanent markers and nail polish…

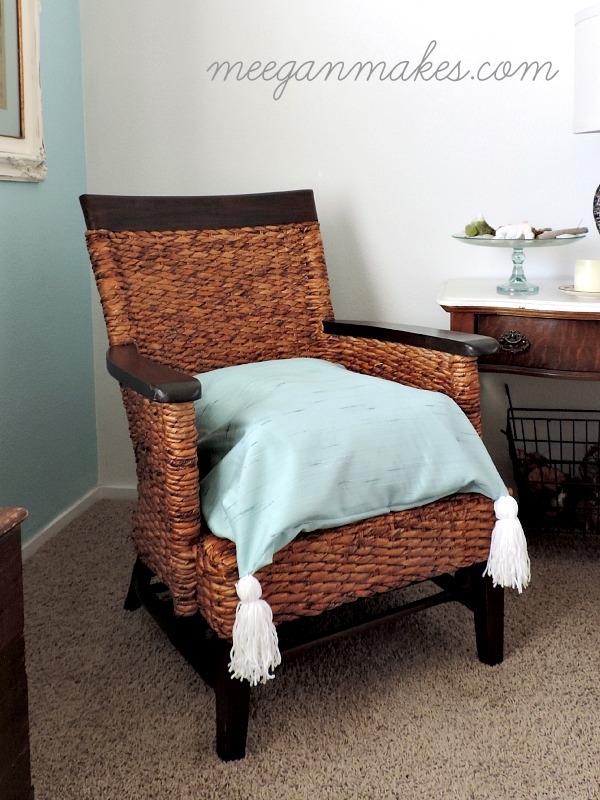
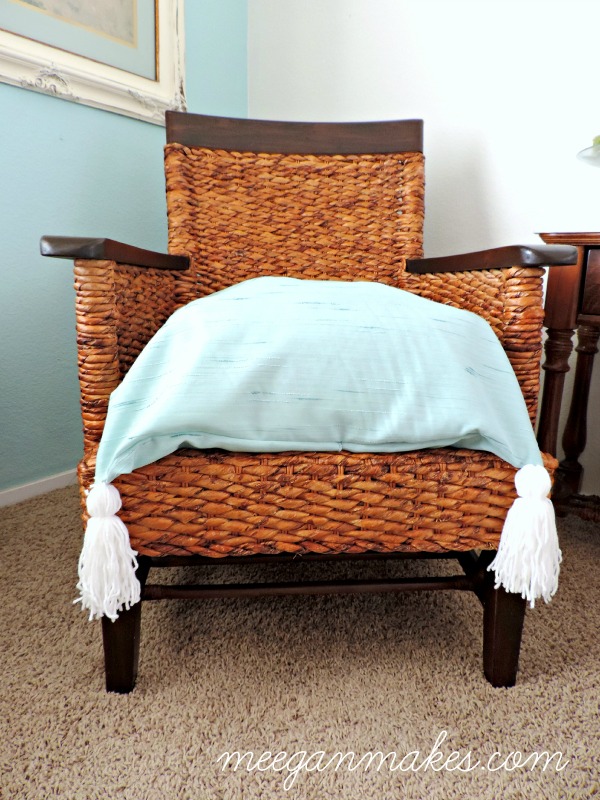
Here it is after…
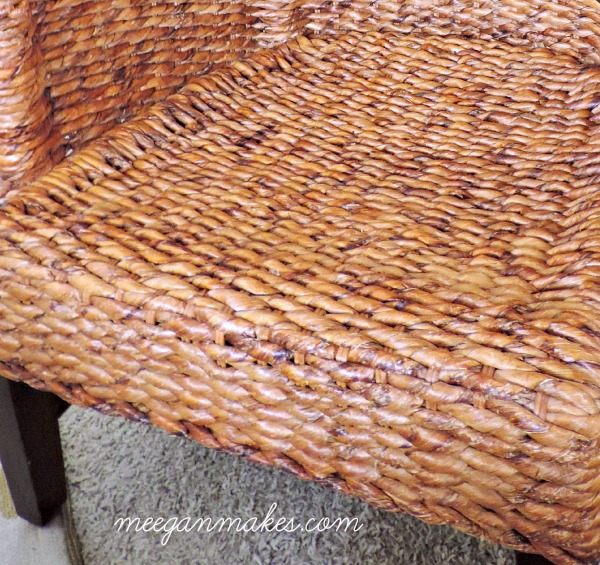
I have to admit, there were more scapes and fraying than I had realized. It took almost 2 hours of solid work to completely transform this into a new looking chair. There were scapes on the arms, the back and the sides. Once I was finished with the markers, I “polished” the frays. The clear polish WILL turn a brownish color when you are using it. So don’t plan on using it for your nails afterwards.
How To Repair a Rattan Chair? Use nail polish and permanent markers. It works like a charm. I am sure there are repair kits you can buy. I didn’t even look, to be honest. I used what I knew had worked for me in the past.
Remember how it used to look???
I like this picture because you can see how the corner was scraped up and fraying. But with a little TLC it looks fabulous, now.
Not too shabby for a Salvation Army find, right? And the cost, you ask… $22.50. It was a steal of a deal.
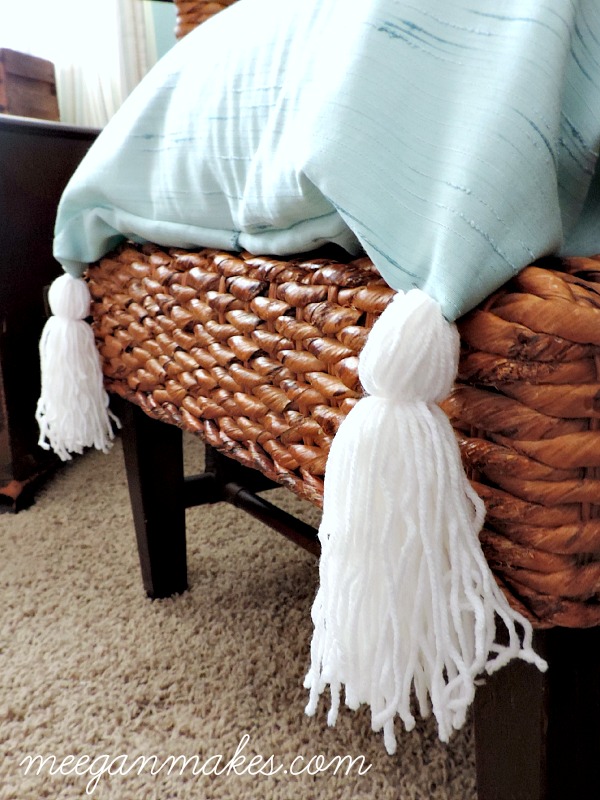
I am looking forward to sharing how I made my fluffy pillow with homemade yarn tassels next week.
I hope you have learned something today about How To Repair a Rattan Chair. I enjoyed every minute of it.
Be sure to visit all of the furniture makeovers listed below. I know each one will inspire you.
Make it a terrific Thursday!


Permanent markers and nail polish worked like a charm to restore this piece. It looks like new now! Wouldn’t it be great if the person who donated it to Salvation Army reads your blog and recognizes it? I’ll bet that they’d really regret donating it!
[WORDPRESS HASHCASH] The poster sent us ‘0 which is not a hashcash value.
What a steal, Meegan! I love the use of makers and nail polish – stinkin’ creative. ;)
Great job on saving that chair. And I never would have thought to use nail polish to stop the fraying on the rattan. You’re so smart! Thanks for sharing that great tip with all of us. The chair looks great!
Oh my goodness, such a smart fix! I have always loved these Pier1 chair! Great find and even better fix!
Debbie
Wow! I had no idea you could do that with markers and nail polish!! Awesome tips and it looks amazing!!
What a great idea!!! Thanks for sharing!
You are so smart! That looks so good now that there is no need to paint. Great find too! XOXOX
Oh my gosh, that is brilliant!!! I love it!! You got a great find there!
xo
Nancy
Love it. What a great way to transform it. My aunt has those exact chairs and I love them. You made it look brand new.
That turned out Fabulous!!!
I love it!
Hugs,
Karin
Wow! What a great idea. It turned out fabulous. What a steal!
You did a bang up job on the chair. It looks brand new now Meegan! You got a deal!
Thank you for sharing this!! I have a wonderful Pier One chair that I love to pieces, unfortunately so did one of our cats. I’m thrilled I’ll be able to cover the kitty scratches:) You got an awesome deal on your chair too!!
Love it! So glad you didn’t paint this one :)
I have quite a few pieces of rattan furniture and a new puppy has found a few of them. These tips will certainly come in handy! Thanks.
What a fantastic restoration, Meegan! Now your new Pier 1 chair is perfect! Fabulous fix it tips, lady! xxoo
I have used ;markers and shoe polish to cover scrapes on wood furniture. :) Your chair is gorgeous! What a find and what a great makeover.
Meegan you had a fantastic find! And thank you for sharing your tips- I’m going to have to try them on a similar chair that I have that’s been fraying!
Great job on restoring a too much loved chair! Jeanette
LOVE the chair. I was SO excited to see something on a ‘channel back’ chair. My grandmother’s chair was originally channel back, but when she had it re-upholstered back in the late ’60s they didn’t put in the channels. I’m about to do this chair myself, but haven’t found real instructions/hints/tips on doing the ‘channel back’. I’ve bought more thank enough fabric, but it’s sitting in the fabric bin waiting for me to figure out how to do this.
Do you have any photos/suggestions of that part of this project.
THANK YOU!
Great work Meegan, you made it look new! I’m going to have to save this tutorial because my cat is doing a number on my wicker chairs!!