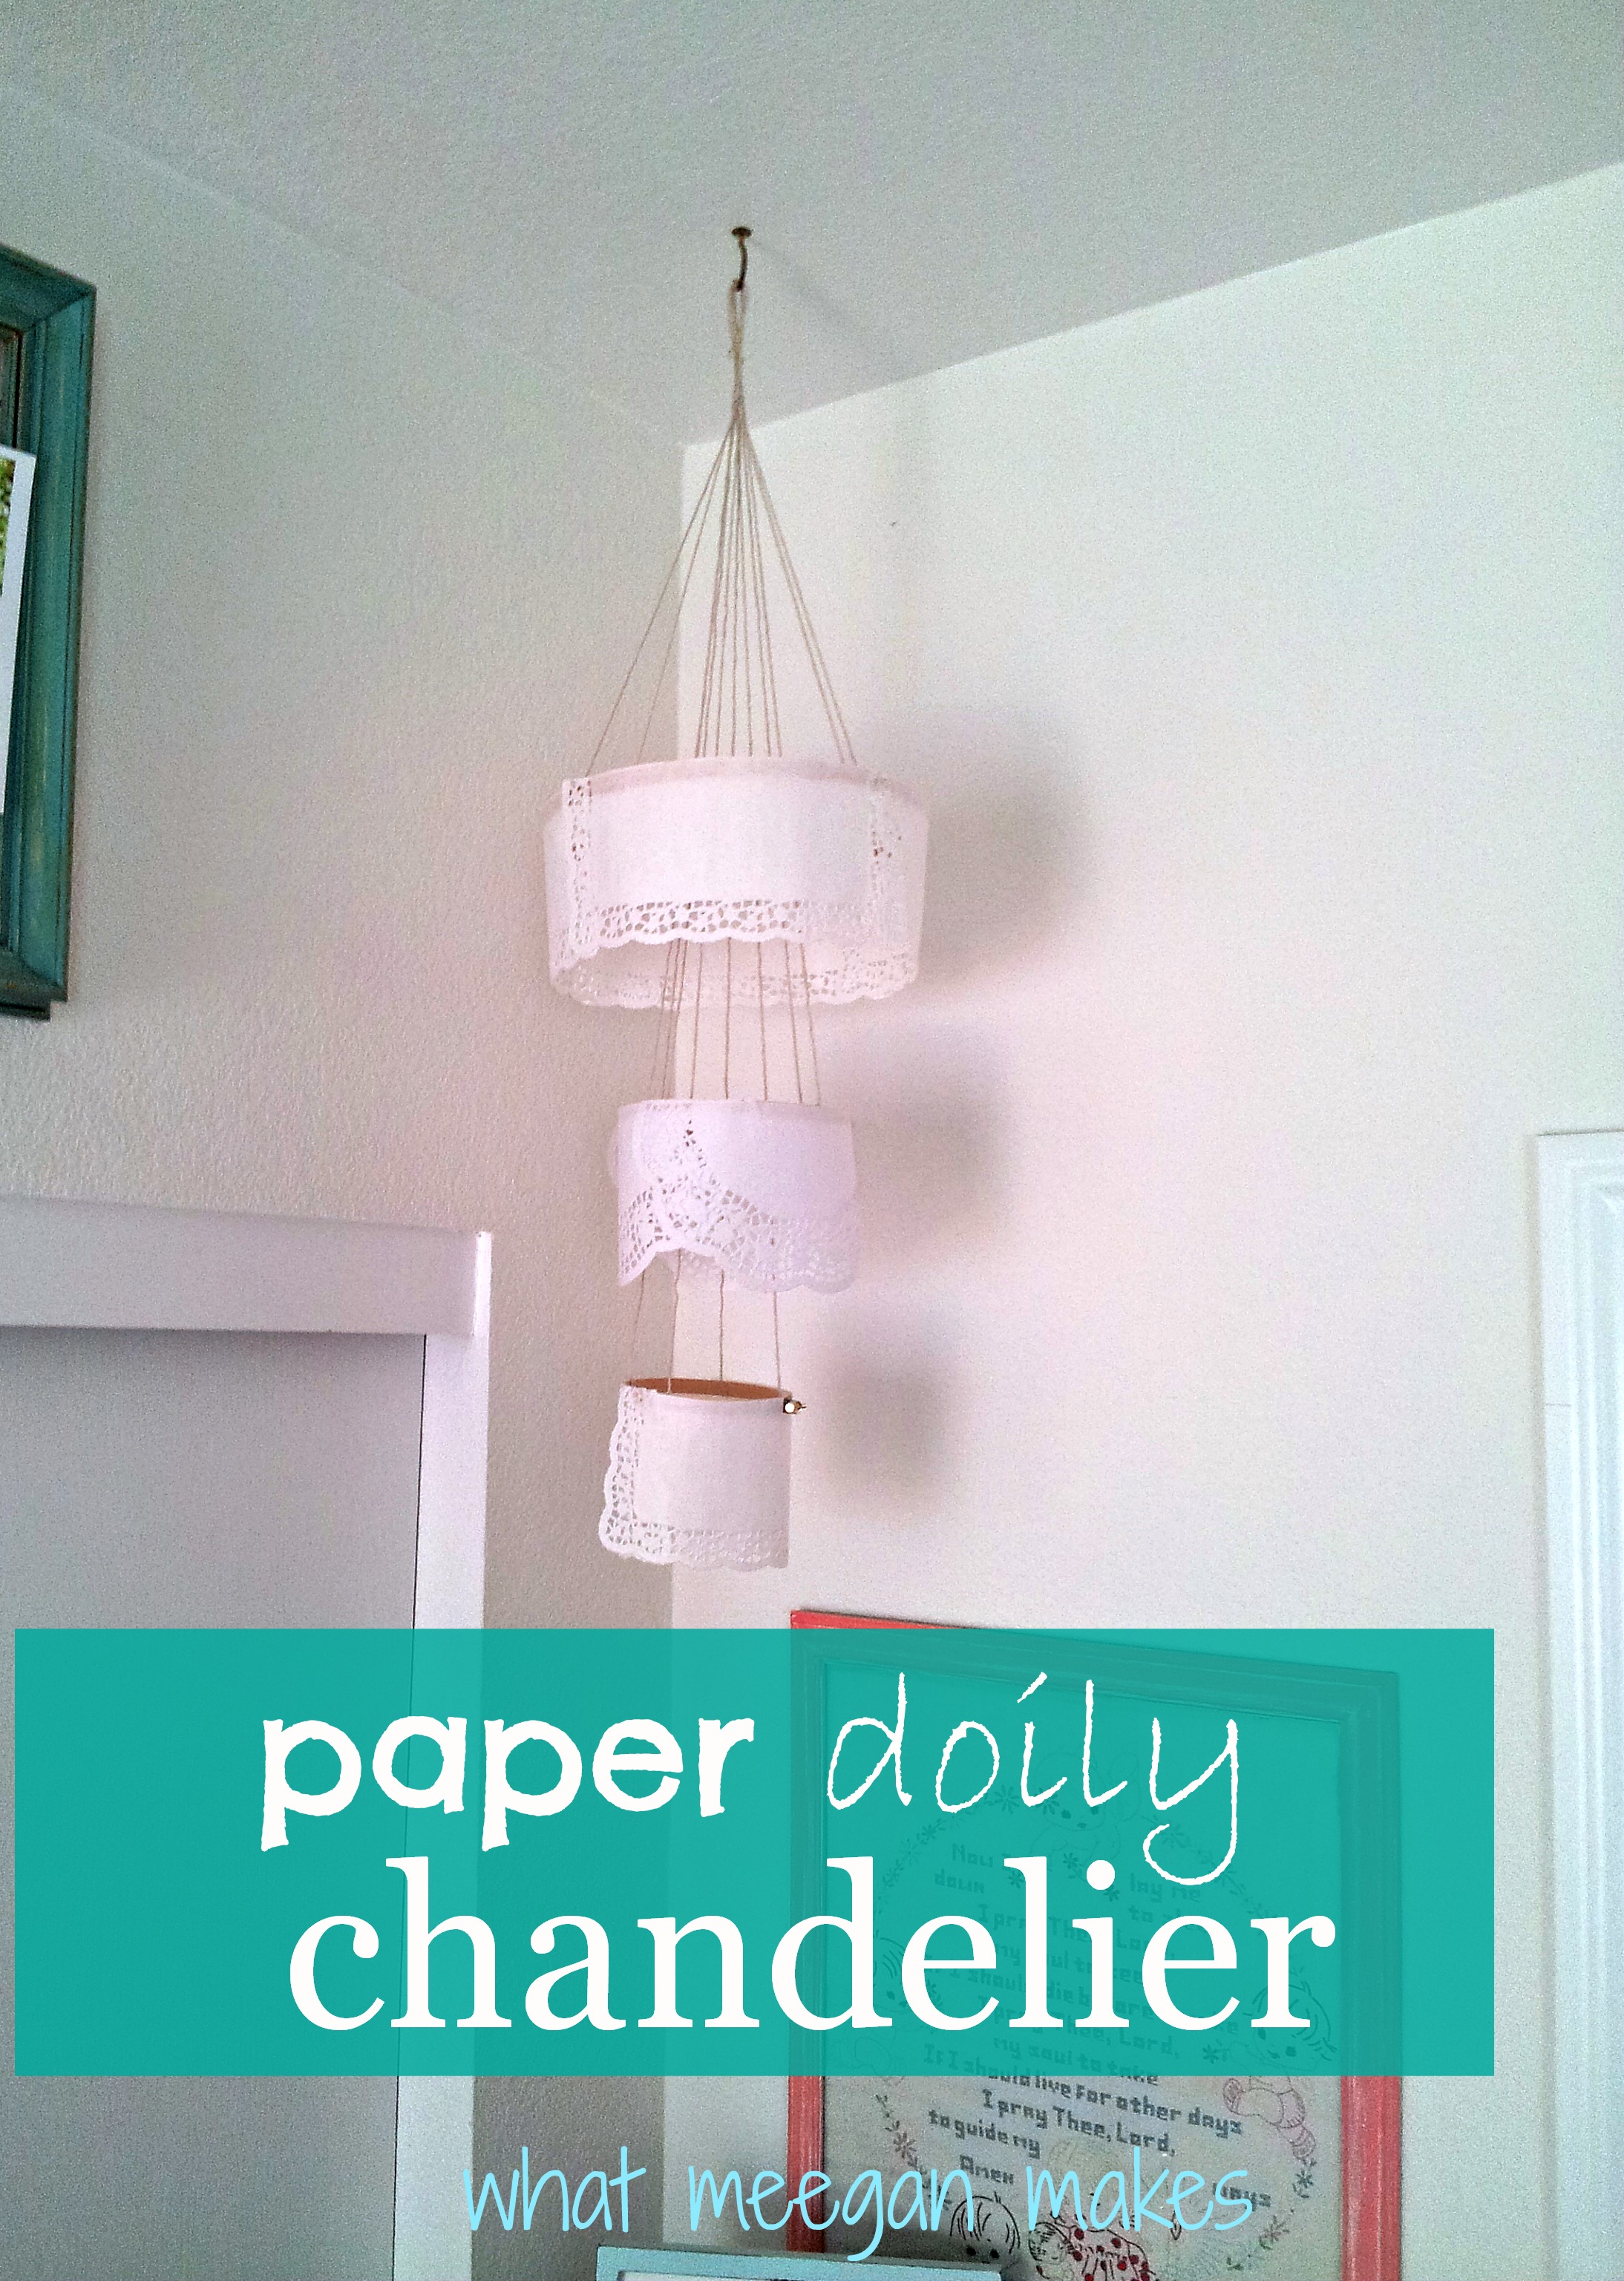
You all know how much I love chandys, right?? Well, since I love them so much I decided to make my paper doily chandelier. Isn’t she a beauty?? She has found the perfect spot in our home office.
This first paper doily chandelier I made was for our son’s wedding open house:
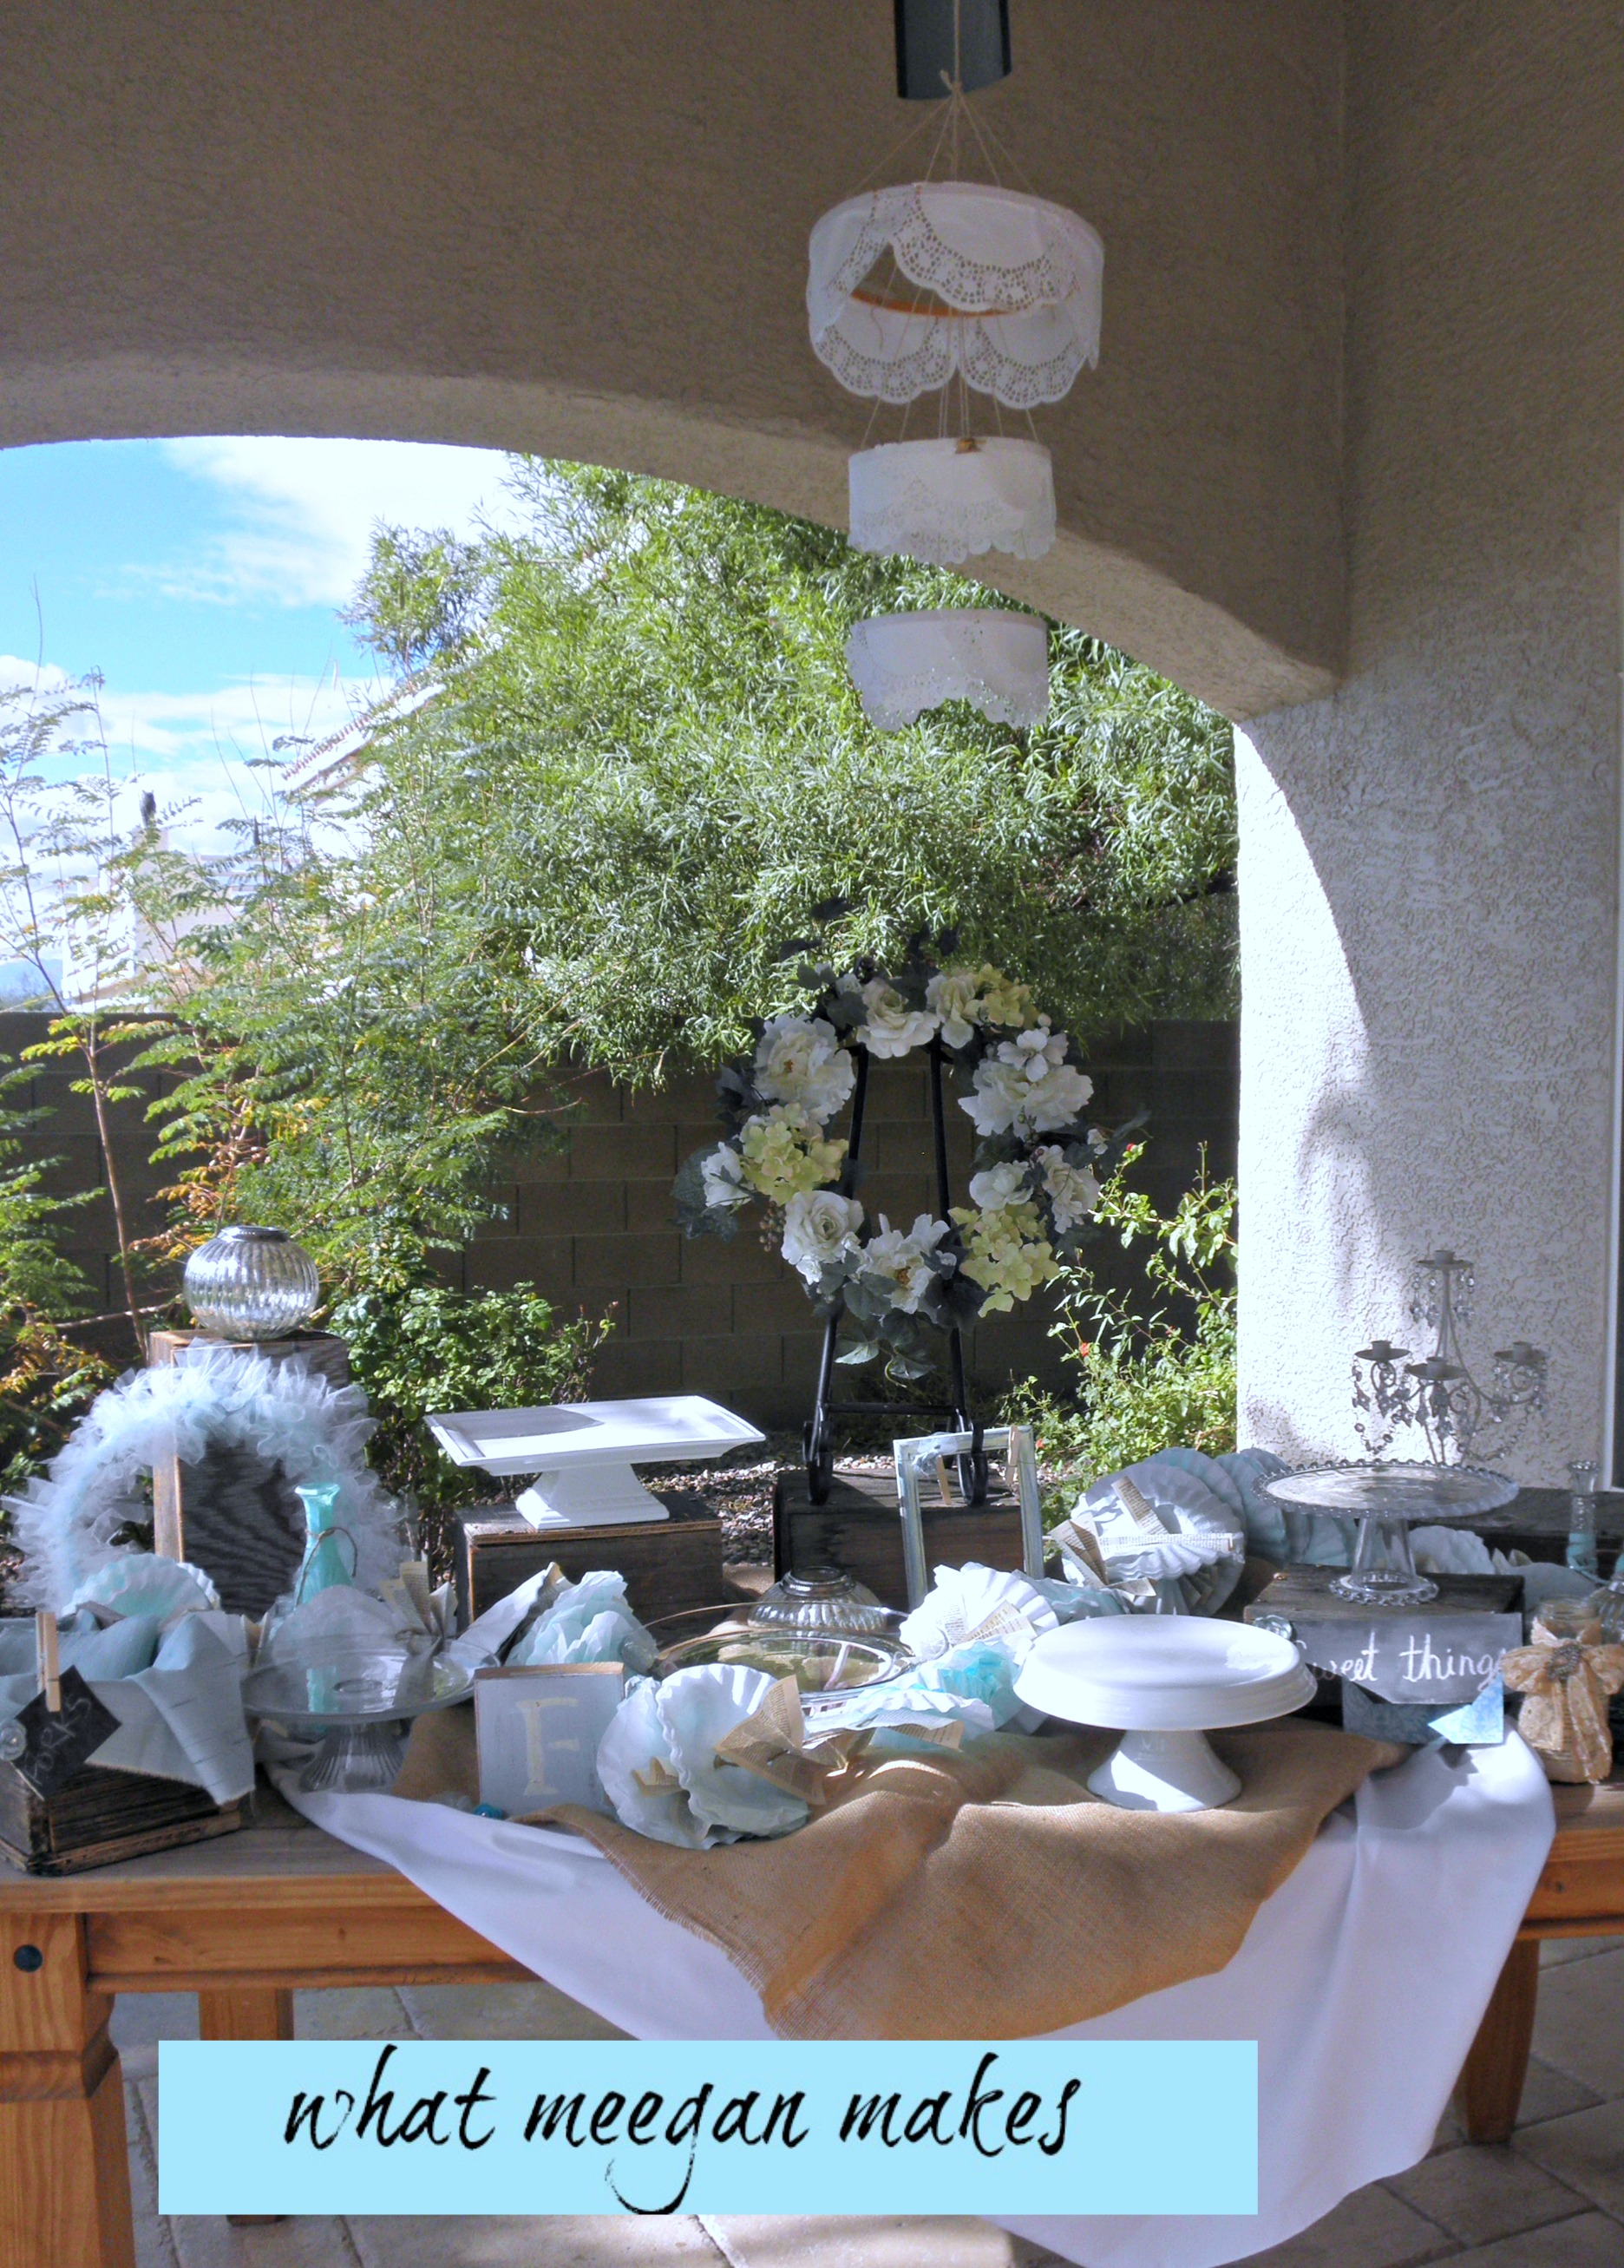
Doesn’t she add just the right touch??
Now on to the instructions:
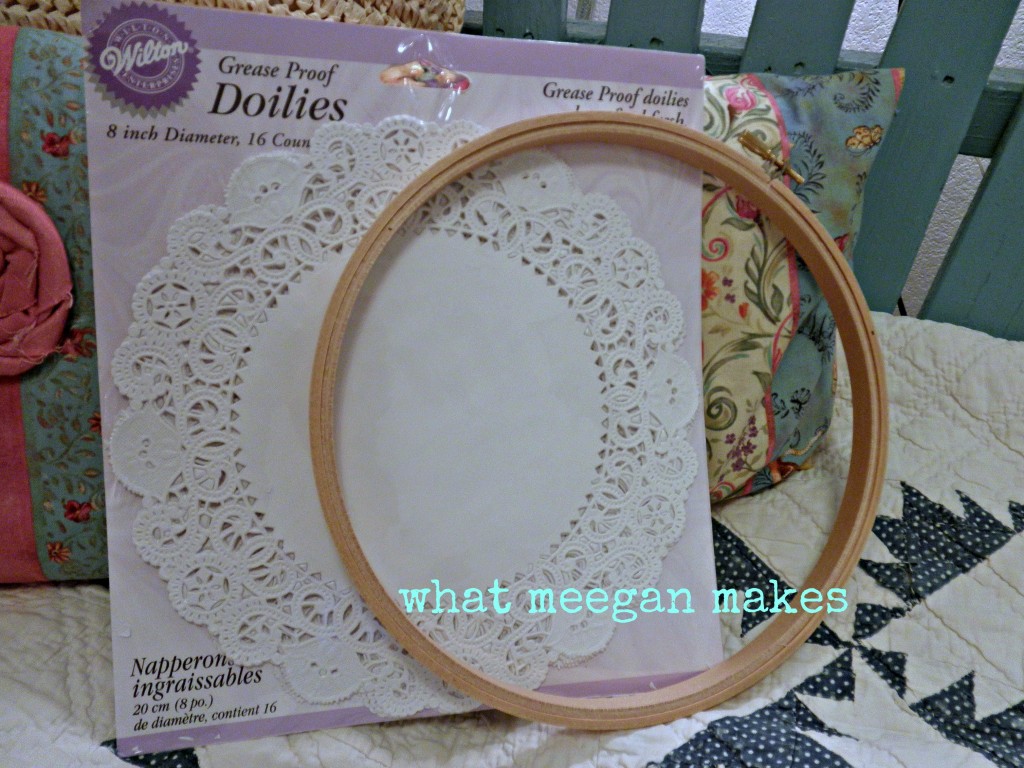
I started out with paper doilies that can be purchased at Michael’s, JoAnn’s, or even Dollar Tree. I also used embroidery hoops that I bought at JoAnn’s using a coupon-yay!!
I chose to use 3 sizes of hoops. 12 inch, 5 inch, and 3 inch hoops. Since the hoops come with 2, you can make 2 chandys for the price of one!! Woo!!

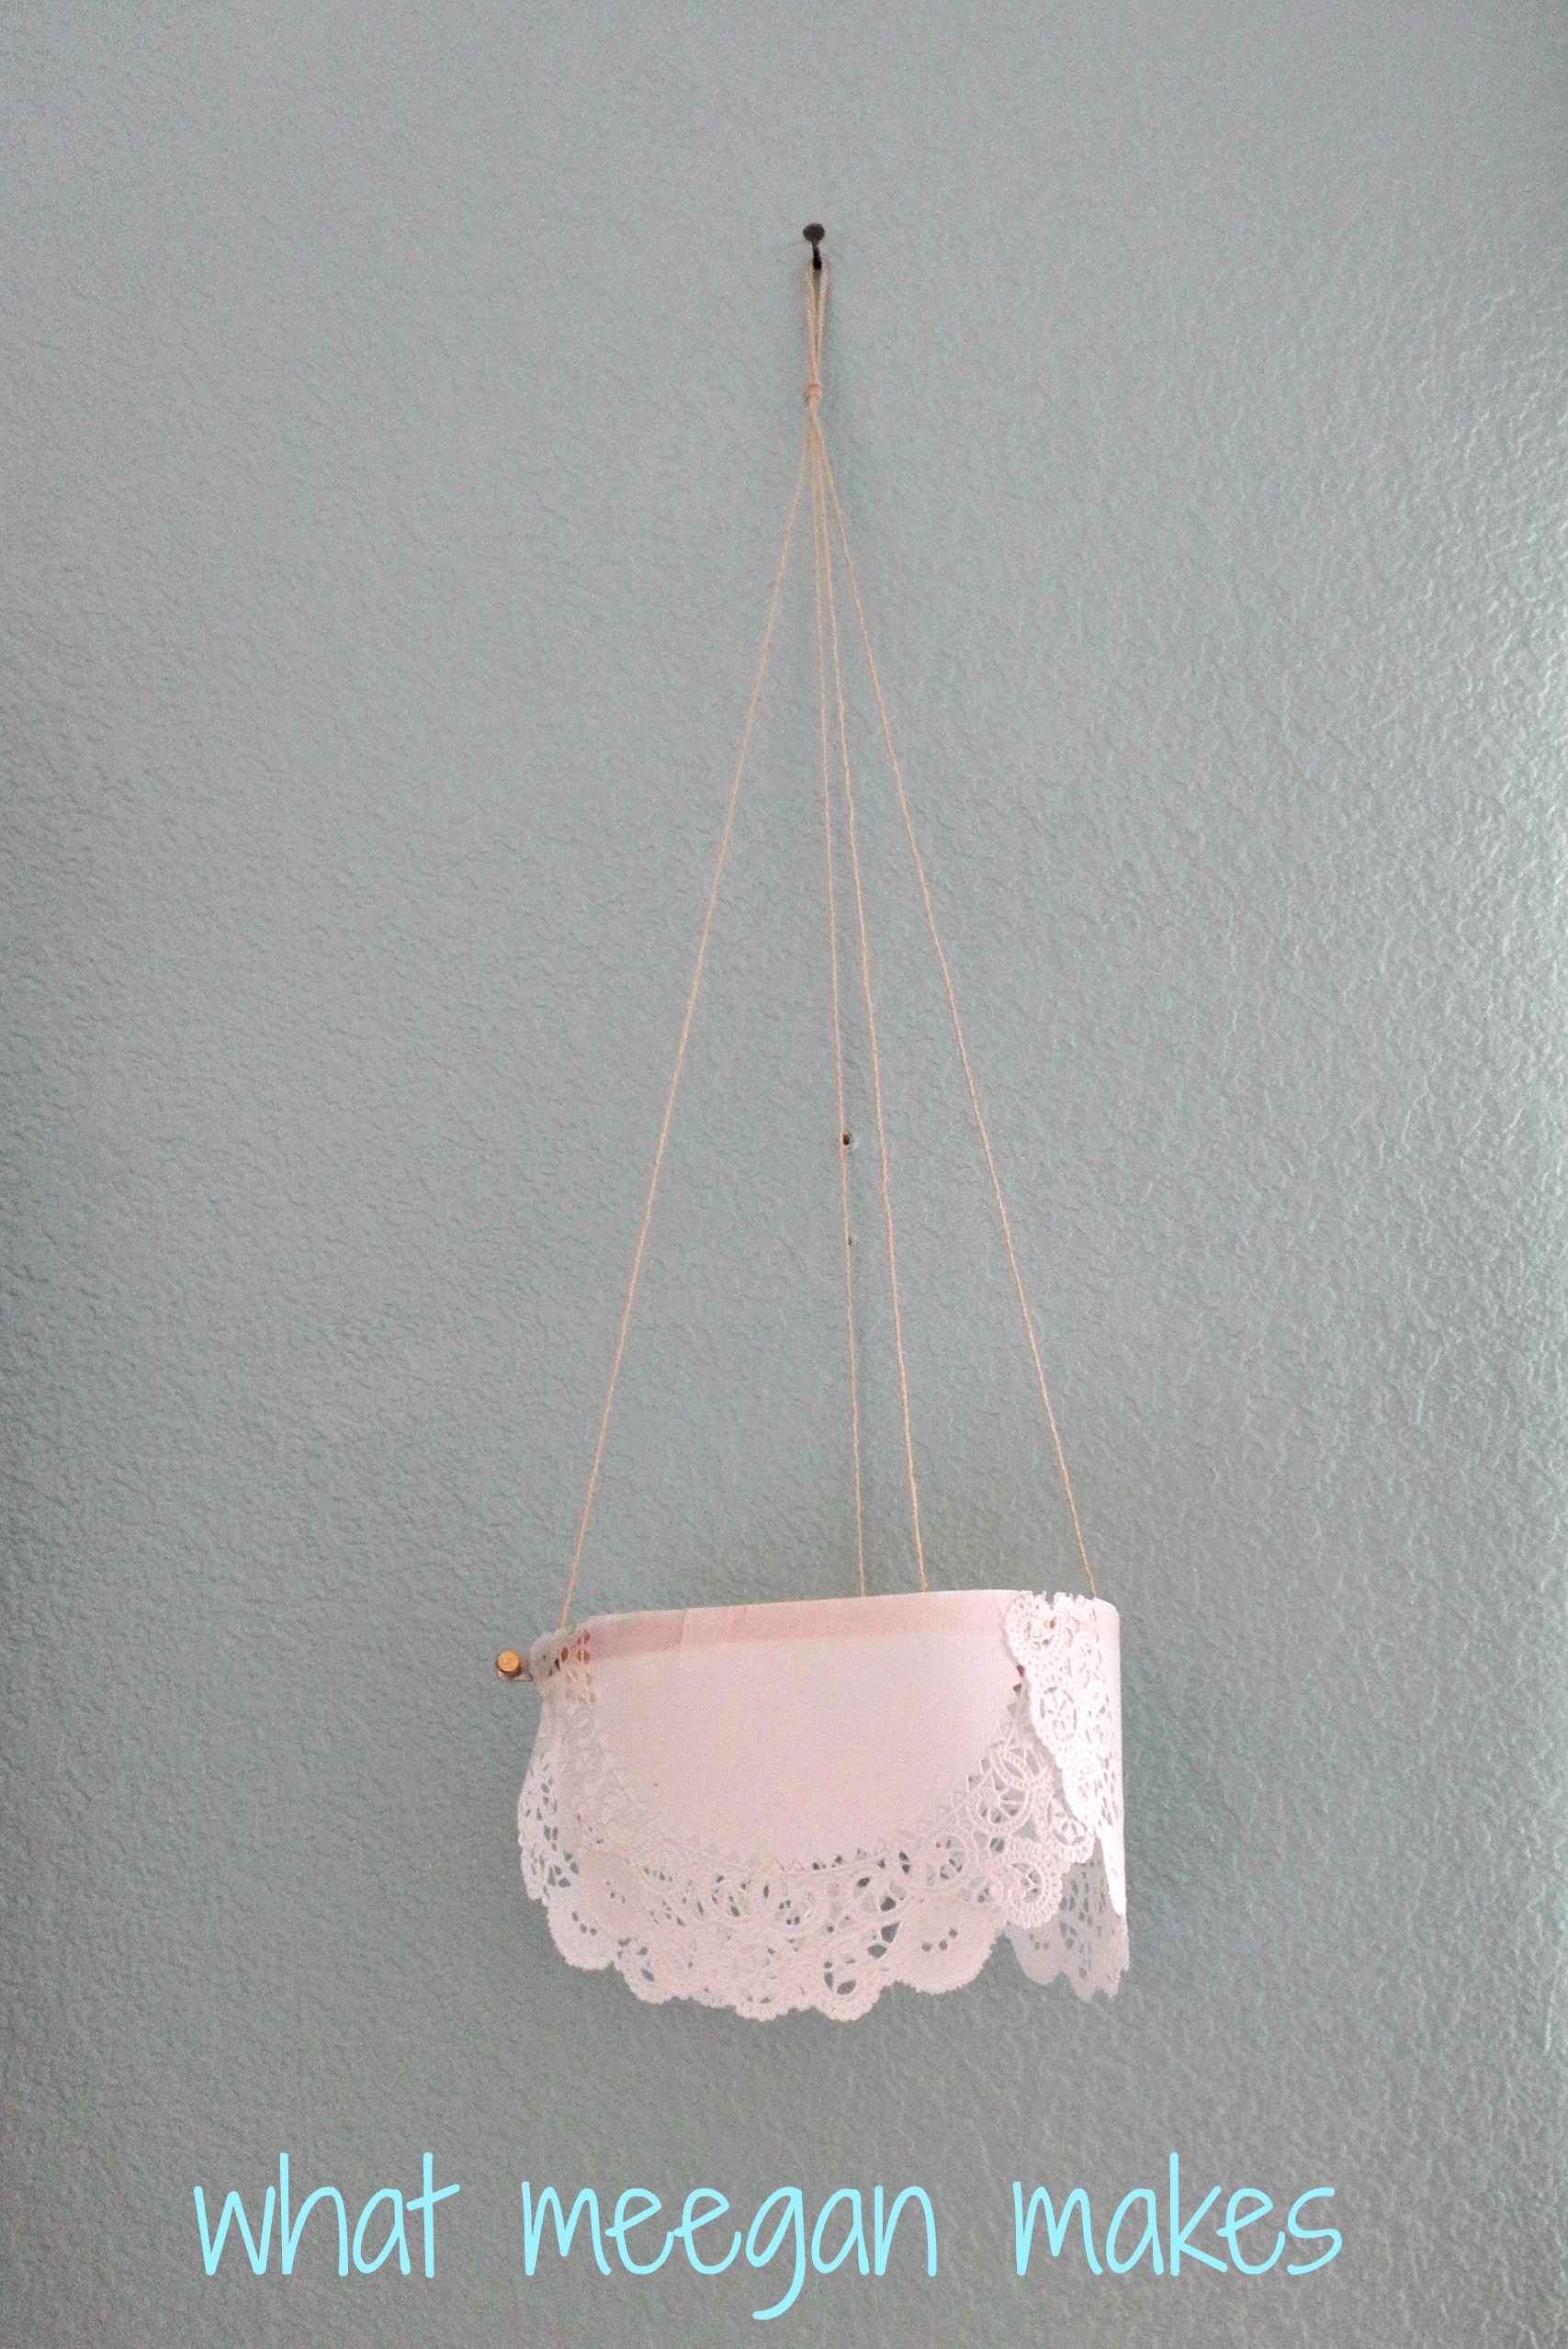
I cut each doily exactly in half. Then I hot glued the half doily to each hoop. I didn’t mind them overlapping a litle. It just adds more texture and variety.

When I had a clasp in the way, I cut the doily to fit around it.

Now for the hardest part (not hard at all). My first measurement of my string was 35 inches for the largest hoop. Then I added 7 inches for each hoop. The allows each hoop to hang evenly spaced. So the next one was 42 inches, and then the next one was 49. I attached the string using hot glue.

I hot glued one end of the string to the hoop, and then attached the other end of it exactly across, so the chandy would hang evenly. I added 2 sets of string of the smae length to each hoop.

Once they were attached and even, I looped a knot at the top-again making sure it hung evenly.
 Here is the first one I made. She is looking pretty would’nt you say???
Now I am ready to add more:

Instead of attaching them altogether, I hung one “inside” the other on my hook. Starting with the largest one first then the mid-size, and ending with the smallest.
Just the right look for our “new” office and the perfect home for my paper doily chandelier.
Didn’t my paper doily chandelier come out just amazing?? She makes me smile every time I look at her from our desk!
This is a super easy project, and would be a great addition for a craft room, laundry room, even for a baby or bridal shower.
Like I always say,”Gotta love me a chandy!”
Thanks for visiting me today!! I love sharing what I do, and I love even more that you love it, too!!
Make it a stupenous Saturday!!
I hope we can stay connected:
Pinterest Facebook Hometalk Google + Stumble Upon Bloglovin’ twitter And now I am on Instagram!!

Linked with: Its Overflowing I Should Be Mopping Cowgirl Up Coastal Charm Kammy’s Korner Elizabeth & Co Alderberry Hill Shaken Together Home Stories A2Z 504 Main Lil Luna Savvy Southern Style From My Front Porch LiveLaughRowe House of Hepworths Whipperberry DIY Showoff Happy Hour Projects Ginger Snap Crafts No Minimalist Here White Lights On Wednesday 52 Mantels {Primp} Made In A Day Craftionary At The Picket Fence French Country Cottage The Dedicated House Creations By Kara Redoux Debbie Doos The DIY Dreamer My Uncommon Slice of Suburbia The 36th Avenue Funky Junk Becoming Martha


Darling chandelier!!! Hey I have a question for ya….What do you use to put the blocks and symbols that you can text on your pics. I use Picasa and I don’t think they have them.
Why, thanks so much Kelly!! I trulay appreciate your comments!! I happen to use picmonkey.com for all of my editing. Let me know how it goes for you :)
Make it a great day!!
What a fun chandelier!
Thank you Marilyn!! I really appreciate your thoughts.
That is soo cute!
Thank you, thank you!! xoxoxox
What a cute idea…and it’s so versatile! Pinning!
Thanks Meredith! And thank you for the pin!! Loves!!
How creative lady! Really fun!
So creative! Love it!
So cute and perfect for that corner!