It’s great to be with you today. I am always excited for Themed Furniture Makeover Day. This day is such a fun day of the month. There are many bloggers that get together today and share their latest furniture makeover.
This post was updated October 2025.
It’s always fun to see the ideas and interpretation of each makeover.
In the past I have shared:
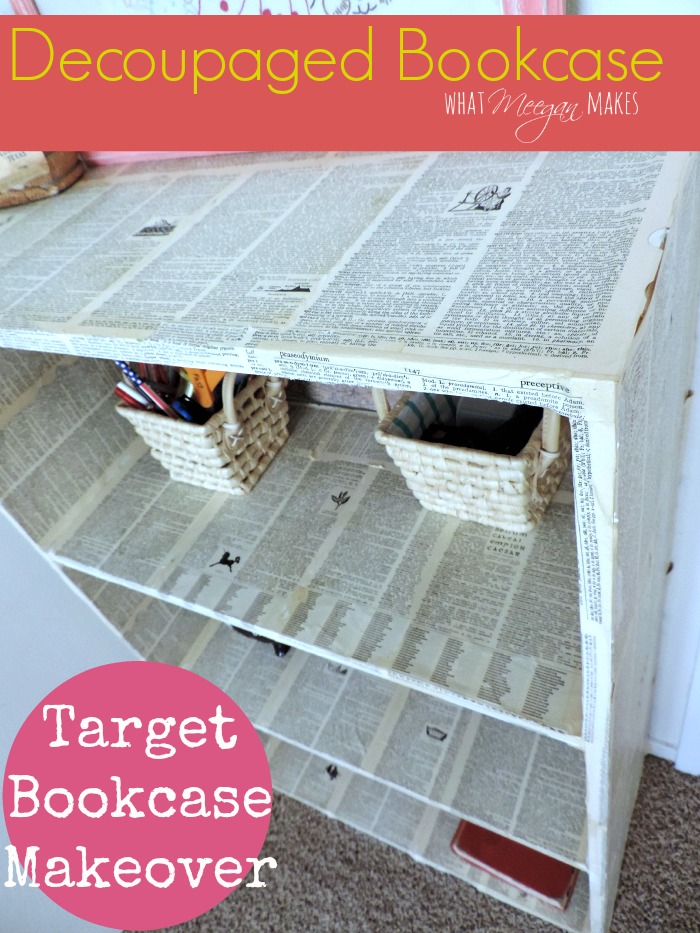
Decoupaged Book Page Book Case

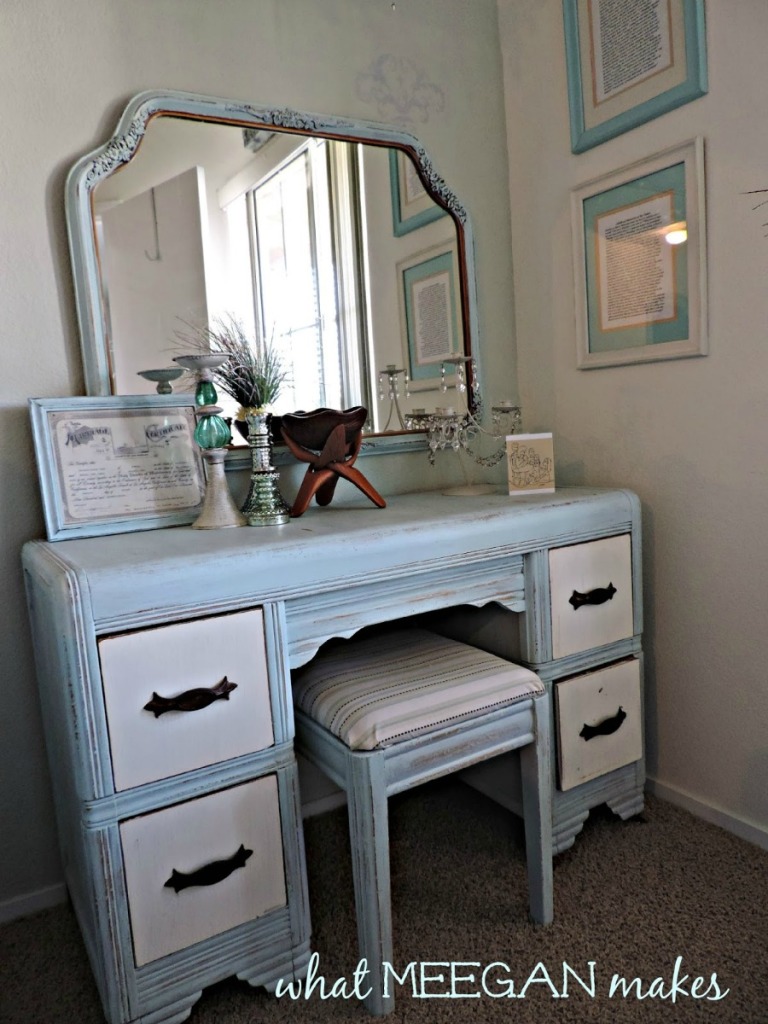
My Grandparents Bedroom Furniture Makeover
Today the theme is: Words or Letters.
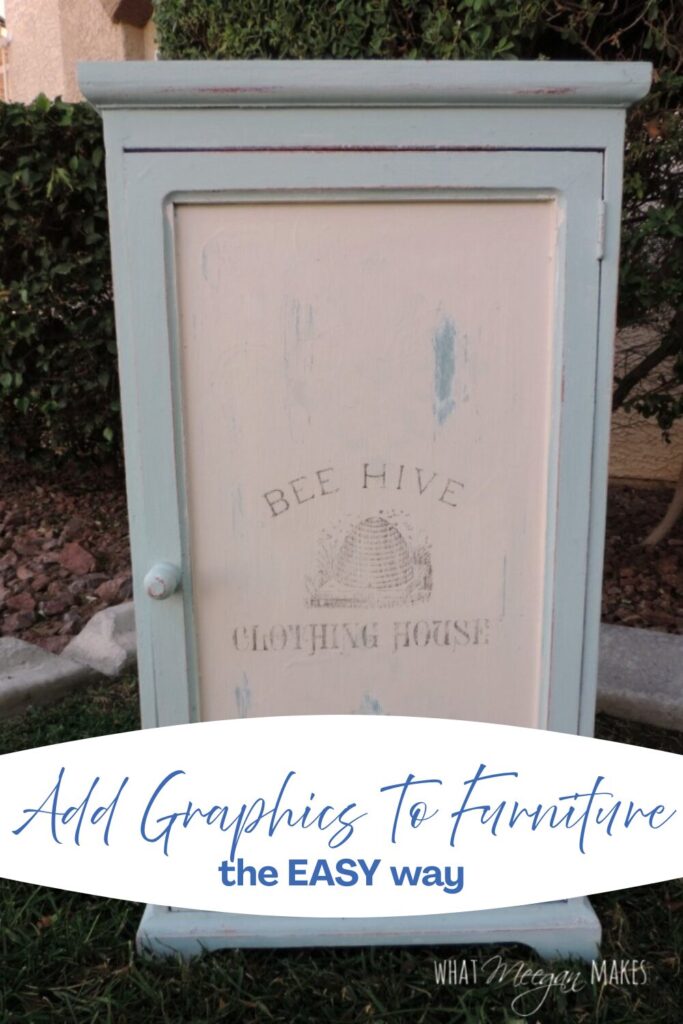
I want to show you How To Add A Graphic To Furniture The EASY Way.
I decided to start with a little cupboard that was a gift.

When I first received it, it had a sweet angel panted on it. BUT, it wasn’t my style.
So, I spray painted it red. It looked amazing in our home when I had all red accents. But, alas, my style changed once again. (I have been known to do that often)
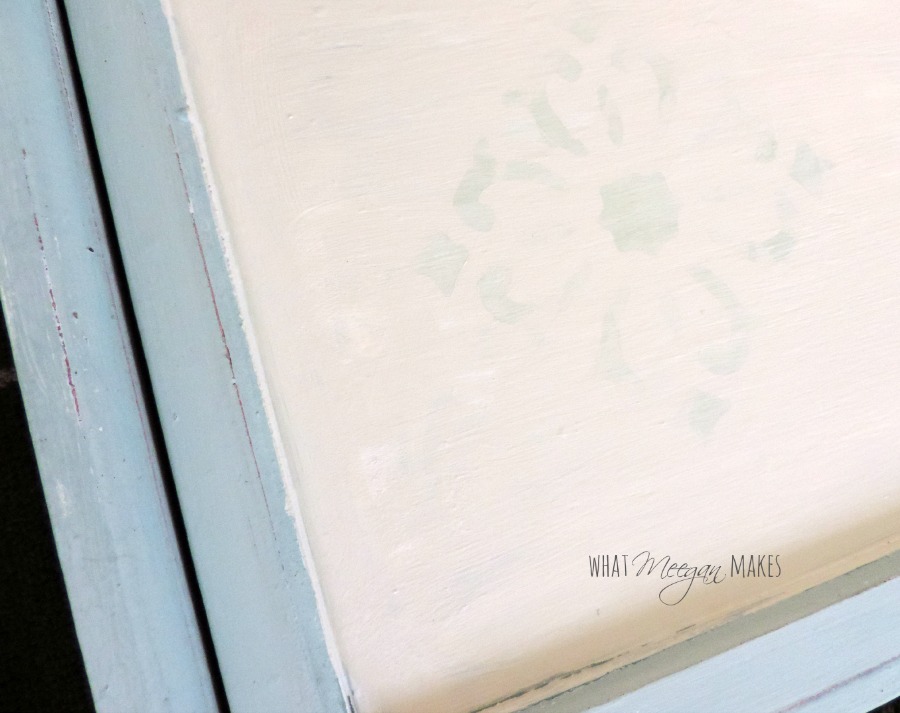
I painted it with (believe it or not), craft paint. I mixed a light blue with a touch of white and green to make the blue. I painted the center with a white craft paint as well. Wanting to add a stencil, I was messing around I added the green stencil. Meh...I never did like it and have wanted to change it since then.
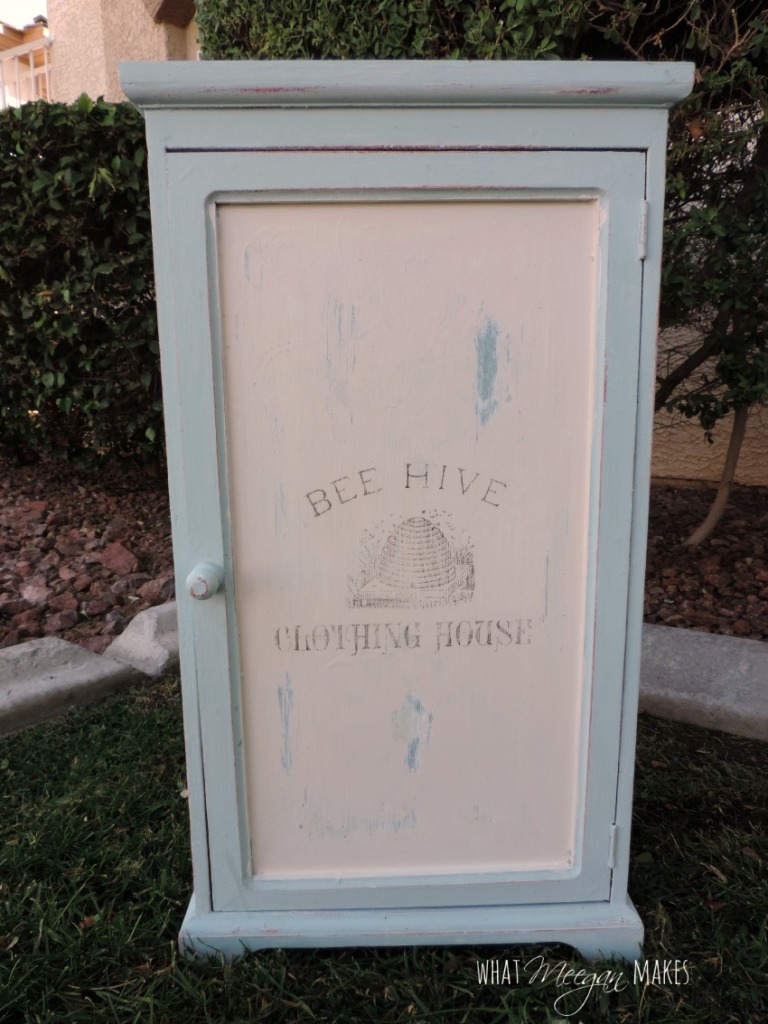
My first step was to paint the white a soft color called White Birch. It’s from Americana by DecoArt. I painted a few coats to hide the green stencil, BUT left enough of it so I could sand through later, as to see the paint layers.
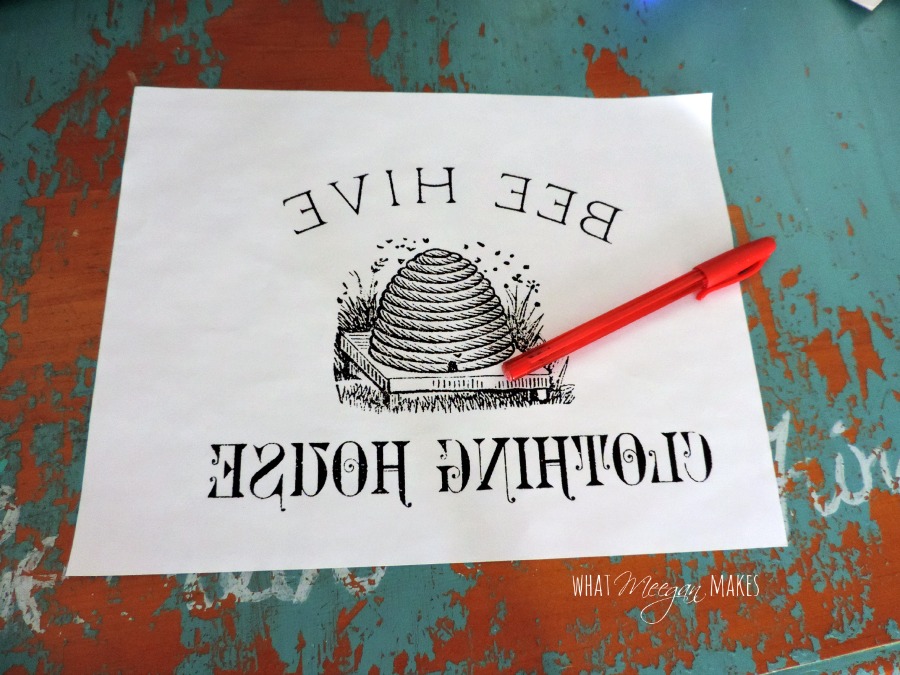
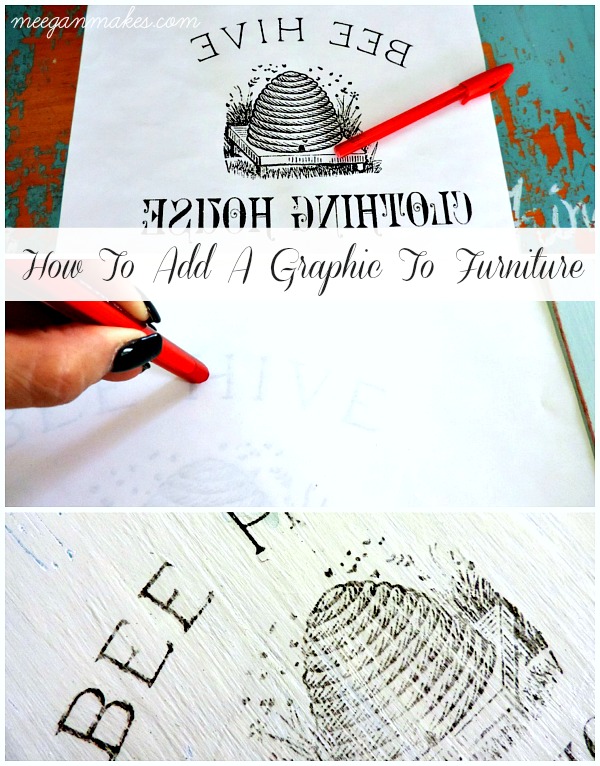
Then I needed to find the words. I found what I wanted from The Graphics Fairy. I thought this would look cute on my little cupboard.
I printed it off backwards which is an option on her site on my ink jet printer.
Now here is the part I wasn’t REALLY sure would work…
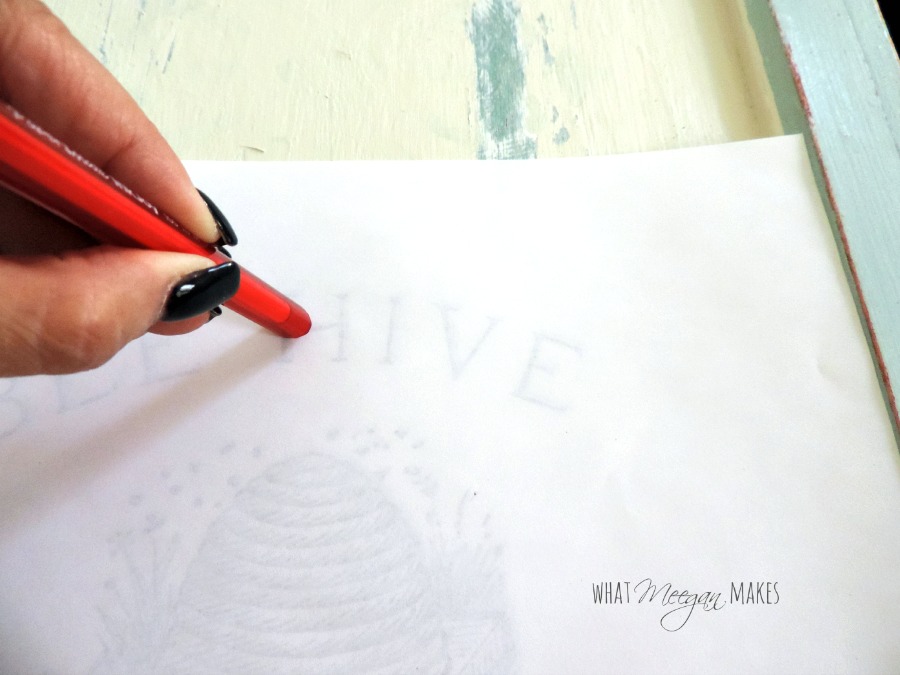
Using the flat end of a pen, I began rubbing the print onto the cupboard. I lifted it up to see if it was working. Guess what? It WAS!!

After it set for a little, I used a coat of polyurethane to seal it on my cupboard door.
How To Add A Graphic To Furniture The EASY Way was A LOT easier than even I had expected.
Using a 120 grit sand paper I roughed up the door and more of the edges.
And for some fun it is BRIGHT CORAL on the inside!

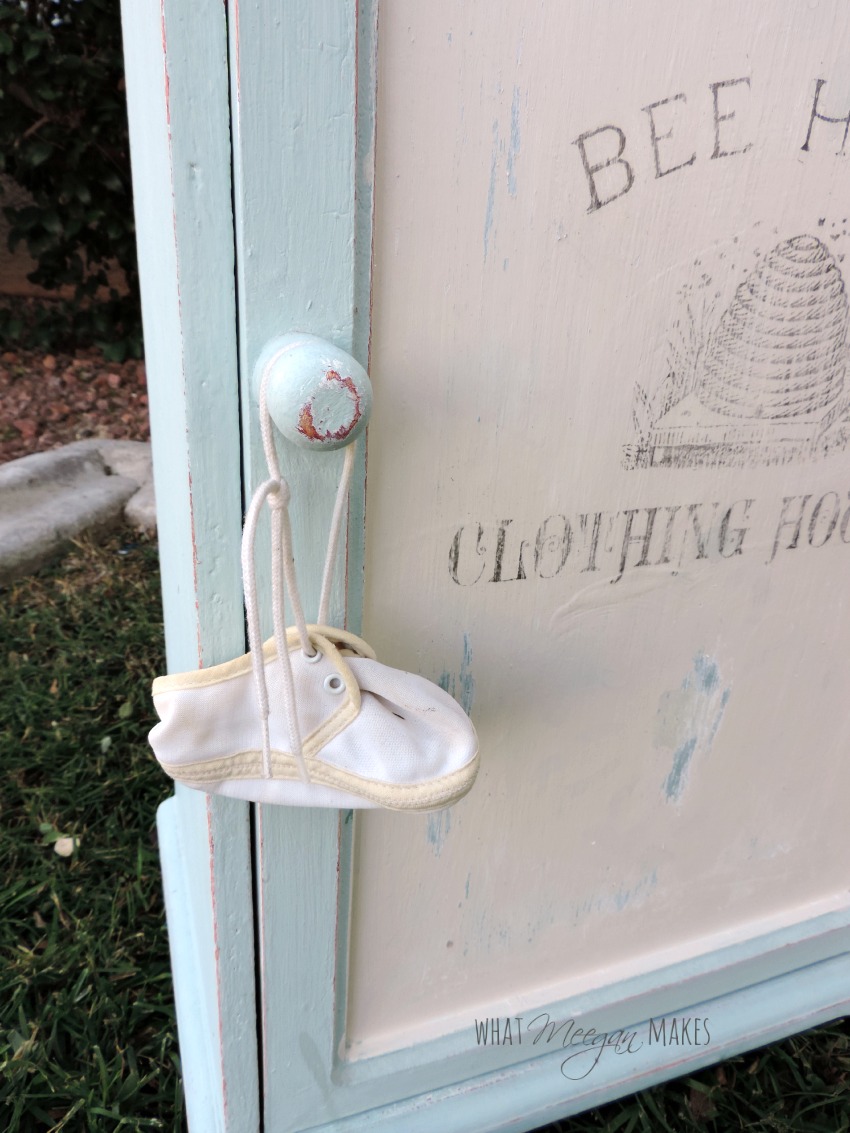
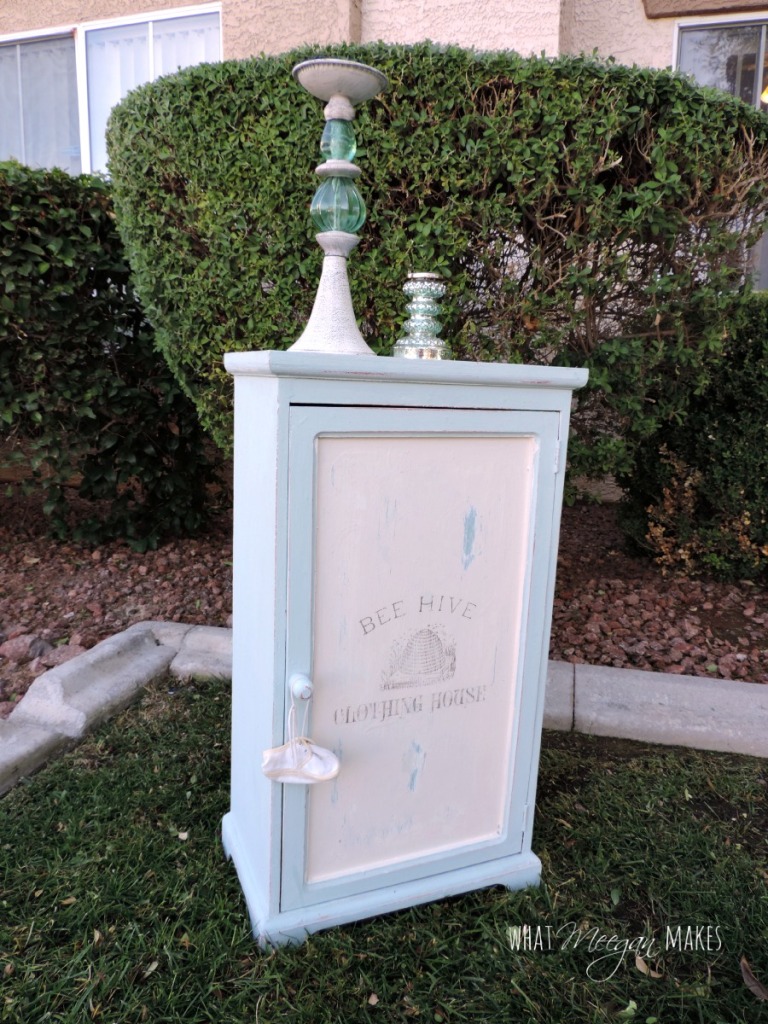
I couldn’t be more pleased with the way it turned out. Now it is more my style and taste.
Thanks for visiting me for my lesson on How To Add A Graphic To Furniture The EASY Way I love your comments and thoughts.
Visit the other furniture makeovers below for more ideas and inspiration.
Make it a terrific Thursday!


Wow! I had no idea that an image would transfer this way. I’m definitely going to try this technique in the future. Your cabinet looks great and I love the pop of coral that you gave the inside.
[WORDPRESS HASHCASH] The poster sent us ‘0 which is not a hashcash value.
This turned out so pretty Meegan! I have never seen anyone just rub on a printable before! I’m going to have to try that!
[WORDPRESS HASHCASH] The poster sent us ‘0 which is not a hashcash value.
This is so sweet Meegan!!! I just love it and the pop of color inside! :)
Nancy
[WORDPRESS HASHCASH] The poster sent us ‘0 which is not a hashcash value.
This is so stinkin cute, Meegan! LOVE it! I have to check and see what kind of printer I have because I need to try this method. Thanks for the inspiration!
[WORDPRESS HASHCASH] The poster sent us ‘0 which is not a hashcash value.
I love love love it Meegan! The transfer worked perfect! And I’m crazy for the fun coral inside too! Beautiful!
[WORDPRESS HASHCASH] The poster sent us ‘0 which is not a hashcash value.
Love the pop of coral and love the stencil!
[WORDPRESS HASHCASH] The poster sent us ‘0 which is not a hashcash value.
Love it Meegan!!! Jeanette
[WORDPRESS HASHCASH] The poster sent us ‘0 which is not a hashcash value.
Ahh, I adore that transfer! Such a cute piece :)
[WORDPRESS HASHCASH] The poster sent us ‘0 which is not a hashcash value.
Love your bee hive. I have always wanted to try the transfer from a photo printed out. I was wondering if you have to do the transfer as soon as you have printed it or can you use one that was printed awhile ago? I have an image that I want to use but I printed it a few months ago so I am wondering what I would need to do to be able to use this one. I appreciate any advice you can offer. Thank you
[WORDPRESS HASHCASH] The poster sent us ‘0 which is not a hashcash value.
What a beautiful result :-) So the ink on the print simply transfers over to the surface by rubbing it? Is the key to this working, using an ‘inkjet’ printer? Thank you!
[WORDPRESS HASHCASH] The poster sent us ‘0 which is not a hashcash value.
I love your cabinet. I have a question for you if you can help me with your answer. Do you have to apply the transfer right after you have printed it or is it all right to use one that was printed awhile ago? I have some nice ones that I printed out from the Graphic Fairy quite awhile ago and I would like to use one of those. So is that possible or do I have to do it right after it is printed? I appreciate your help?
Thank you
Love this!! Did you use regular paper or something special?
I used regular computer paper. Easy peasy. Have fun!
Did you use the print immediately after it came off the printer, or had it dried a little?
I let it dry about 15 minutes. But that was my own preference.