It’s always fun to share a Dumpster Dive Vintage Chair Makeover. Especially a treat when I can find a piece of furniture at a steal of a deal. It makes my heart skip a beat, without a doubt. Especially when I can spy something in the dumpster! I know, I am THAT person. You can read about how I found this amazing chair (pictured below) here.
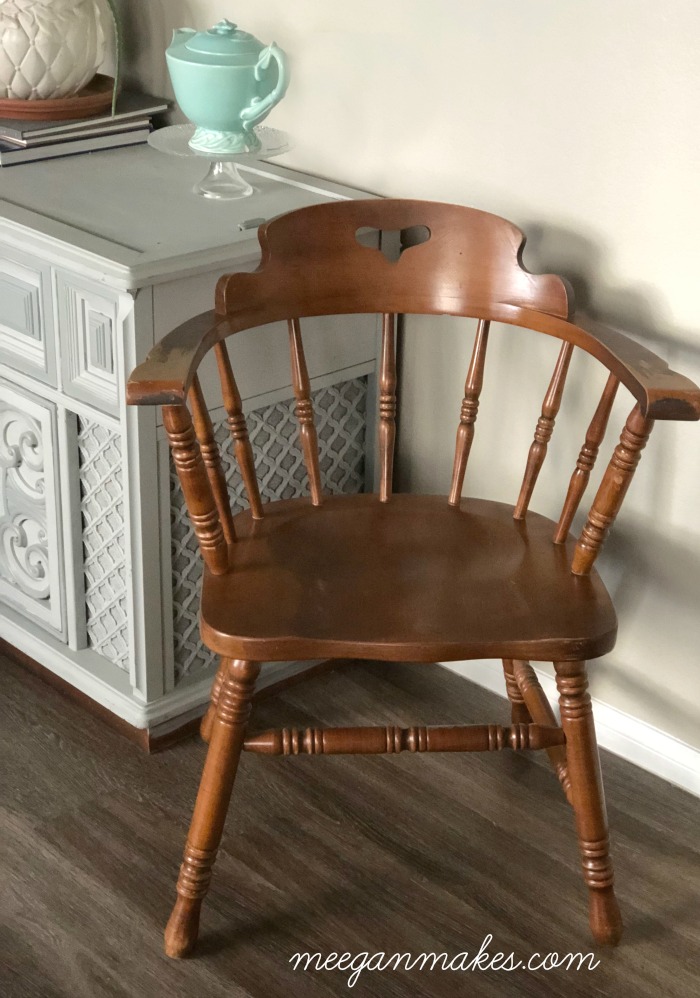
Now that I have had this vintage style chair in our home for a few weeks, I have a vision of what I want this to be. Let me show you my steps for this Dumpster Dive Vintage Chair Makeover.
*This post was updated November 2025.
In my quest to add new, fresh color into this new (to me) apartment, I am looking for lavender, pink, and even orange pieces to fill this home with life and a whole new vibe.
I searched and searched for a rosey/lavender paint that would transition my dumpster dive chair into something fabulous and surprising.
Through my research, I wasn’t able to find THE color that was in my head. That happens to me a lot. Does it happen to you, too?

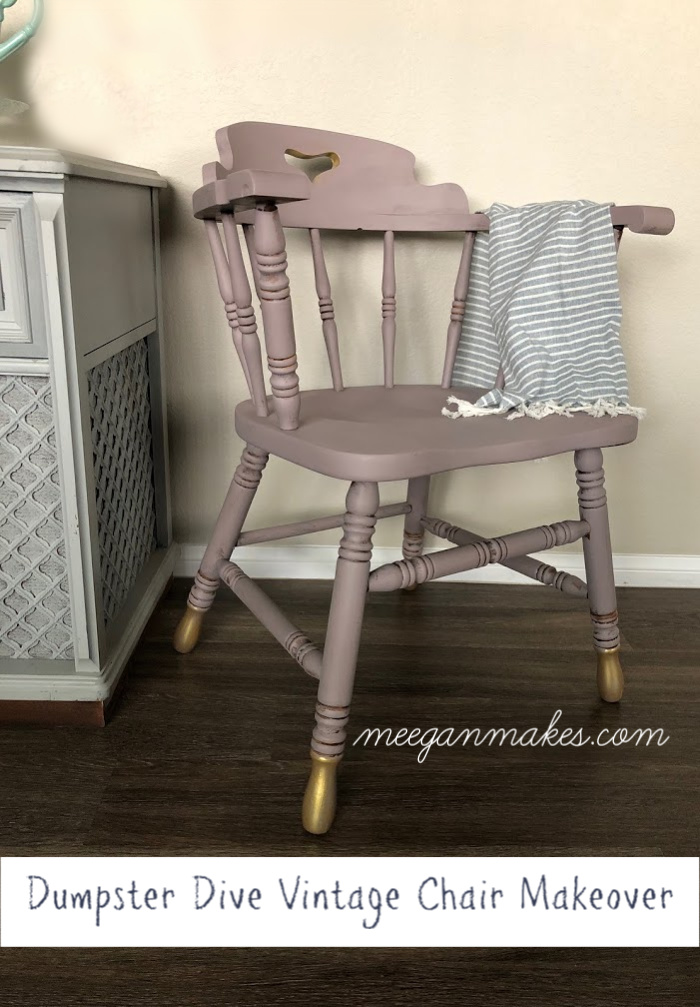
Anyway…After mixing my own paints from my paint stash, I came up with this. It has a gray undertone with a chalky finish.
Just what I wanted.
I did a little research and the closest I could find to this paint color is Lilac Gray from Valspar. You can buy it here.
I added a little water to the paint mixture before applying it to the chair. Just because I wasn’t sure how deep the color would be when it was dry.
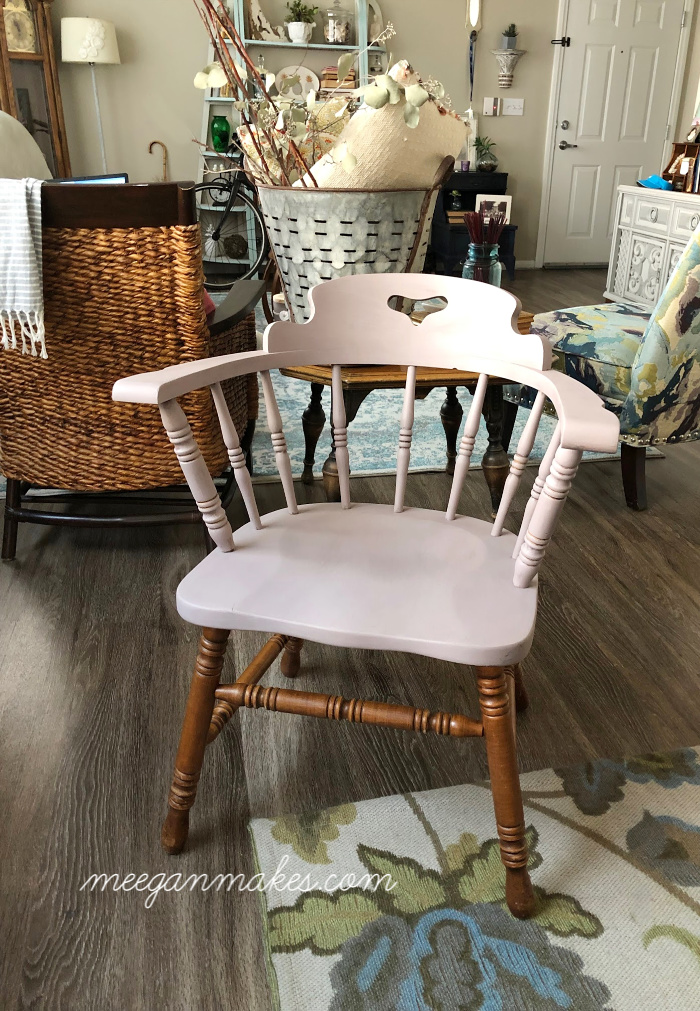
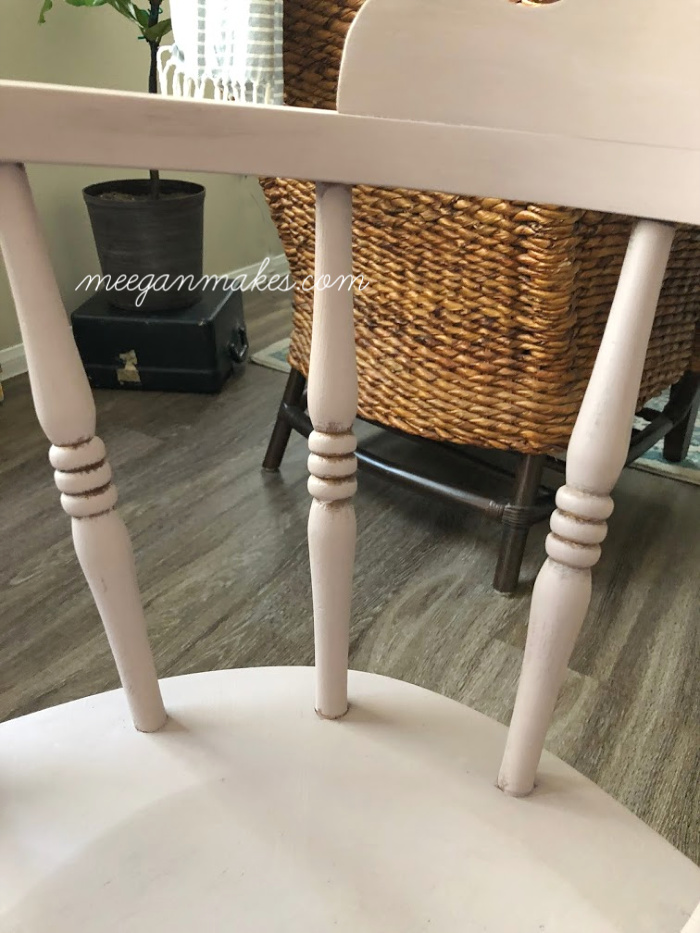
I dry brushed the seat, back and spindles with a dry sponge brush. I like the dark curves and accents coming through. So I didn’t cover every inch of the chair.
When it came to the legs, I wanted to add something special. An added surprise, if you will.
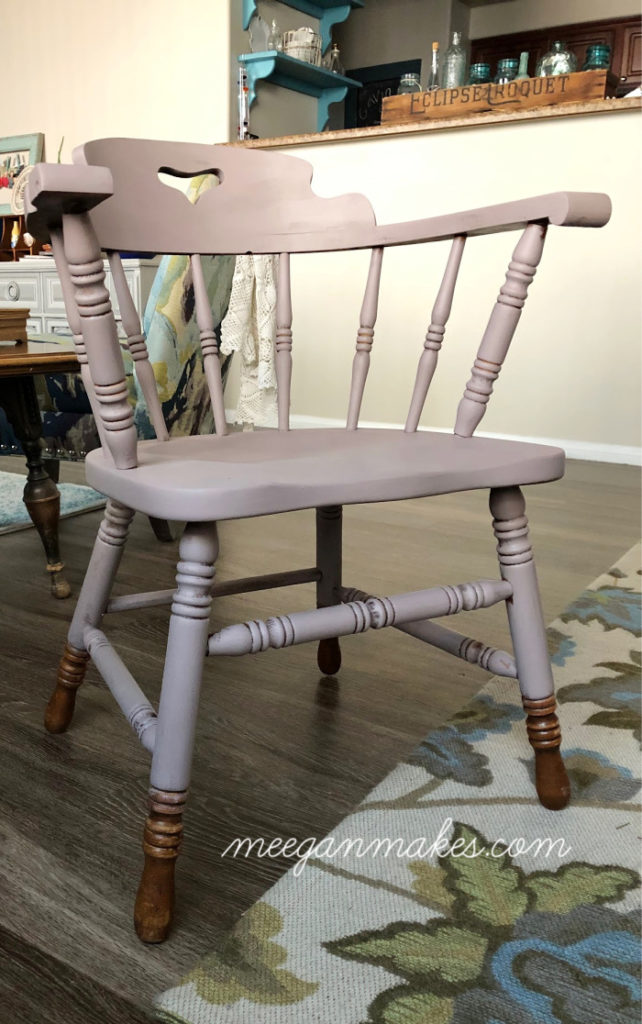
So I left the bottom of each leg unpainted. For now.
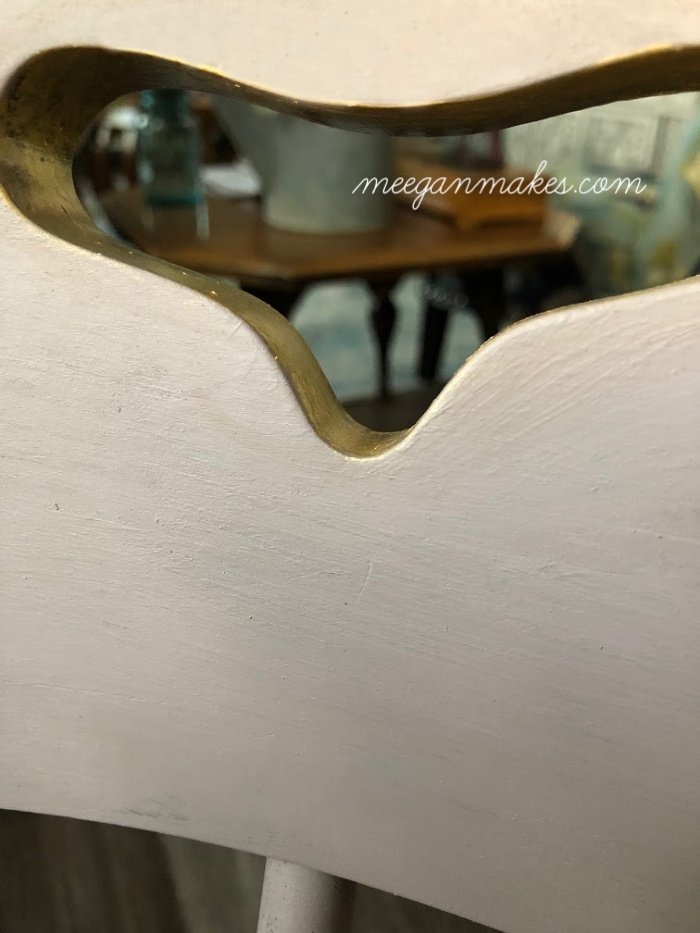
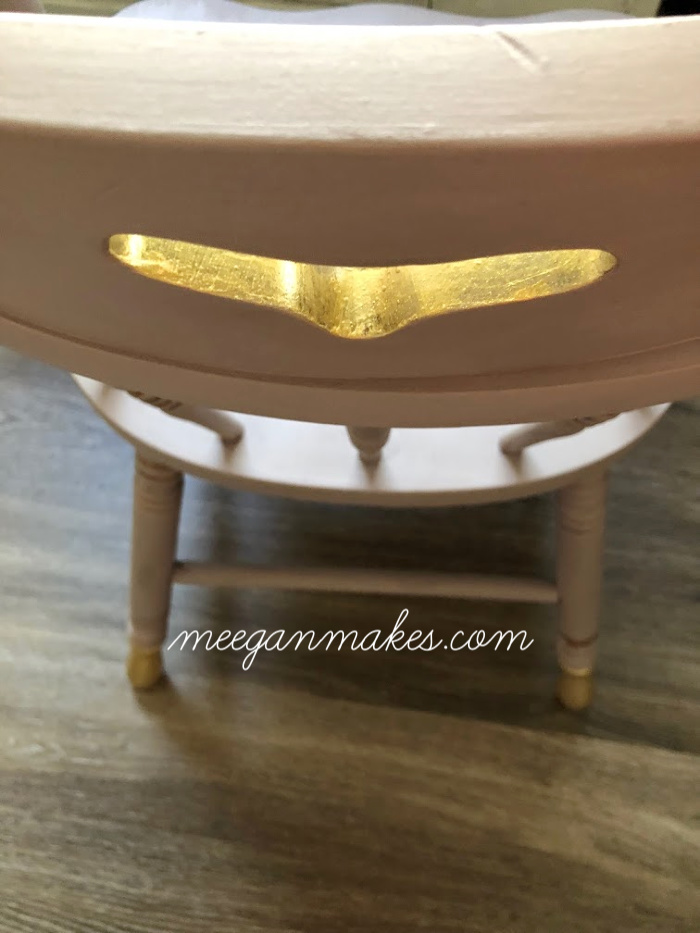
A touch of gold tint from Fusion Mineral Paint was just the accent color I wanted for my Dumpster Dive Vintage Chair Makeover.
It looks amazing on the keyhole cutout on the back of the chair, doesn’t it?
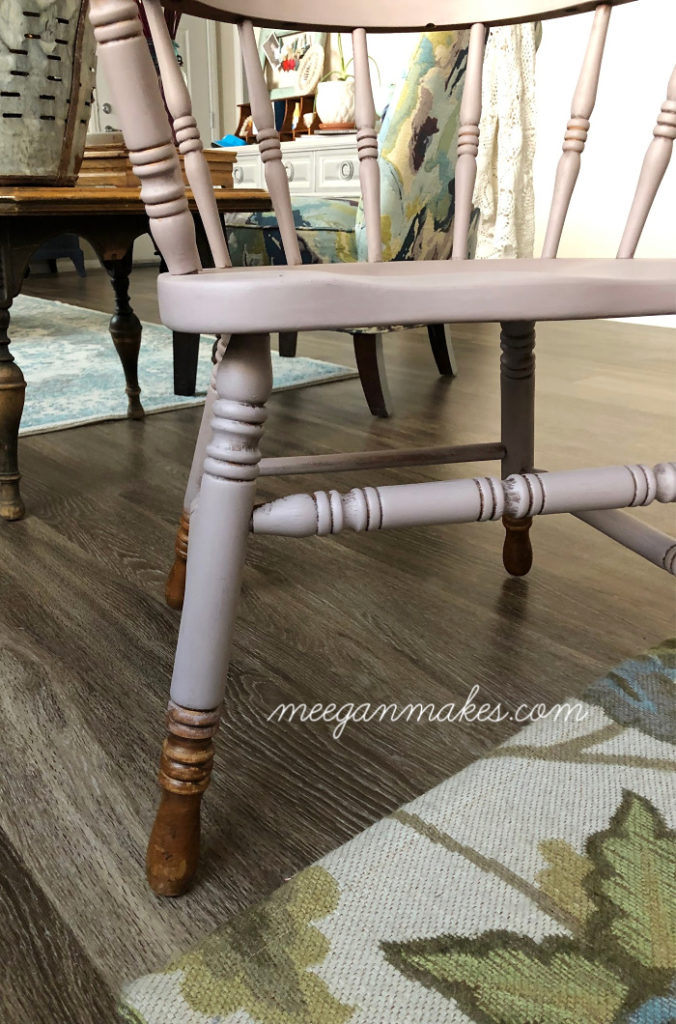
Next I was ready to move on the the bottom of each leg.
Yep, you guessed it. I used the gold tint once again.
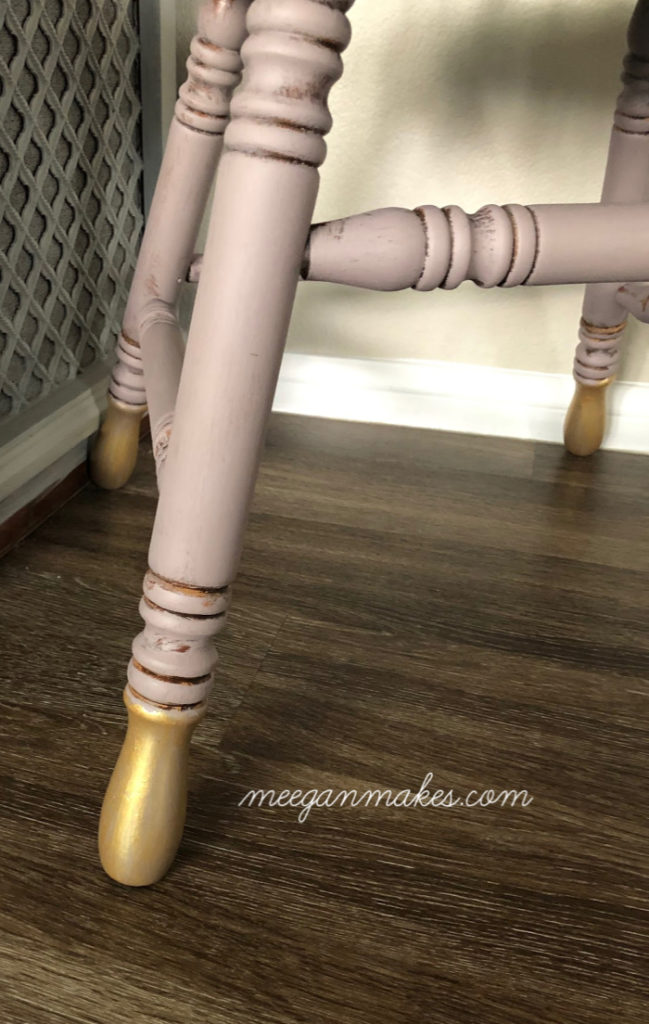

I just love the gold highlight on the legs.
When I first told my husband of my plans, he said, “Hmmm…I are sure you wan t to paint real wood? And use gold tint? I can’t picture that.” Don’t get me wrong, he is so good at putting furniture styles, colors and pieces together. I trust his judgement. Most of the time.

When he walked in a saw my “new” Dumpster Dive Vintage Chair Makeover, he was blown away! He can’t stop admiring it.
Surprisingly, it came out just as I pictured. I love when that happens.
My plan is to use it at my sewing vanity dresser. (I will be sharing that very soon.)
Until then, it is sitting in our living room for me to admire for a few more days.
I hope you enjoyed this as much as I have. Sharing parts of my apartment furnishings, thrifted finds, recipes and all the rest of the bits and bobs I find is fun for me.

More DIY ideas below:

Breakfast Nook Furnished with Thrifted Finds
Most of my Furniture Makeovers since I have been blogging.


My hubby can’t envision anything until it’s done and still questions my judgement after so many years of marriage – lol. I love how this turned out :).
This is awesome. I have a few items that need a makeover! Sometimes I look at my items and wonder what color I should paint them, or maybe I need to stain them. This gave me a lot of inspiration. Thanks!
What a great find and I love how you painted it. The gold legs just make it stand out. Great job.
Charming! Love the gold touches.